Record Editors
Description
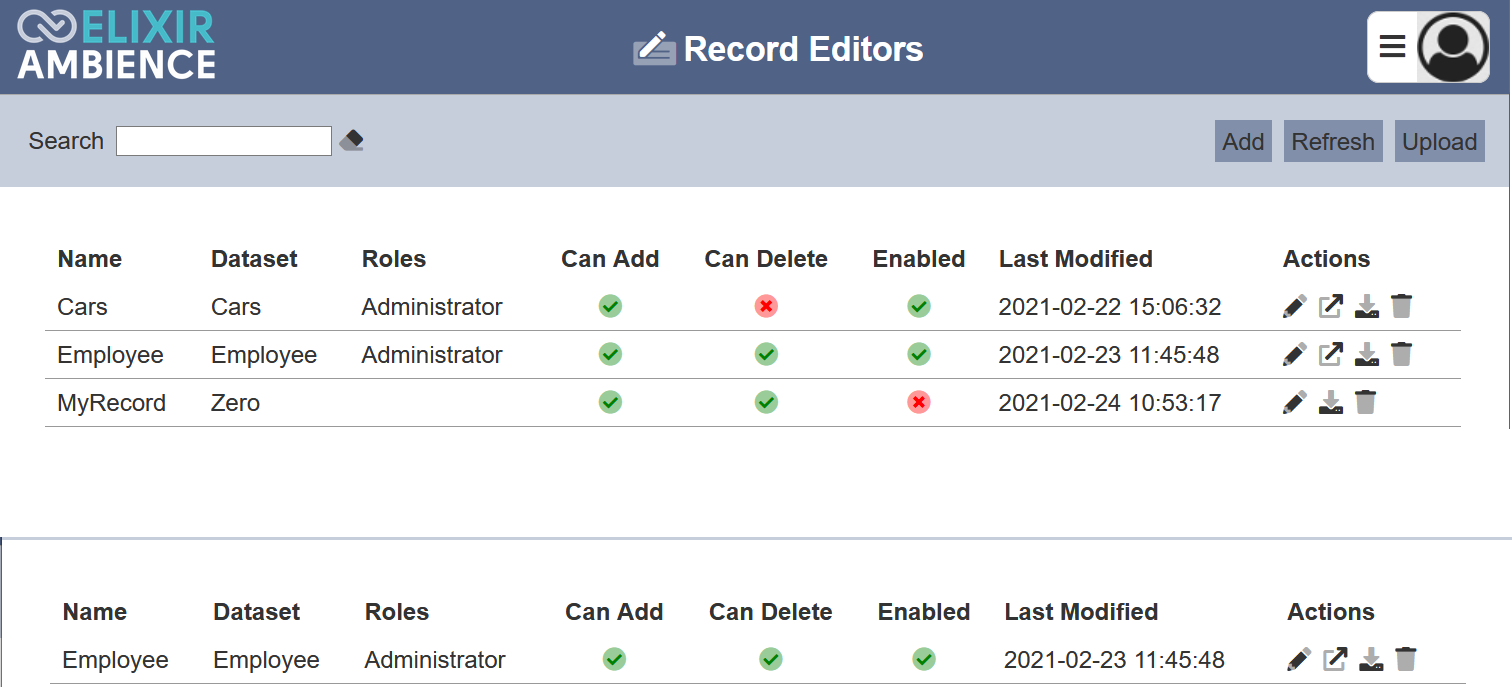
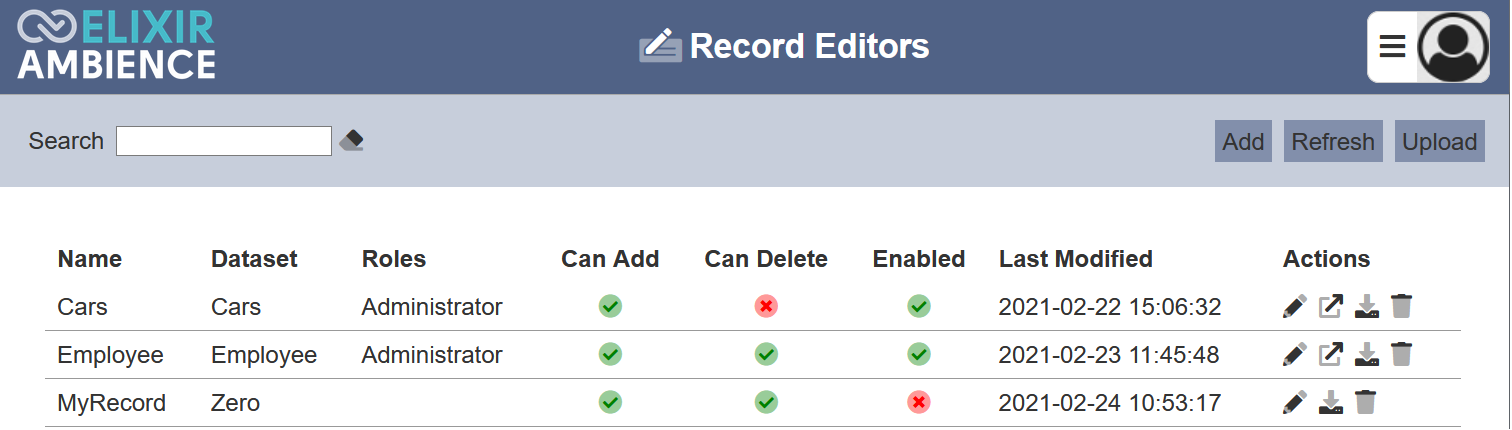
The Record Editors module allows you to manage the record editors created and edit the data records defined to be editable in the editors.
Features
- Add record editor
- Edit record editor
- Upload record editor
- Delete record editor
- Download record editor
- Refresh list
- Search
Module Interfaces
| Interface | Description | Required Privilege |
|---|---|---|
| Record Editors | Allows Record Editors access | mod-record-editor |
| Record Editors | Allowed to edit Record Editors | mod-record-editor-edit |
| Record Editors | Allows Record Editors management access | mod-record-editors |
Add
To add a record editor, start by clicking on the “Add” button on the upper right corner of the page.

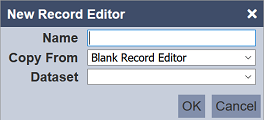
In the “New Record Editor” dialog box, set the properties for the new record editor.
| Field | Description | Mandatory | Input Type | Constraints | Default Value |
|---|---|---|---|---|---|
| Name | Unique name assigned to the record editor. | Y | Text field | Any text (case-sensitive) | Empty string |
| Copy From | Copy from an existing record editor. | Y | Drop-down list | Select from list | “Blank Record Editor” |
| Dataset | Defines the dataset to edit. | Y | Drop-down list | Select from list | None |
In “New Record Editor” dialog box, key in the name to be given to the record editor into the “Name” field. The “Name” field must be a unique value (not used by other record editors) and it is case-sensitive.
If an existing record editor is selected in the “Copy From” field, the “Dataset” field will use the property from the existing record editor and will not be available. If a blank record editor is selected in the “Copy From” field, select the dataset to be edited in the “Dataset” field.
Click on the “OK” button in the dialog box to create the new record editor. Clicking on the “Cancel” button aborts the action. By default, the newly added record editor is enabled and is allowed to add and delete records. No fields from the dataset is added to be editable.
Refresh
After performing actions on the browser/tab, the list is reloaded to display the record editors. The manual “Refresh” button is available and is particularly useful if there are others making changes on the same page.
The “Refresh” button is found on the upper right corner of the page. Clicking on it reloads the list.
Upload
To upload a record editor, start by clicking on the “Upload” button on the upper right corner of the page.
The “Upload” dialog box appears on the page.
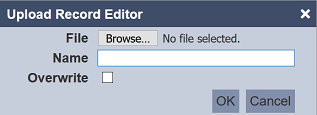
Browse to the location of the file (<filename>.recordeditor.json) to be uploaded and set the “Name” field. By default, the “Name” field uses the name of the upload file. You can change it to an appropriate name if desired. If the file to be uploaded is to replace an existing record editor, select the “Overwrite” field. Do note that the “Name” field must be unique, or an error message will appear.
| Field | Description | Mandatory | Input Type | Constraints | Default Value |
|---|---|---|---|---|---|
| Browse File | Browse to select file to be uploaded. | Y | Text field | Any text | Empty string |
| Name | Unique name assigned to the file to be uploaded. When a file is specified in the above field, this field will automatically takes in the file name of the specified file. |
Y | Text field | Any text | Empty string |
| Overwrite | If selected, overwrites existing record editor. | N | Checkbox | Select or not selected | Not selected |
Click on the “OK” button to upload the selected file. Click on the “Cancel” button to abort the action. A message will appear after the file has been successfully uploaded.

If the name of the record editor to be uploaded already exist, an error message will appear.

To overwrite the existing record editor, select the “Overwrite” field in the dialog box, then click on the “OK” button.
You can arrange/sort the list of record editors in ascending or descending order by clicking on the name of the desired field. By default, the list is sorted by the “Name” field in ascending order.
Edit
To modify an existing record editor’s attributes, click on the  “Edit” icon under the “Actions” column corresponding the desired record desired.

The “Edit” panel displays the selected record editor’s attributes in three tabs:
- Properties
- Scripts
- Fields
By default, the last tab, which is the “Fields” tab is displayed.
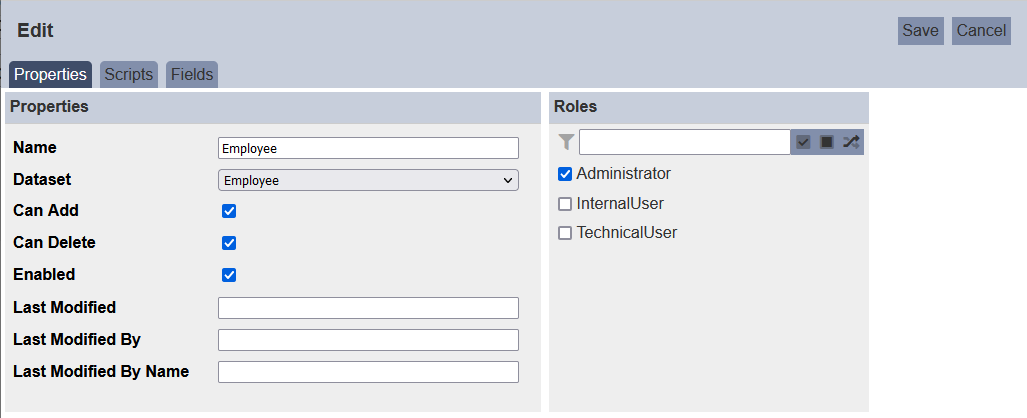
Properties
In the “Properties” tab, you can change name of the record editor in the “Name” field and the dataset in the “Dataset” field.
| Field | Description | Mandatory | Input Type | Constraints | Default Value |
|---|---|---|---|---|---|
| Name | Unique name assigned to the record editor. | Y | Text field | Any text (case-sensitive) | Name of record editor |
| Dataset | Defines the dataset to edit. | Y | Drop-down list | Select from list | Selected dataset |
| Can Add | For string type, if selected, allow to manually add _id for new records. If unselected, UUID will be generated automatically. For non-string type, this field is disabled. |
N | Checkbox | Select or unselect | Selected |
| Can Delete | If selected, allow to delete records. | N | Checkbox | Select or unselect | Selected |
| Enabled | If selected, enables record editor. | N | Checkbox | Select or unselect | Selected |
| Last Modified | Date of modification. | N | Text field | Any text | Empty |
| Last Modified By | User ID of modification. | N | Text field | Any text | Empty |
| Last Modified By Name | User name of modification. | N | Text field | Any text | Empty |
If the _id field of the dataset is string type, the “Can Add” field will be enabled for editing. In this case, if the “Can Add” field is selected, the _id will be available to be as a normal field in the “Fields” tab. For non-string type _id fields in the dataset, the “Can Add” field will be disabled (not selected).
If the “Can Delete” field is not selected, no records are allowed to be deleted in the “Editor” page.
You can allow or disallow adding or deleting records in the dataset by selecting or deselecting the “Can Add” and “Can Delete” feilds respectively.
To enable or disable the record editor, select or deselect the “Enabled” field respectively. By default, the record editor is enabled and allows adding and deleting of records. Disabled record editors will not be able to access Editor page.
The “Last Modified”, “Last Modified By” and “Last Modified By Name” allows you to key in details, which as date, user ID and/or user name of the user editing the record editor respectively.
In the “Roles” section, you can select the roles that are allowed to access the record editor by selecting the roles listed.

Alternatively, you can search for the roles required. You can also choose to select all, select none, or invert selection by clicking on the respective icons at the upper right corner of the panel.
Click on the “Save” button located on the upper right corner of the “Edit” panel to proceed with saving the changes made. Clicking on the “Cancel” button aborts the action and retains the record editor’s attributes prior to opening the “Edit” panel.
Scripts
The “Scripts” panel consists of two portions, one portion is the “Setup Script” while the other is the “Results Script”. It allows you to customise a more restrictive search function.

The “Setup Script” portion is to initialise the custom-search panel and the “Results Script” portion is to filter and display the search results.
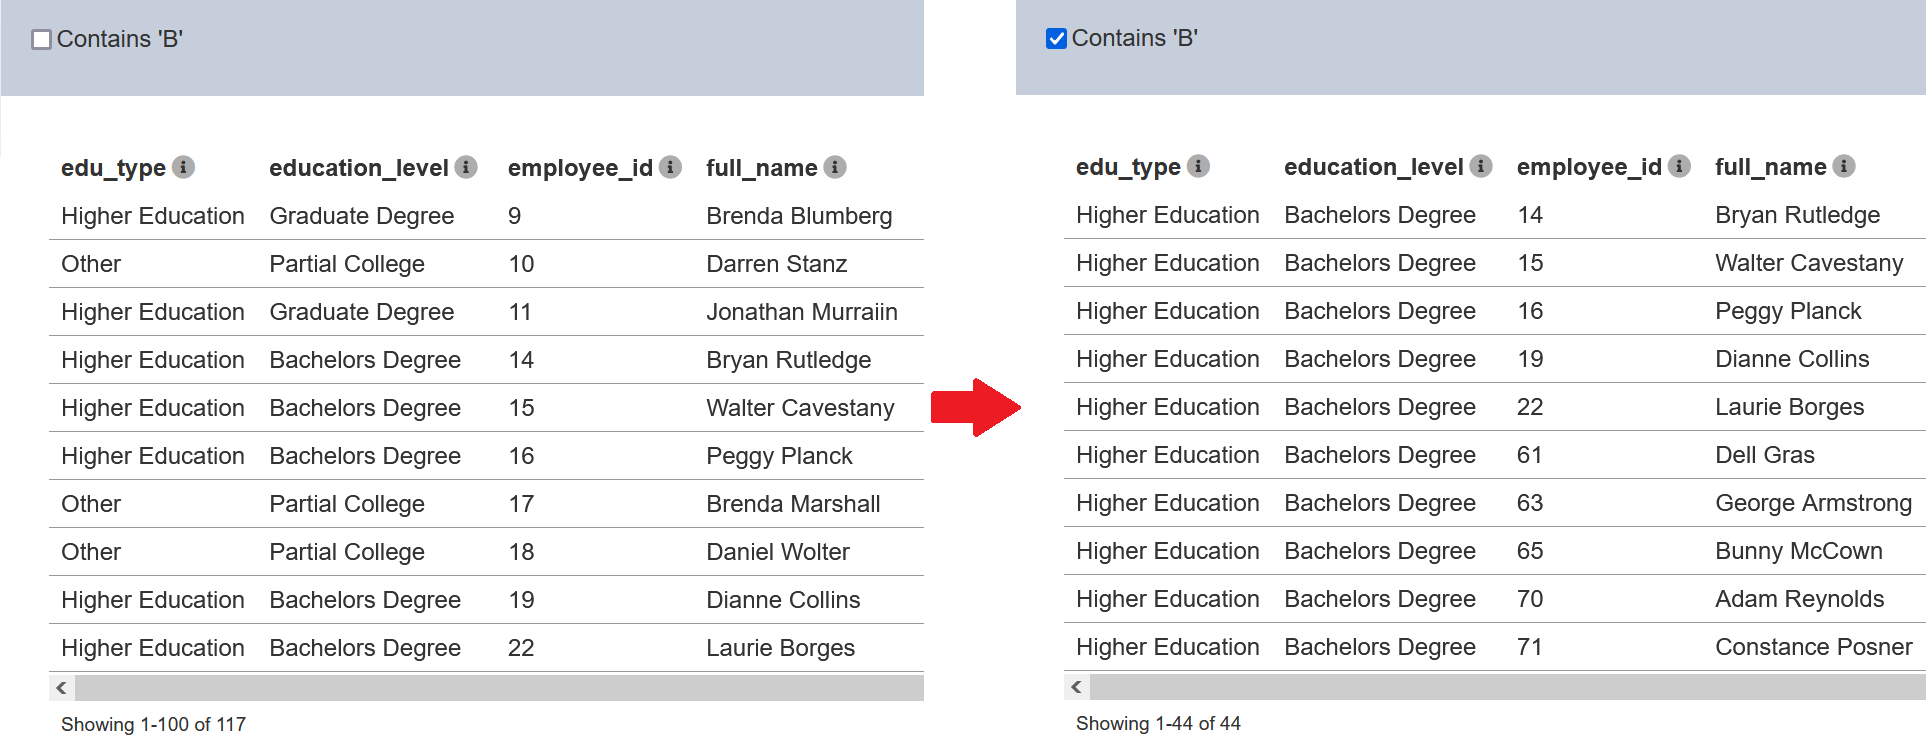
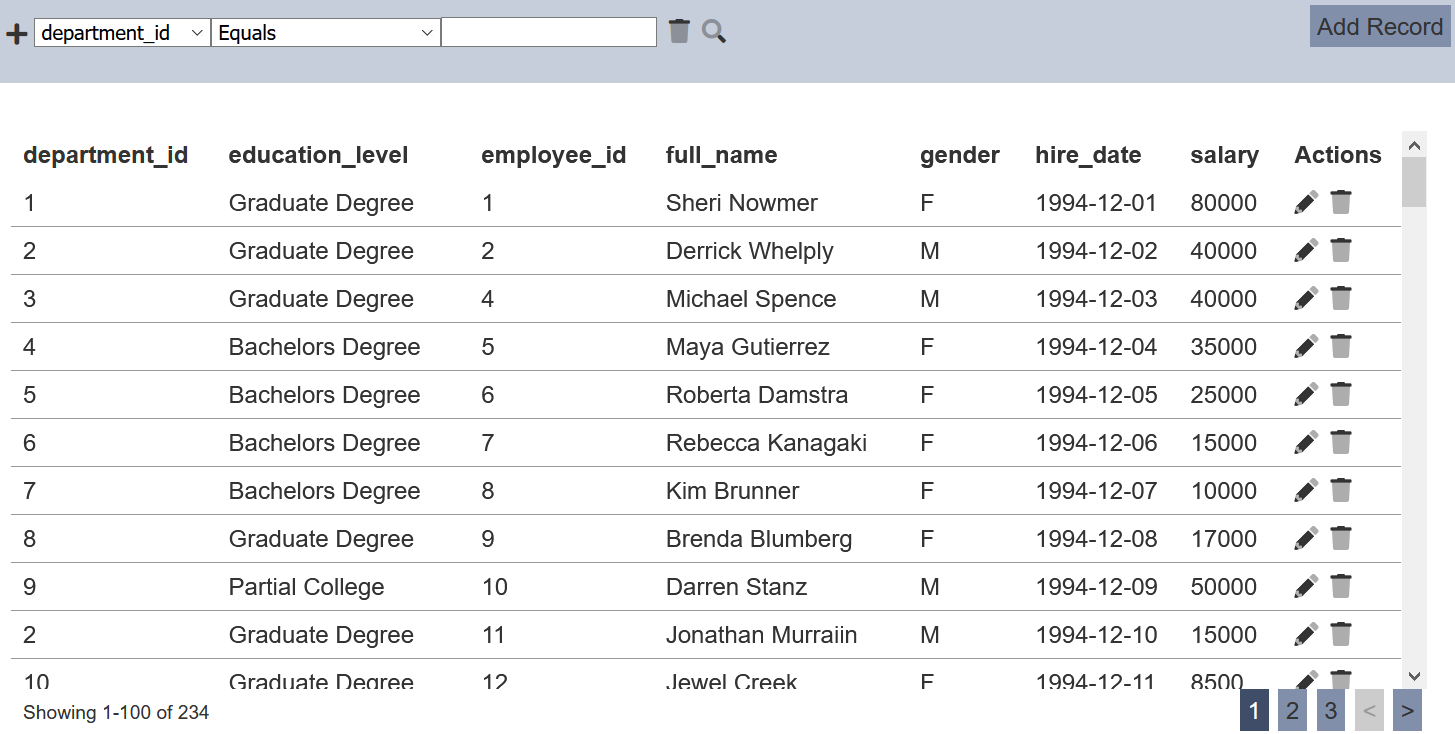
Below is an example of customising a search for records in “education_level” that has a “B” in it.
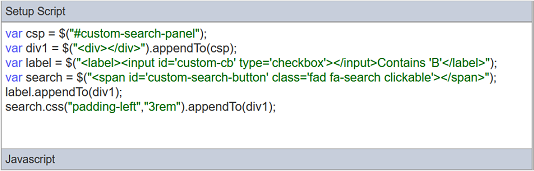

To use the customised search function, select the “Contains ‘B’” field and click on the  icon. All records with values that contains ‘B’ in the
 education_level field are displayed.

To revert, unselect the “Contains ‘B’” field and click on the icon.
You can also create a more dynamic search using the following script in the “Setup Script”.
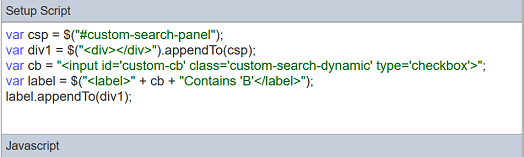
The script removes the icon. Once the checkbox is selected, the search is triggered.
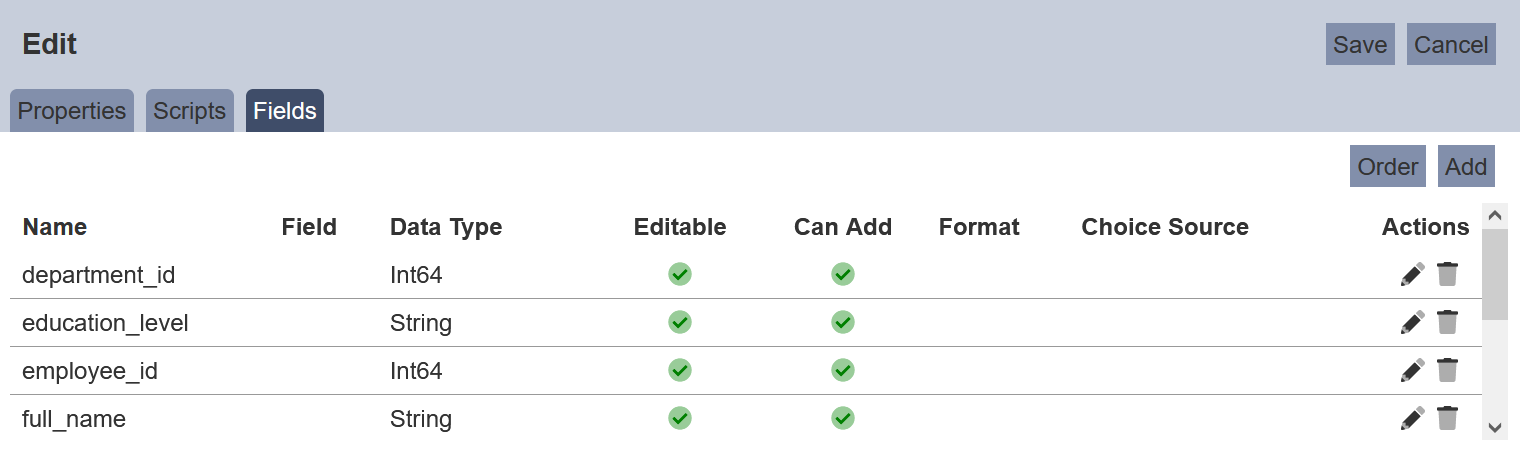
Fields
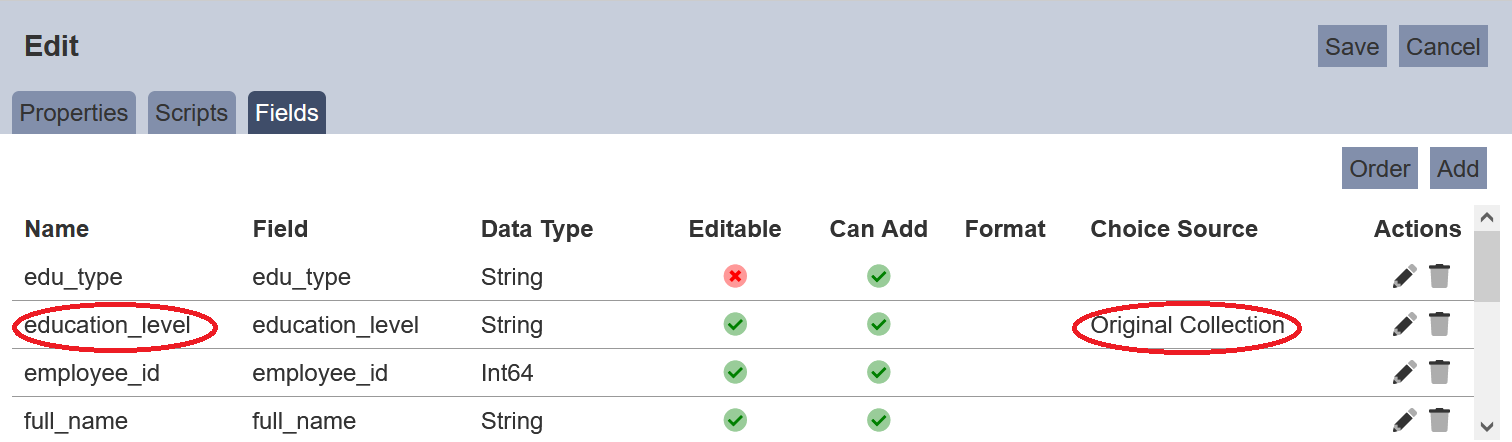
By default, the last tab, which is the “Fields” tab is displayed. This tab allows you to add, order, edit and delete the fields in the dataset.
Add Field
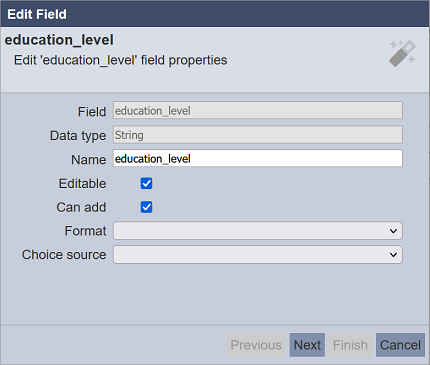
To add a field for editing, click on the “Add” button at the upper right corner of the Edit panel. The “Add Field” dialog box will appear.

| Field | Description | Mandatory | Input Type | Constraints | Default Value |
|---|---|---|---|---|---|
| Field | Name of field in dataset. | Y | Drop-down list | Select from list | First option |
| Data type | Data type of select field. | Y | Textbox | Uneditable | According to selected field |
| Name | Name of selected field. | Y | Textbox | Any text | As per selected field |
| Editable | If selected, allows the field to be editable. | Y | Checkbox | Select or unselect | Selected |
| Can add | If selected, allows the field to be added. | Y | Checkbox | Select or unselect | Selected |
| Format | Selects the format of the field. | N | Drop-down list | Select from list | None |
| Choice source | Selects the source for the field. This field is only available for string type. |
Y | Drop-down list | Select from list | None |
Select the desired field from the drop-down list in the “Field” field. Change and edit the other properties as desired. The “Editable” is disabled and unselected for the _id field of the dataset.
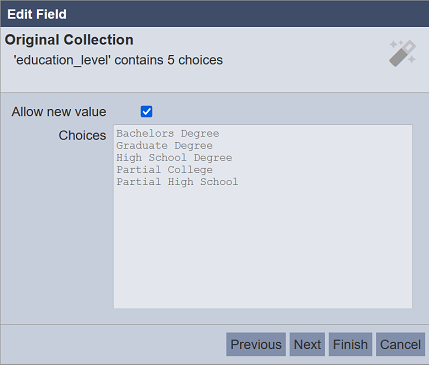
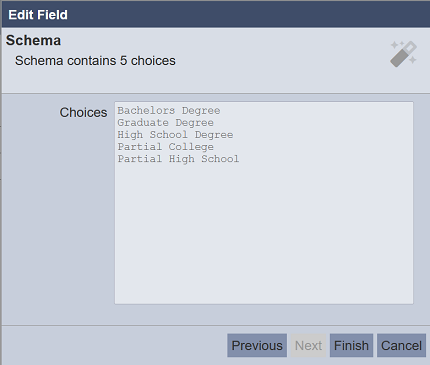
The “Choice source” field is available only for string type and it allows you to restrict the values using the several options available:
- No Choice (blank) - Users can set any value in this field (default)
- Custom Choices - Enter own choices (separated by commas) in the “Choices” field

- Other Collection - Allows selecting choices from another dataset

- Original Collection - Uses its own source as choices
- Schema - Uses the schema;s choices as the choices
Click on the “Next” button and the “String Constraint” screen appears in the dialog box. For “No Choice” and “Original Collection” options, the “Character Limit” fields must be set but the “Regex” is optional.
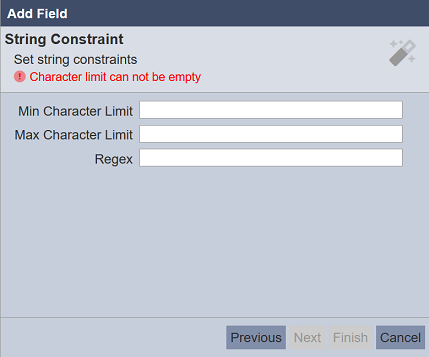
Key in required value for the fields and the “Finish” button will appear.
Click on the “Finish” button to add the field. Clicking on the “Previous” button (if available) bring you back to the previous screen. Click on the “Cancel” button to abort the action.
The added field will appear in the “Fields” tab. The “Choice Source” column will reflect the option selected earlier.
Order Field
By default, the fields are listed according to the sequence the fields are added. This function allows you to sort the order of the fields.
To do so, click on the “Order” button at the upper right corner of the Edit panel.

In “Fields Sort Order” dialog box, drag-and-drop the fields to their desired location. Click on the “OK” button to save the changes. Click on the “Cancel” button to abort.
Edit Field
To edit a field, click on the icon under the “Actions” column corresponding the desired field.
In the “Edit Field” dialog box, make the necessary changes. Click on the “Next” button and edit the “String Constraint” fields (if applicable). Then click on the “Finish” button to save the changes.
Delete Field
To delete a field, click on the  icon under the “Actions” column corresponding the desired field. Do note that there is no notification when a field is deleted. You can simply add the field back into the list.
Open Editor
To open the record editor, click on the  “Open” icon under the “Actions” column corresponding to the desired record editor.
The Editor page will be displayed.
In this Editor page, you can edit the records, add new records, as well as delete a record. Do note that any disabled record editor will not be able to access the Editor page.
For more information on the Editor, see Editor.
Download
You can download an existing record editor by clicking on the  “Download” icon under the “Actions” column corresponding the desired record editor.
The downloaded record editor has the following filename format <filename.recordeditor.json>.
Delete
Deleting a record editor removes it from the list.
To delete an existing record editor from Ambience, click on the “Delete” icon under the “Actions” column corresponding the desired record editor.
There is an option to undo the deletion. A notification with an “Undo” button appears right after clicking on the “Delete” icon.

Upon clicking on the “Undo” button, the deleted record editor is restored and is added back to the list. Do note that the notification will disappear after 5 seconds.
Search
The search bar appears on the upper left corner of the page.

This provides an easy way to search through the list. It is case-insensitive and displays records that have the entered search value in any of the values of the fields below:
- Name
- Dataset
- Roles
- Last Modified