
System Settings
Description
The System Settings module provides users a means to place the Ambience server into maintenance mode, as well as hiding modules.
This module is available in both the Ambience and Repertoire software suite.
Module Interface
| Interface | Description | Required Privilege |
|---|---|---|
| System Settings | Allows access to the System Settings page. | mod-system-settings |
AWS Integration
This function allows user to integrate an Amazon Web Service (AWS) Simple Storage Service (S3) bucket to the system. The AWS S3 bucket provides object-based storage, where data is stored inside S3 buckets in distinct units called objects instead of files.
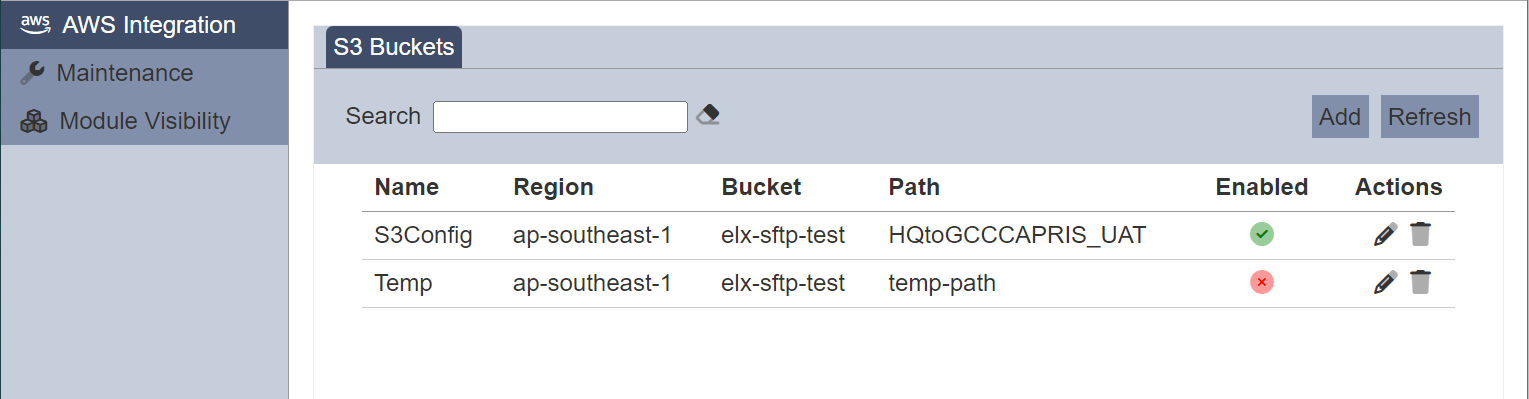
It allows you to add, edit, delete the AWS S3 buckets.
Add
To add a S3 bucket configuration, click on the “Add” button at the upper right corner of the page.

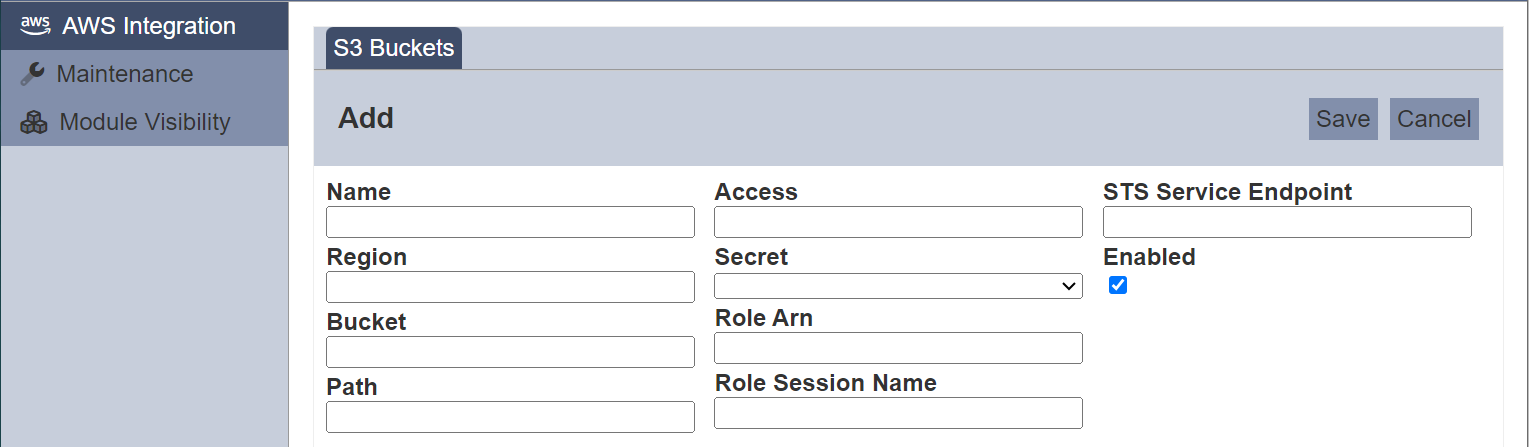
The “Add” panel will appear.
| Field | Description | Default Value |
|---|---|---|
| Name | Unique name for the S3 bucket configuration. | None |
| Region | Region where the S3 bucket resides. | None |
| Bucket | Name of bucket to access. | None |
| Path | Path name of S3 bucket. | None |
| Access | Access point name. | None |
| Secret | Selects the secret to be used with the S3 bucket. | None |
| Role Arn | Defines the role Amazon Resource Name (ARN). | None |
| Role Session Name | Defines the role session name. | None |
| STS Service Endpoint | Defines the AWS Security Token Service endpoint. | None |
| Enabled | If selected, enables the S3 bucket. Enabled S3 bucket is represents with a green tick under the “Enabled” column, while a disabled bucket is represented with a red cross. |
Selected |
Depending on the how and what type of bucket is to be accessed, the fields required may differ.
Key in an unique name for the S3 bucket (mandatory) in the “Name” field. Key in the required values in the other relevant fields. Click on the “Save” button to save the S3 bucket configuration.
If the “Name” is left empty or the name already exist, the appropriate error message will appear.

Edit
To edit a S3 bucket configuration, click on the  “Edit” icon under the “Actions” column of the corresponding S3 bucket.

The “Edit” panel will appear.
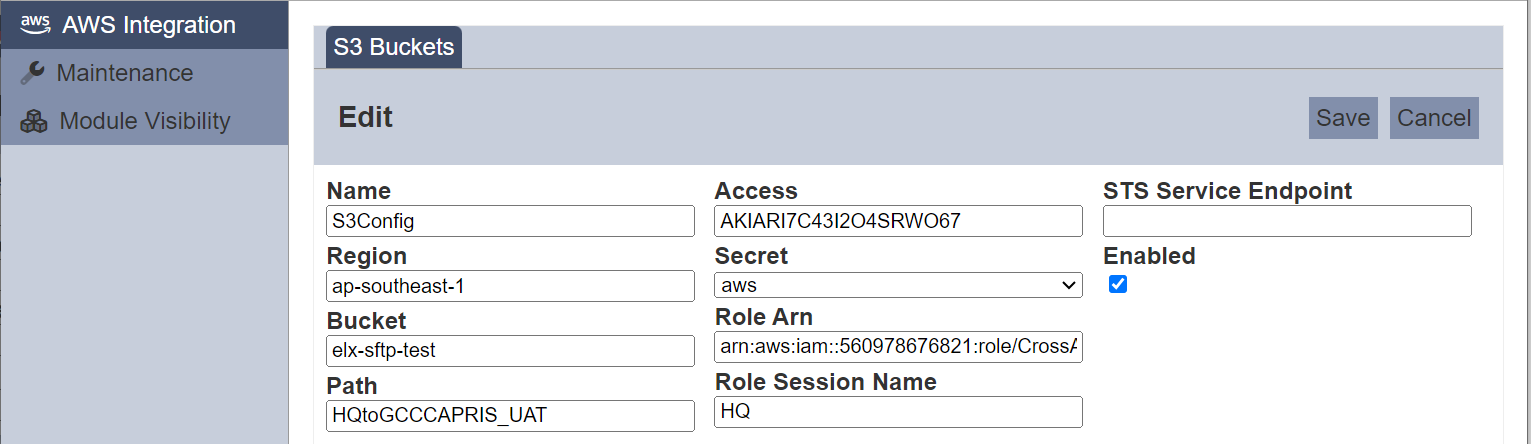
Edit the details as desired and click on the “Save” button at the upper right corner of the panel to save the changes. To abort, click on the “Cancel” button.
Delete
To delete a S3 bucket, click on the  “Delete” icon under the “Actions” column of the corresponding S3 bucket.
A notification will appear.
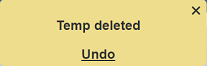
There is an “Undo” button to undo the deletion. Upon clicking on the “Undo” button, the deleted S3 bucket is restored and are added back to the list of S3 buckets. Do note that the notification will disappear after some time.
Refresh
After performing actions on the browser/tab, the list is reloaded to display the list of S3 buckets. The manual “Refresh” button is available and is particularly useful if there are others making changes on the same page.
The “Refresh” button is found on the upper right corner of the page. Clicking on it reloads the list of S3 buckets.
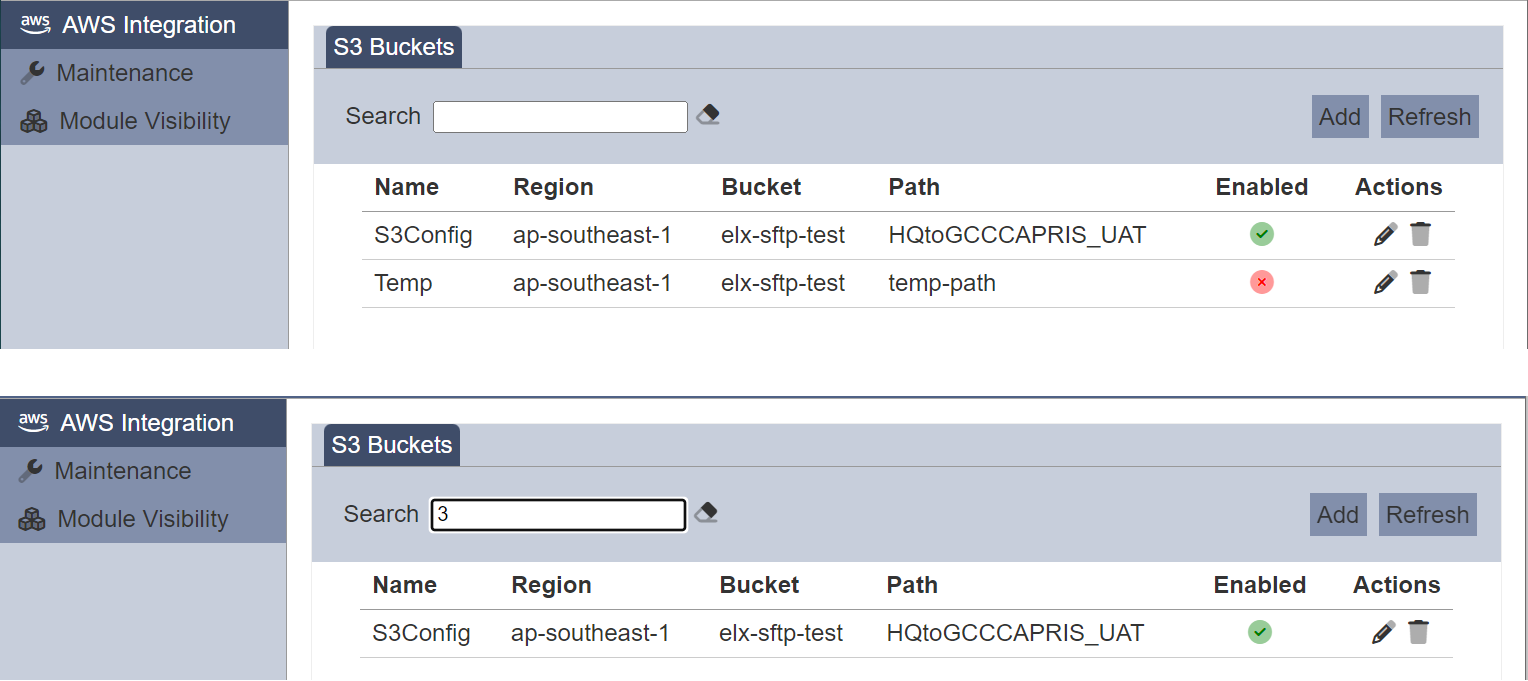
Search
There is a cross-field search function for the list of S3 buckets. It is located at the upper left corner of the page.

This provides an easy way to search through the list of S3 buckets. It is case-insensitive and displays S3 buckets that have the entered search value in any of the values of the fields below:
- Name
- Region
- Bucket
- Path
Maintenance
This function allows user to place the Ambience server into maintenance mode. To be able to use this function, the mod-system-settings and mod-maintainer privileges are required.
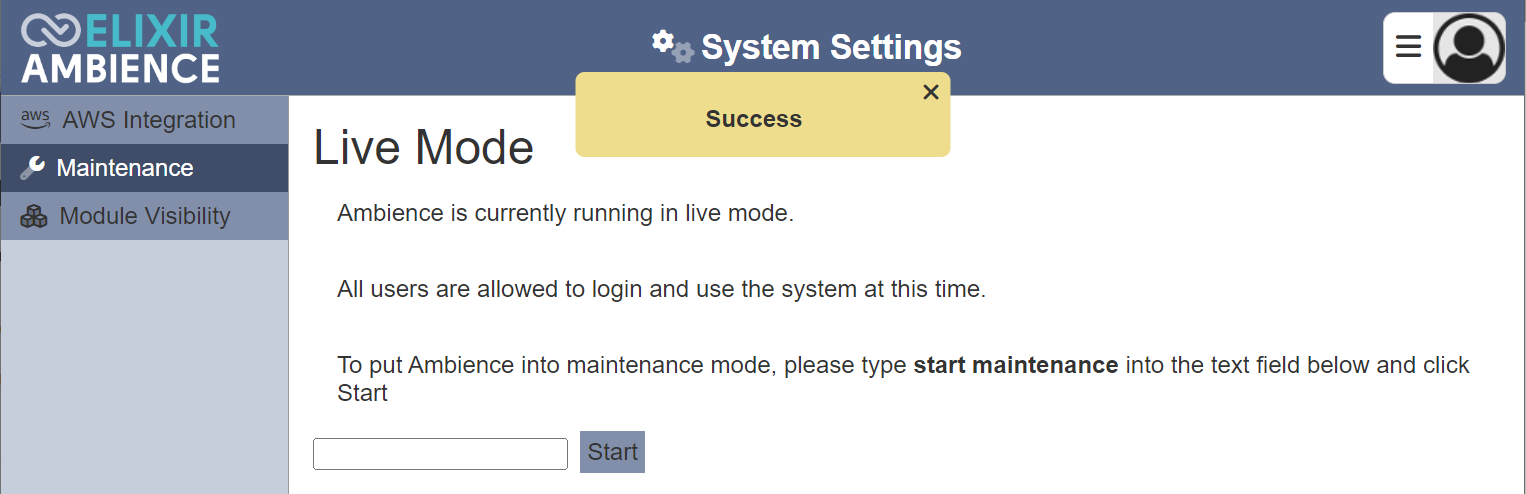
To place the Ambience server into maintenance mode, click on the “Maintenance” option from the left panel. The “Live Mode” page will appear in the right panel.
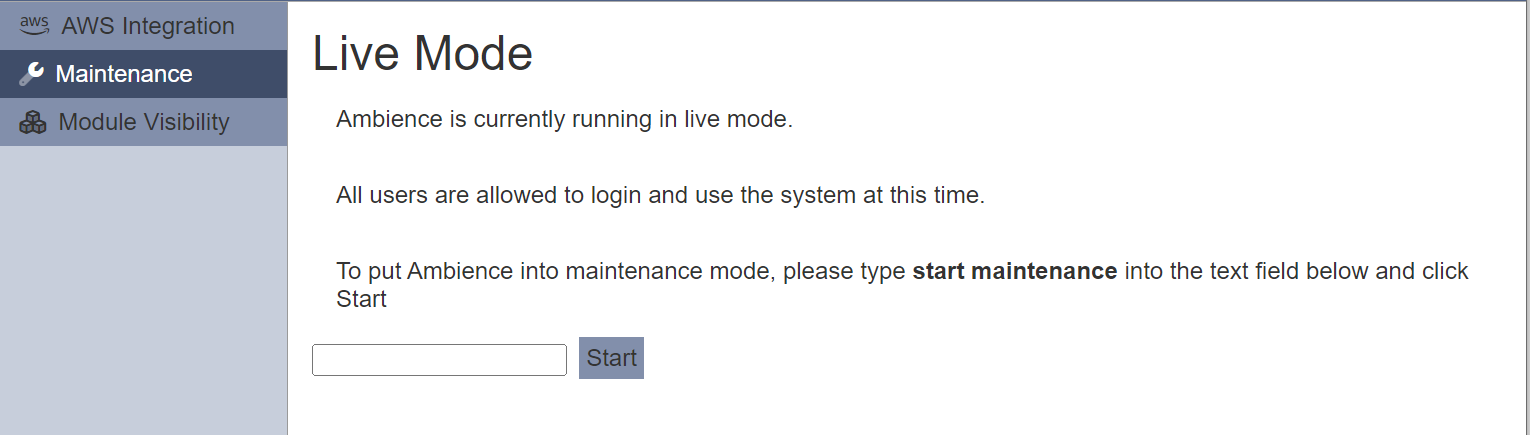
In the textbox, enter in the appropriate phrase and click on the “Start” button.
A message will appear and the Ambience server is placed into maintenance mode, with a message “Maintenance Mode” at the upper left corner of all pages, next to the Ambience logo.
Turning on the maintenance mode affects several things:
- Ends sessions of all users who does not have
mod-maintainerprivilege - Prevents users without
mod-maintainerprivilege from logging into Ambience
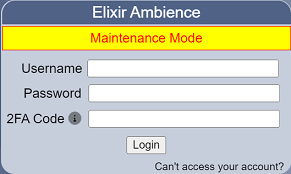
The login dialog will display a message when in maintenance mode.
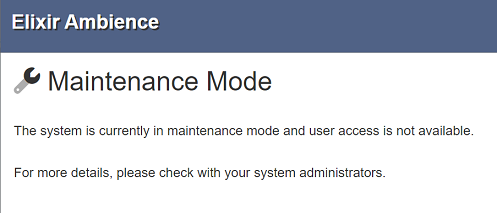
When users without the mod-maintainer privilege try to log into Ambience, they will receive an error page.
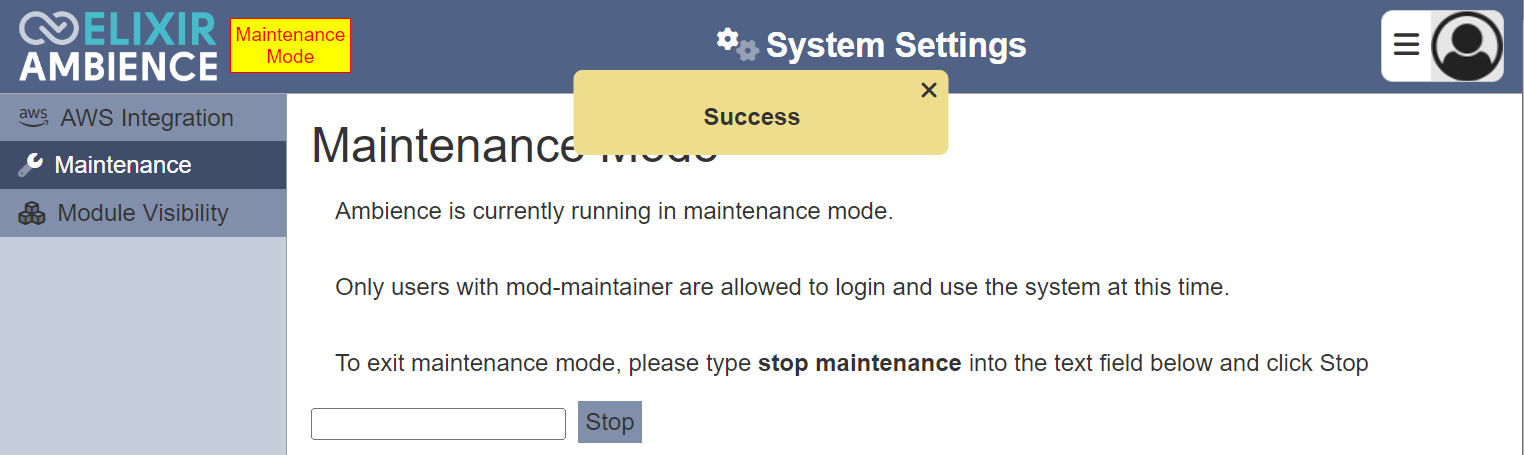
To stop the maintenance mode, in the Maintenance page, enter the appropriate phrase and click on the “Stop” button.
A message will appear and the Ambience server is placed into live mode. The warning message at the upper left corner is removed.
Note:
There are several things to note:
- Maintenance mode survives shutdown and restart.
- Maintenance mode propagates across all servers that share the same MongoDB Ambience database (may take a few seconds).
- Only users with
mod-maintainerprivilege can turn it on and off, and they will not be logged out. Should they explicitly log out (or if their session espires), they can still log in as usual. - Maintenance mode is visible as a boolean at
elx-parameters.maintenanceModeon the client (in case there are scripts or CMS that need it). - Using third party SSO will behave exactly the same, except the third party SSO would not have the “Maintenance Mode” banner at their login page.
- If there are custom
_header.html,ambience.cssand login html, it may be advisable to compare the differences and update accordingly, else you may not see the warnings.
Module Visibility
To be able to access to the Ambience modules, privileges need to be granted to users. With these privileges, users can access these modules via the Service Choose page. There are some modules that may be required for a certain period of time, thus their privileges are granted to users. After that certain period, these modules are no longer needed. Two methods can be used. One is to remove the privileges of these modules from users (one user at a time), or use the Module Visibility function.
To use this function to limit or hide certain modules in the Service Chooser, click on the “Module Visibility” option from the left panel. The list of available modules will appear in the right panel.
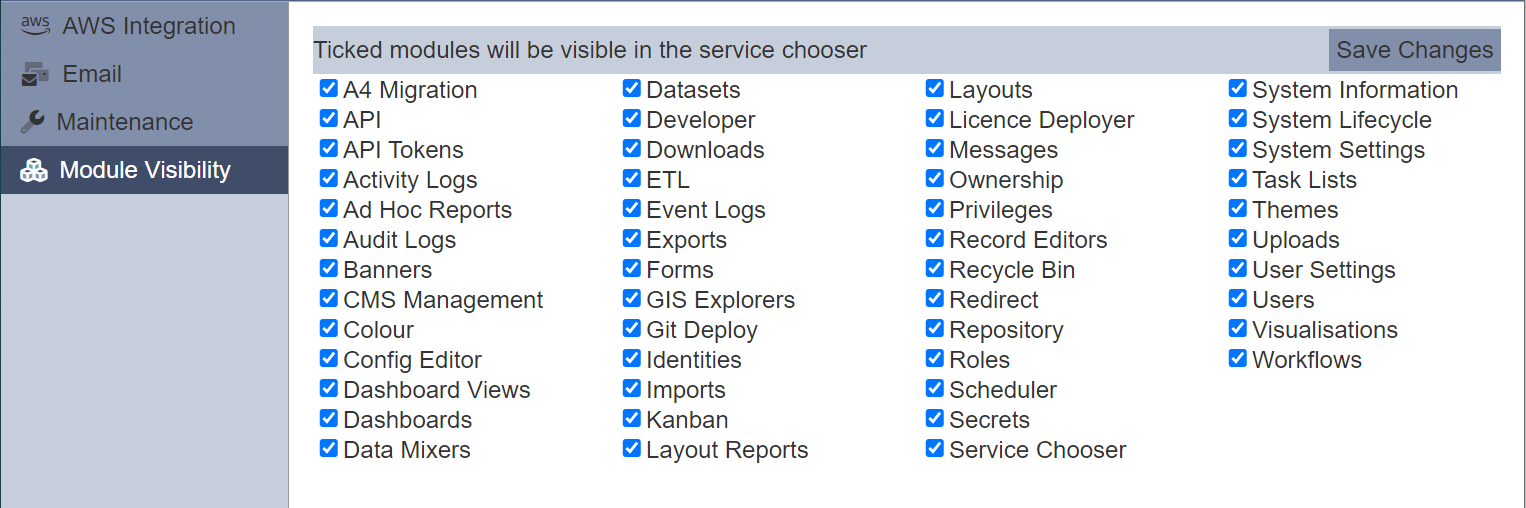
All visible modules are selected by default. To hide any modules, unselect the checkbox next to the desired module. Click on the “Save Changes” button at the upper right corner of the page.
A message will appear.
To view the effect, select “Service Chooser” to display the list of available modules.
In the example below, “A4 Migration”, “Developer” and “Licence Deployer” modules are un-selected in the Module Visibility page.
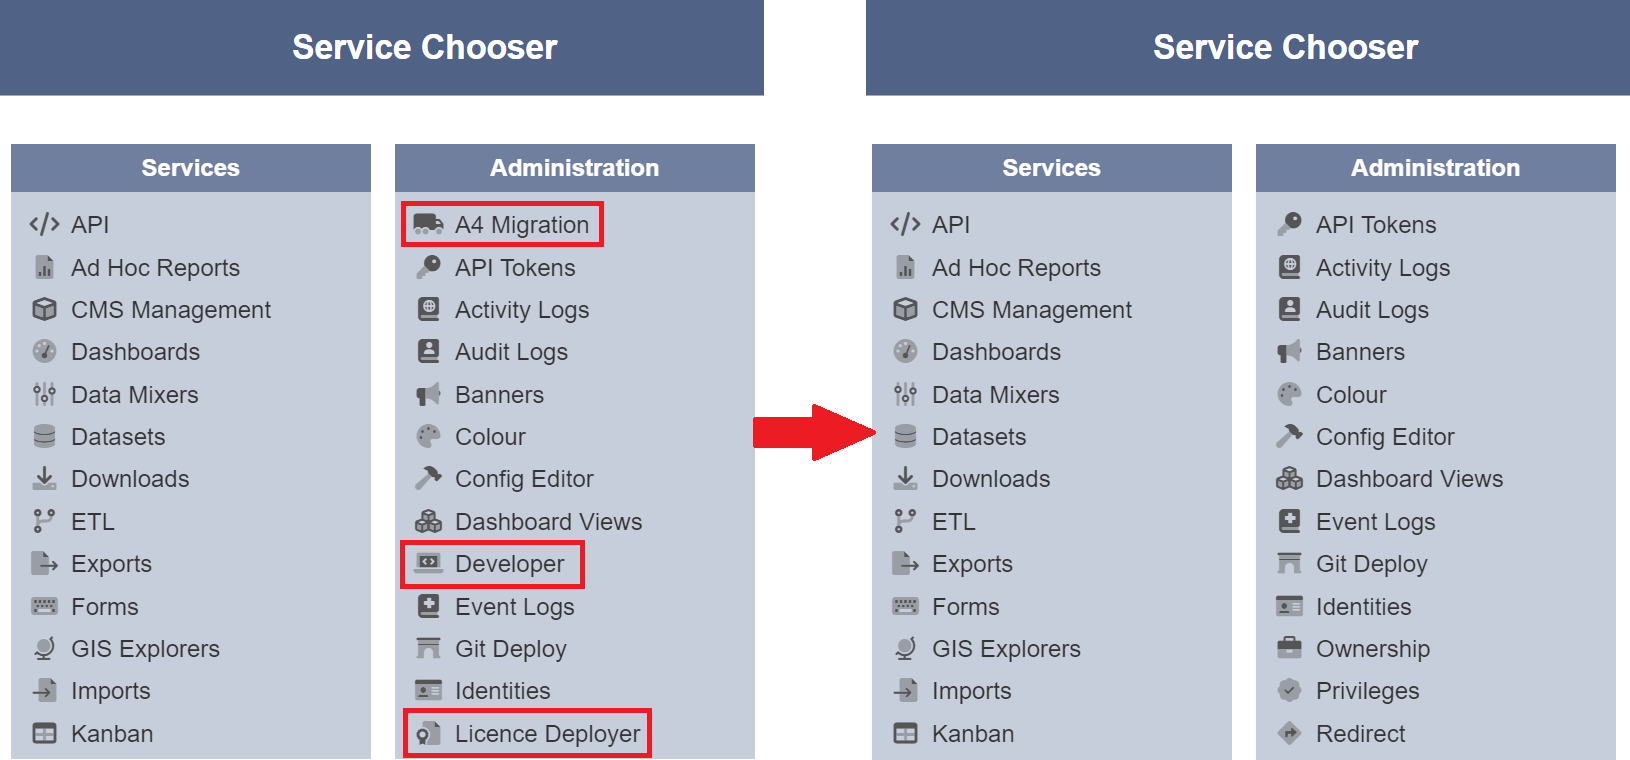
Do note that this change applies to all users and the unselected modules are only hidden in the Service Chooser page. If the URL of the module is known, any user with the appropriate privilege will still be able to access the module.