Git Deploy
Description
The Git Deploy module allows you to store, share and version control your artifacts in Git. Using version control means that it is easy to see what chainsets, dashboards, and forms etc. were changed and even what lines in the file were changed and when.
Module Interfaces
| Interface | Description | Required Privilege |
|---|---|---|
| Git Deploy | Allows Git Deploy access | mod-git-deploy |
Create Repository
The repository can be either local or remote. A remote repository uses a repository in GitHub, GitLab or equivalent. A local repository is created in your local system.
Remote Repository
Create a repository using a git service, such as GitLab or GitHub.
Local Repository
To create a local repository, create a folder in your system. Open a command line terminal window and navigate to the folder. Initialise the local repository using the following command:
git init --bare
A bare repository will be created in the folder.
Create another folder ln your local system. In the terminal window, navigate to the newly created folder. Clone the local repository into this folder using the following command:
git clone <path of local repository>
A warning will appear in the terminal window.
warning: You appear to have cloned an empty repository.
Navigate to the cloned folder (which has the same name as the local repository created earlier). Add a simple text file (e.g., named it as root.file) into the cloned folder. Commit and push the text file onto the repository using the following commands:
git add .
git commit -m "add root file"
git push origin master
The first command includes all files in the folder. The second command commits the file with the comments in the “ ”. The last command pushes the text file onto the repository as a master branch.
Now you have a local repository and a master branch. You can create more branches.
Setup Application Configuration File
In order to use Git Deploy, add the following code in the application.conf file in the Ambience bin folder.
ambience.modules.git-deploy {
   repositories {
      # specify key: value pairs where the value key may be a remote git repository like:
      # "remote-sample": "git@git.example.com:<path of repository in Git>"
      # or a local git repository (pherhaps you cloned itearlier, or used git init to create)
      # "local-sample": "<path of local Git folder>"
   }
   collections: ["CHainsets","Dashboards","DashboardViews","Datasets","Forms","GISExplorer",
   "GEOLayer","RecordEdtitor","Repository","RepositoryChunks","Theme","Visualisation","Web",
   "WebStore","Workflows"]
}
MongoDB databases (such as, eno) can be included. To include a MongoDB database as a collection, the code should be <database-name>.<collection-name>. For example, to include a collection named Sectorsin the database named eno in the Git Deploy, the following code should be added in the application.conf file:
collections: [... "Webstore", "Workflows", "eno.Sectors"]
Since database names cannot include a dot, the first dot marks the separator between the database and the collection name. Do note that it is not advisable to include huge datasets using this method. This method is intended for “infrastructure”, like lookup tables.
The values support {enc} encryption. Only the collections listed above (configurable) will be stored by git-push. Only the collections listed above and included in the Git repository will be loaded by git-pull.
Collections not listed above will not be used, even if they are in the Git repository.
Note that the artifacts are not altered in any way, so it is assumed that the same set of user IDs, roles, etc. exist on both the source and the target system. The necessary collections (such as Users, Roles, Privileges) can be added in the above list to ensure consistency. Do note that all other Users, Roles and Privileges will not be retained. The purpose of this module is to produce a fully repeatable versioned deployment. It should not try to merge in with whatever random contents already happens to exist.
Usage
The typical use case is for a developer to use Git Push to add their collections to a repository, which can either be a remote (e.g., GitLab or GitHub) or a local Git folder.
A corresponding Git Pull can be used to load the collections ready for testing or use. Do note that Git Pull is destructive. It will replace any collections found in the Git repository bt will not touch any collection that is not in Git.
Another common use is as an alternative to MongoDB backup/restore. Developers should regularly use Git Push to save their work elsewhere, in case they need to roll-back or compare differences, which is very difficult to do with a MongoDB dump. Keeping a cloud-based versioned copy also means that any work in the local machine will not be lost if the local machine fails.
This mechanism makes it easy for users to test a particular version of a system and easily roll-back to any prior version. Via Git, users can compare branches, merge branches, tag particular points in the tree for easy access and diff.
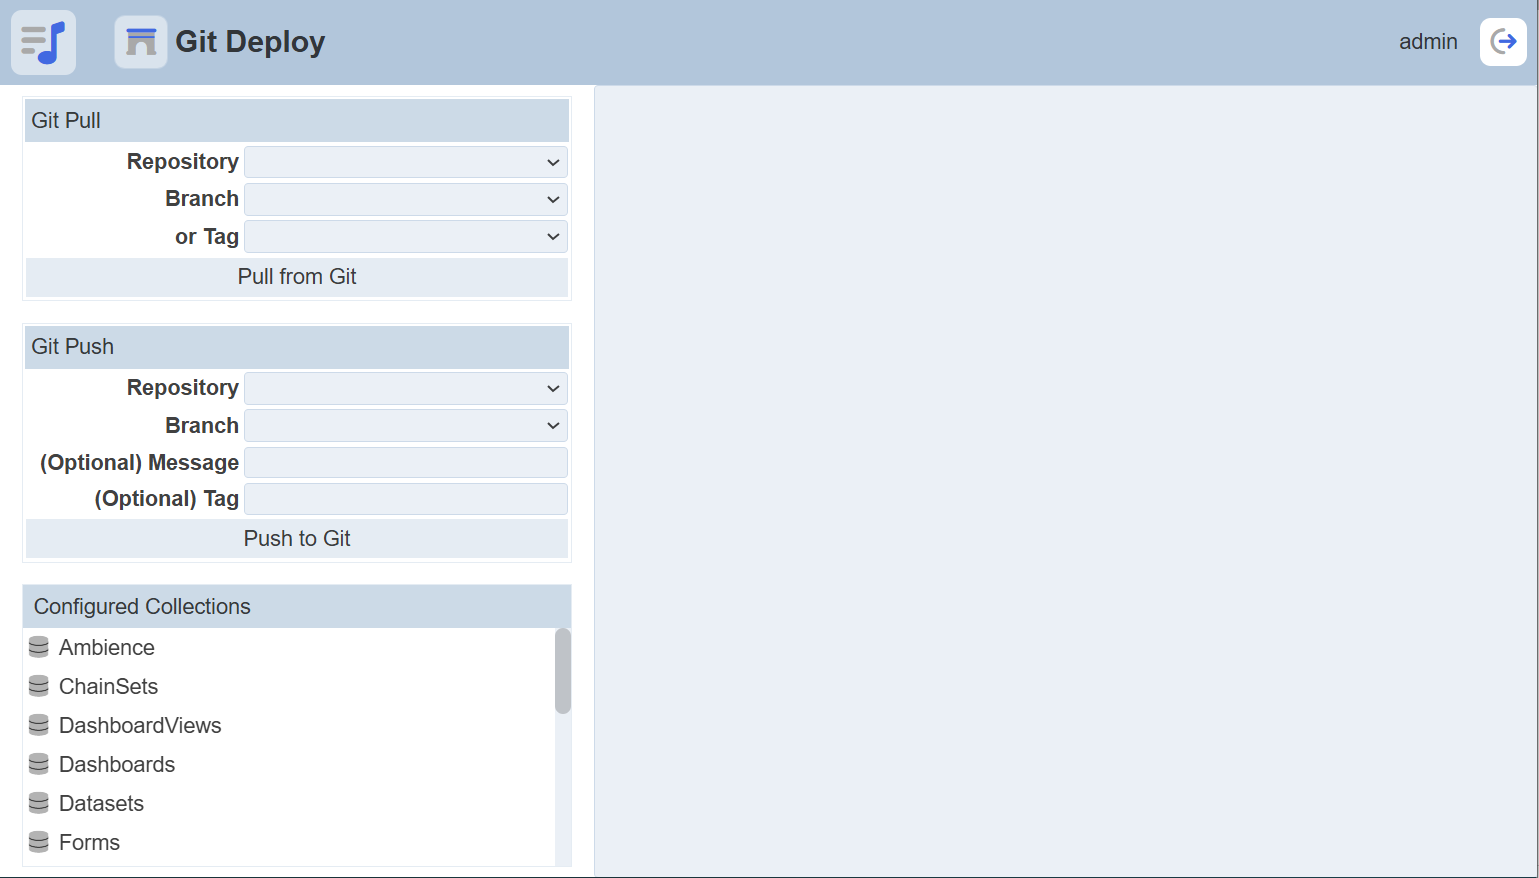
Git Pull
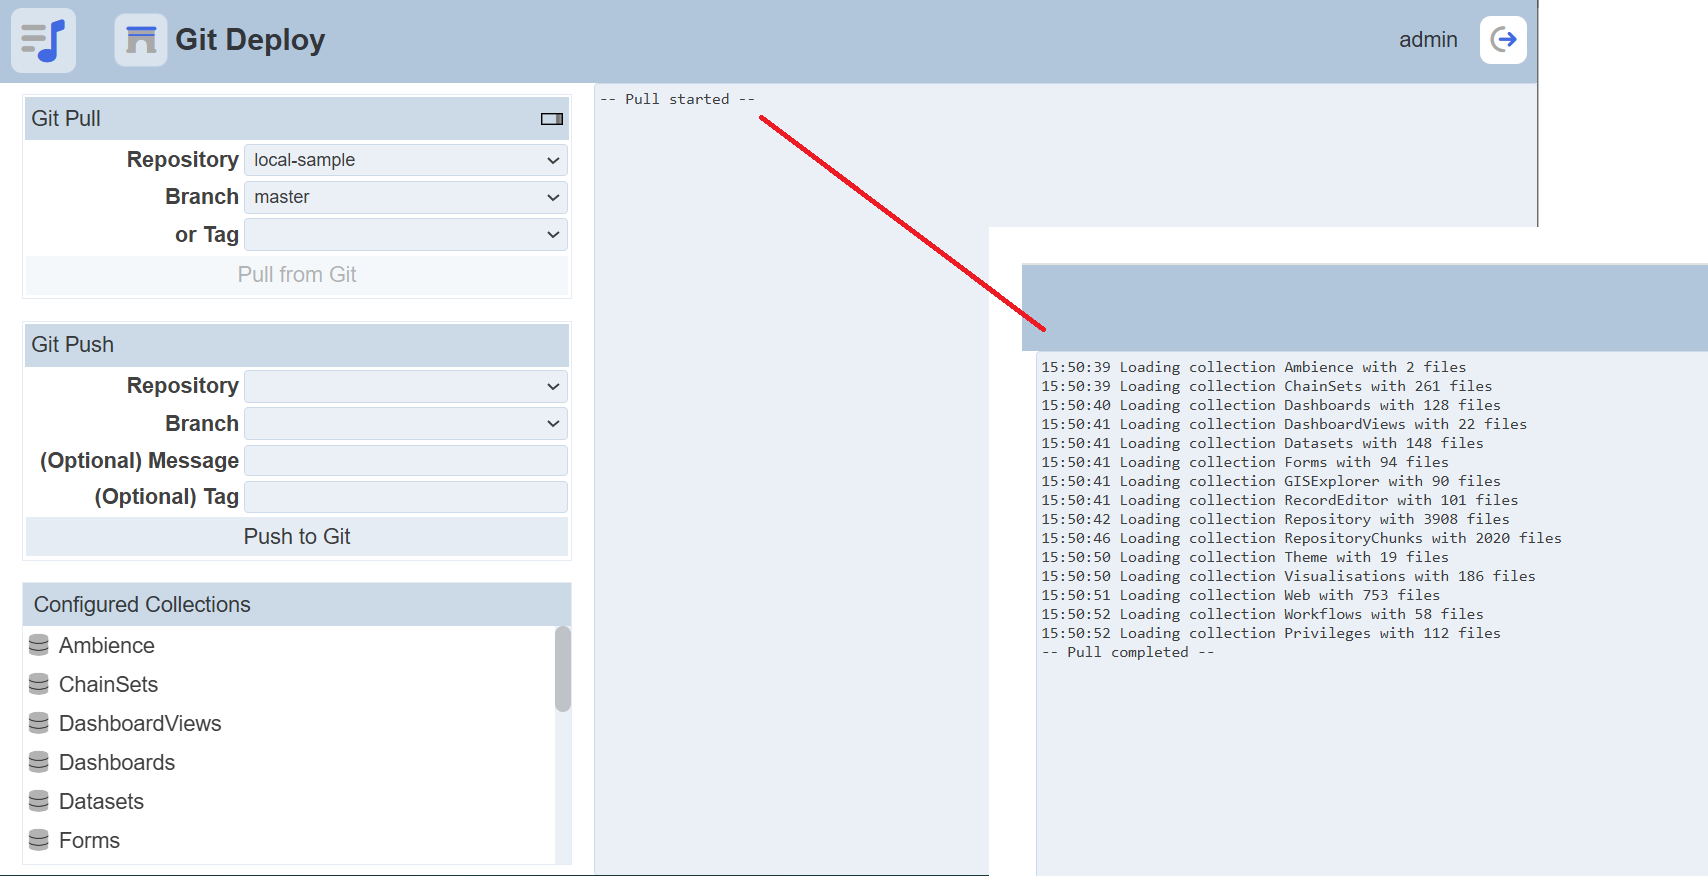
To pull the artifacts from Git, select the desired repository, branch or tag from their respective drop-down list and click on the “Pull from Git” button. The “Git Pull” dialog box will appear, warning on the consequences of the action.
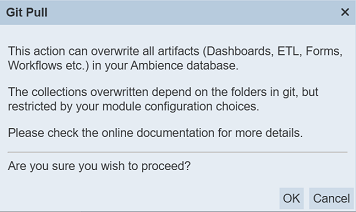
To confirm the action, click on the “OK” button. To abort the action, click on the “Cancel” button. Once the button is clicked, the push progress will start. The progress status will appear in the right of the page.
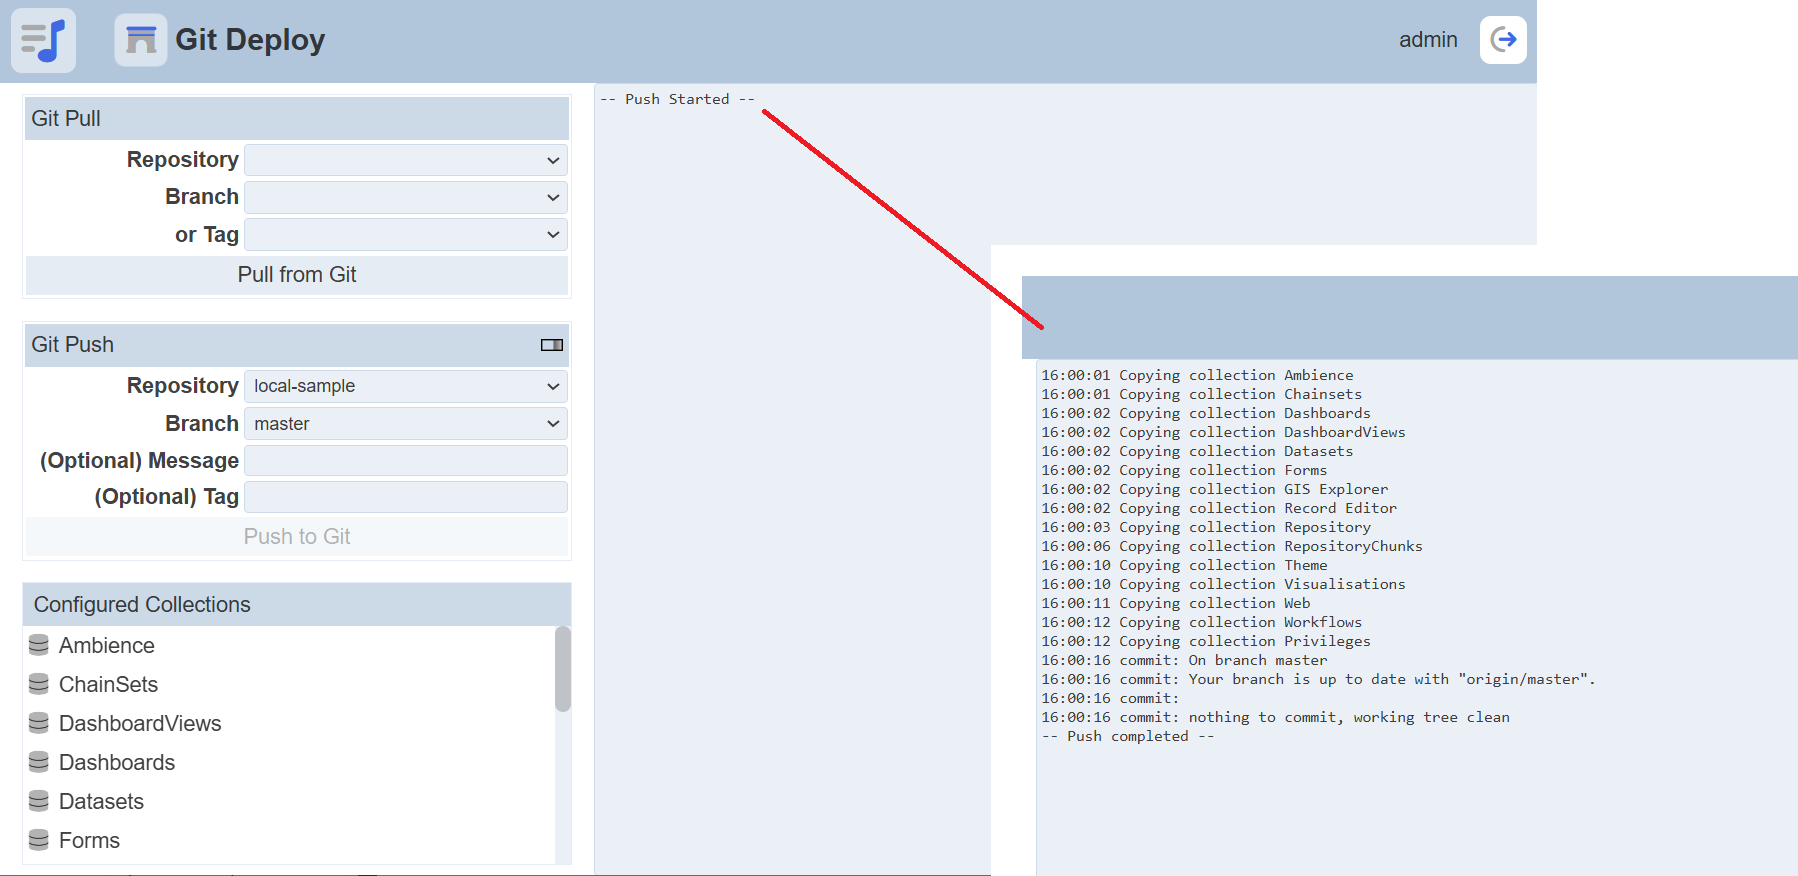
Git Push
To push the artifacts onto Git, select the desired repository, branch and tag (optional) from their respective drop-down list and click on the “Push to Git” button. If no repository is selected, an error message will appear.

Once the button is clicked, the push progress will start. The progress status will appear in the right of the page.