Trigger
Description
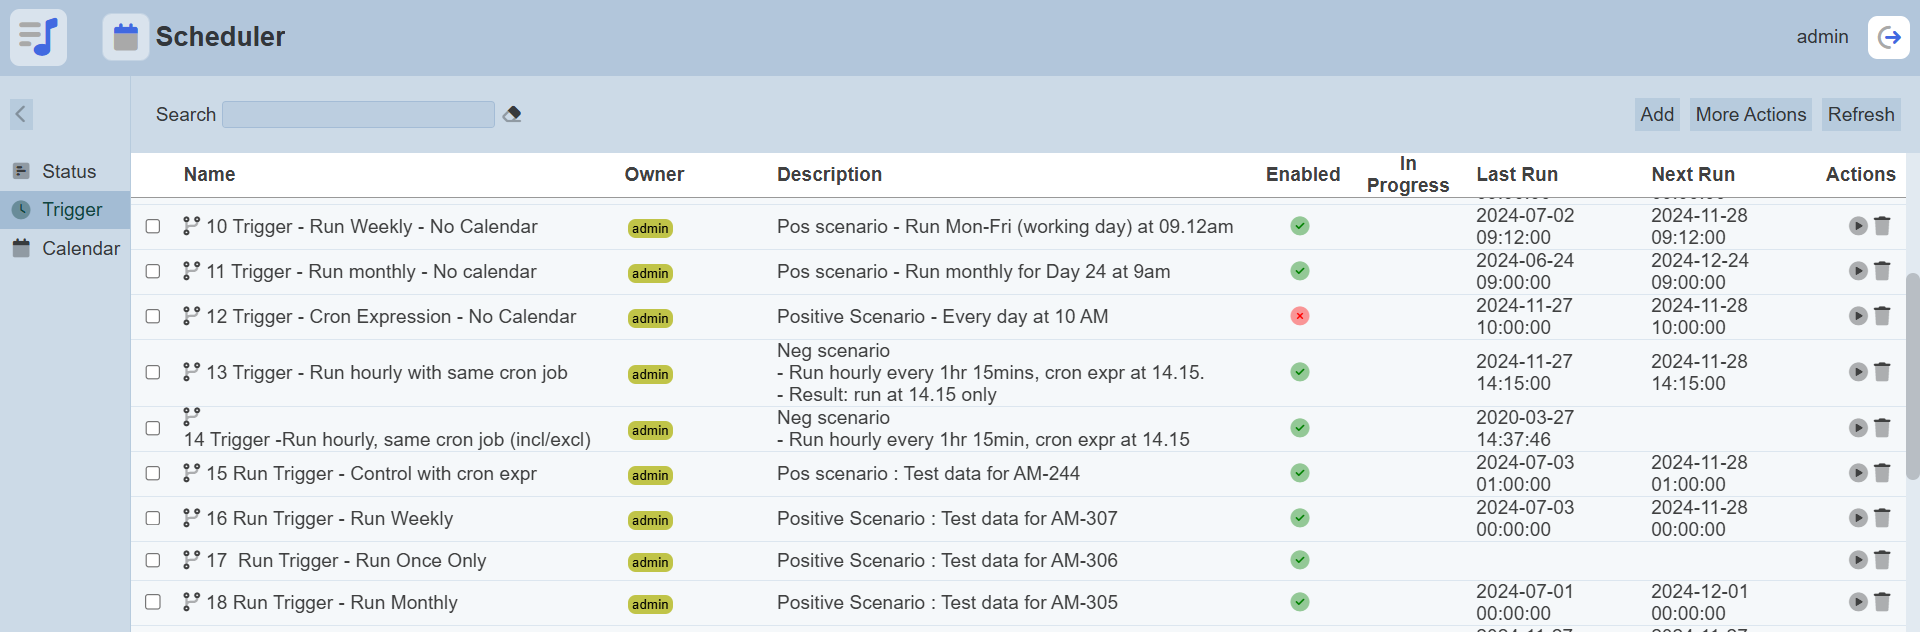
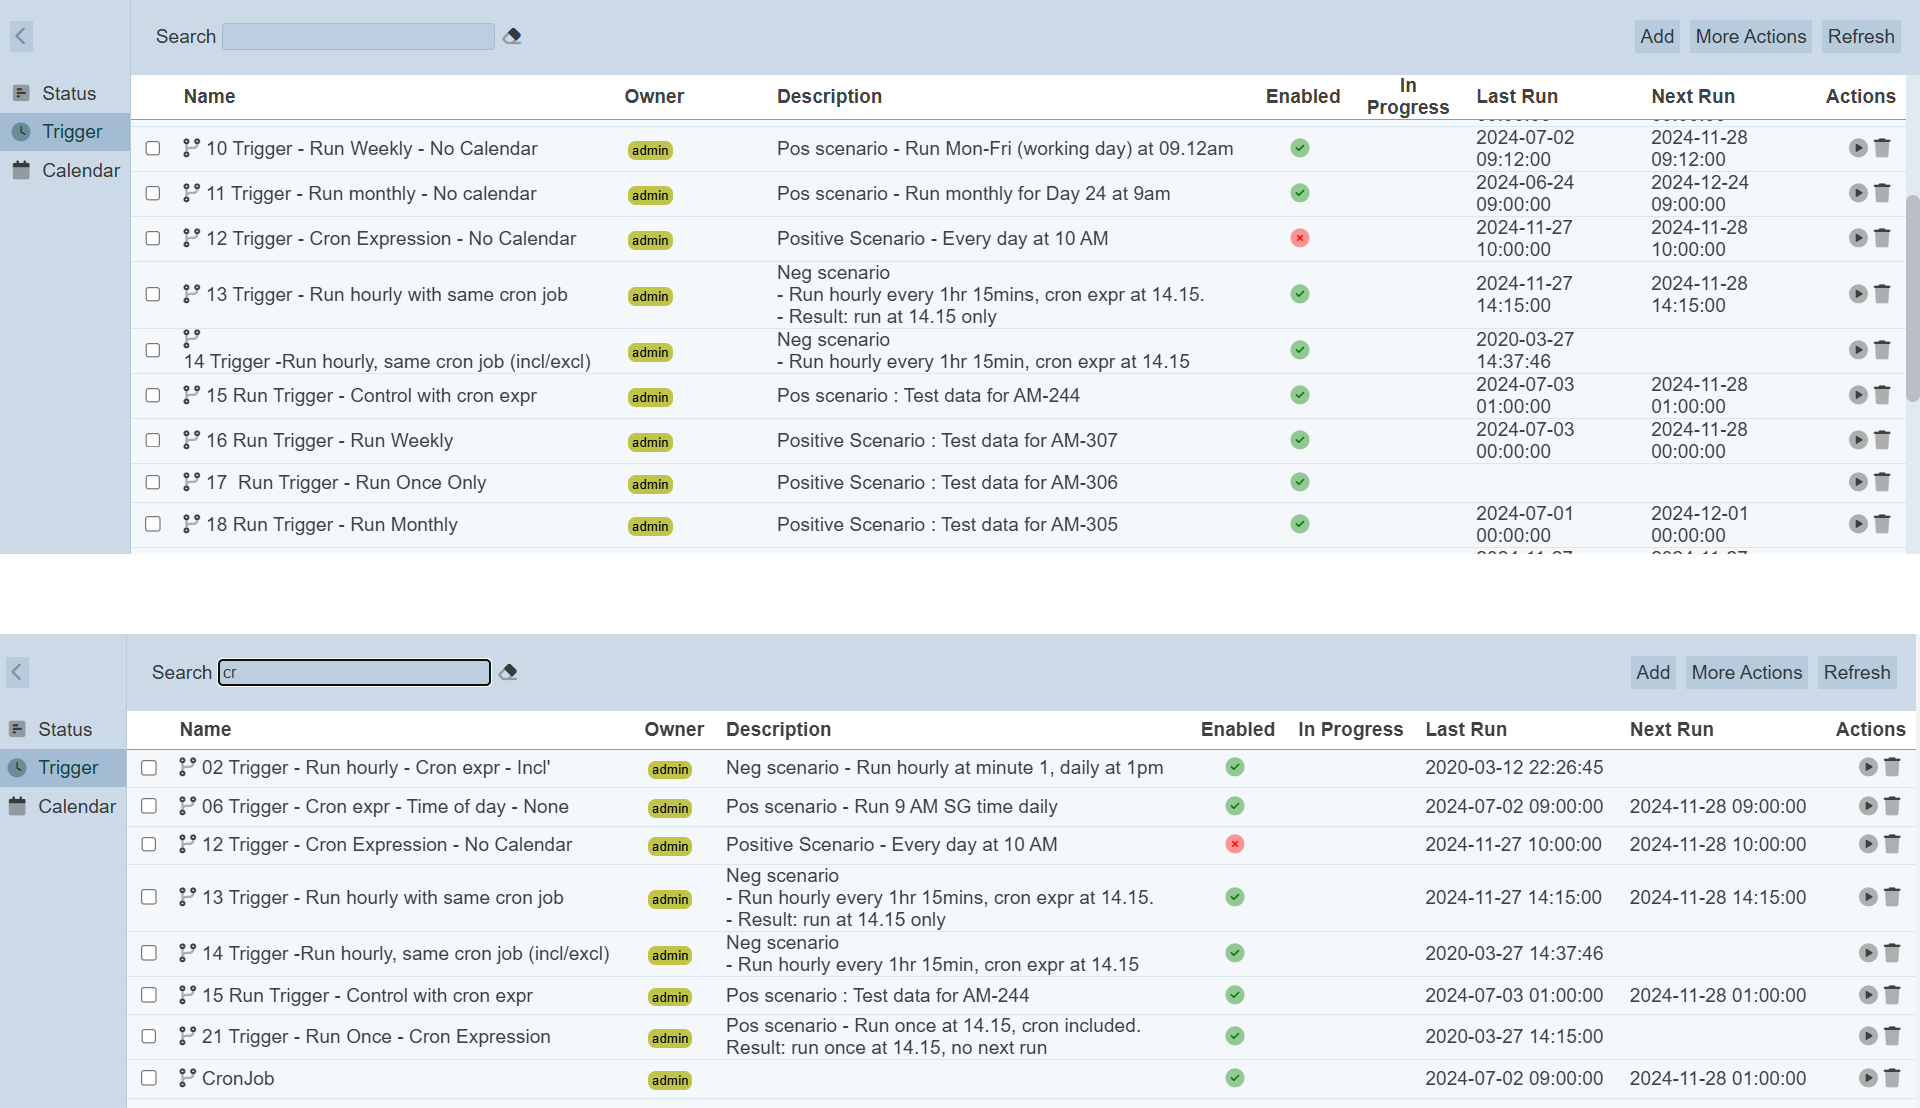
The Trigger page lists all the job triggers that are available for the user, with information such as the name of the trigger, a brief description, the last and next run time. Only the owner who created the triggers can access them. The owner can edit and delete a trigger, as well as manually run a trigger in this page.
A trigger defines the following constraints:
- Chainset and chain to run or the report to generate via DocX/RML file in Repository module
- Frequency or interval of the trigger
- Calendars to decide when a trigger should fire at a particular month, date, day and/or time, as well as the time zone
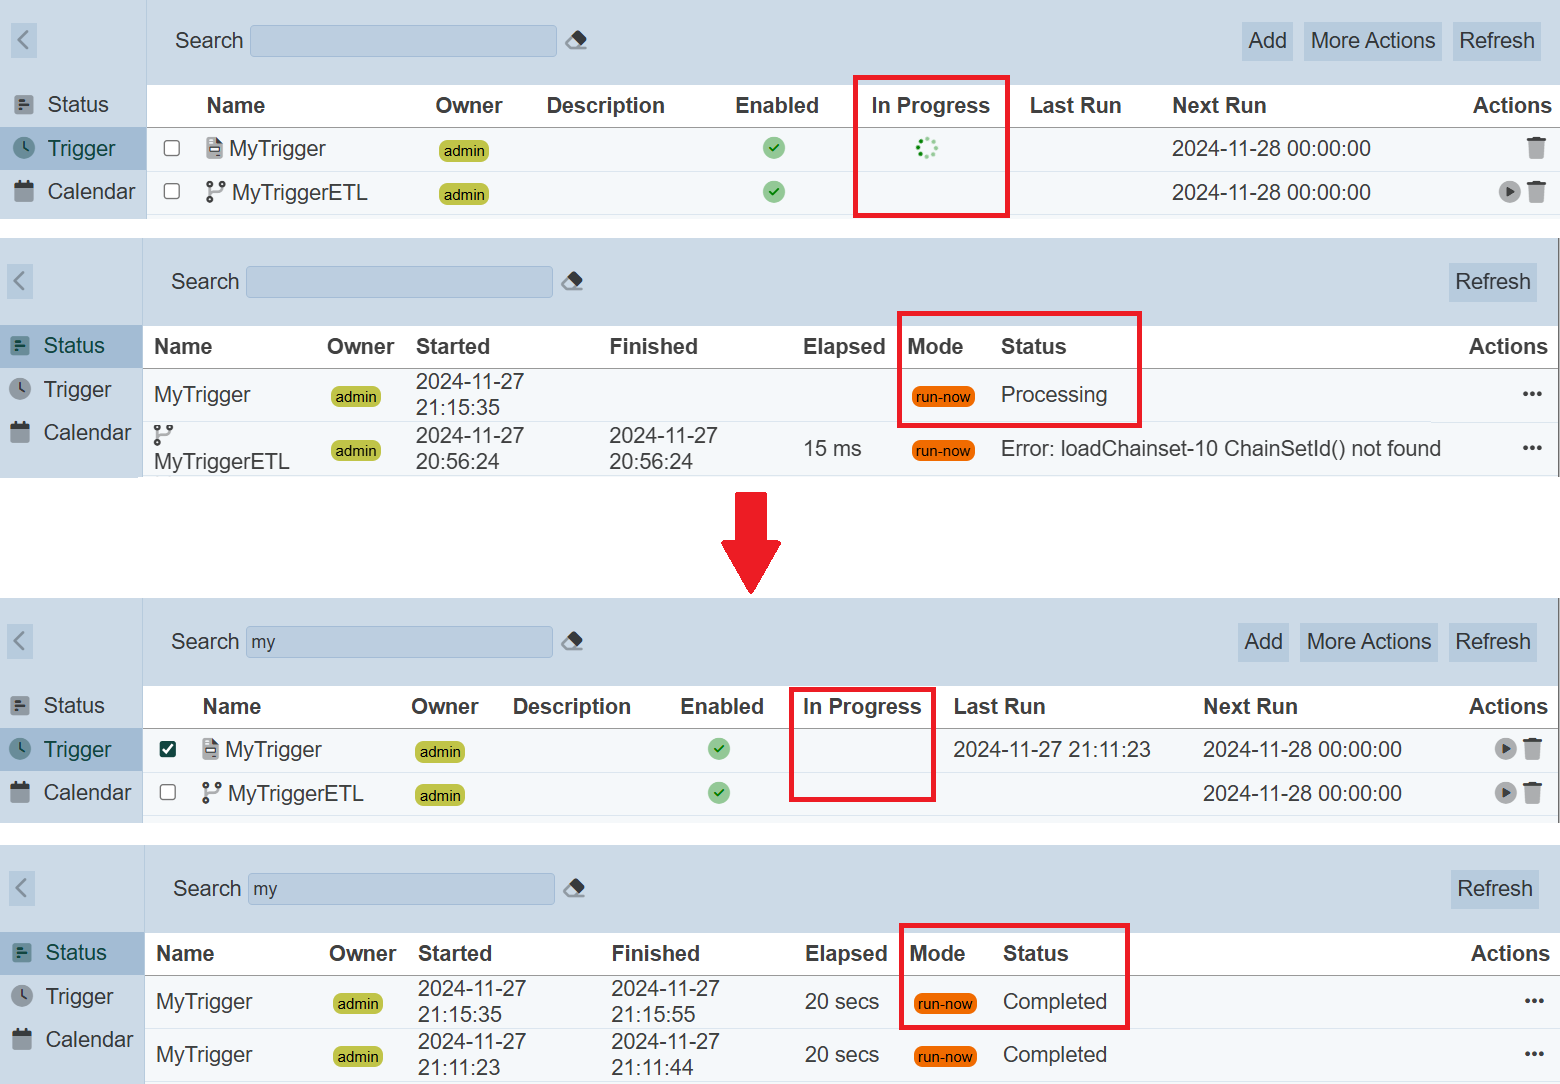
Once a trigger has been set up and enabled, it will run automatically once the defined calendar’s date and time is reached, and will calculate the next run time. Jobs that are currently running (that is, in progress) is indicated by a green ring.

Add Trigger
A trigger determines the type of report to generate, when and how often a job is to be run. The user who create the trigger will own the trigger. Other users will not be able to view or edit it.
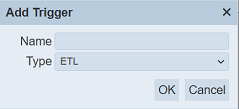
To add a trigger, click on the “Add” button at the upper corner of the page.

The “Add Trigger” dialog box will appear.
| Field | Description | Mandatory | Input Type | Constraints | Default Value |
|---|---|---|---|---|---|
| Name | Unique name assigned to the trigger. | Y | Text field | Any text. | Empty string |
| Type | Defines the type of job trigger. Available options: - ETL - Report |
Y | Drop-down list | Select from list. | “ETL” |
Key in an unique name for the trigger in the “Name” field and select the type of job from the drop-down list in the “Type” field. Click on the “OK” button to create the trigger.
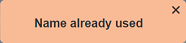
If the name is left blank or the name already exist, the relevant error message will appear.

The “Trigger” page will appear.
This page consists of four tabs; namely Properties, Calendar Constraints, Frequency and Report tabs. If ETL is selected as the job type, the Report tab will be replaced by the ETL tab.
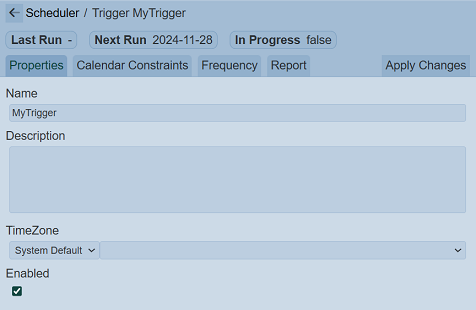
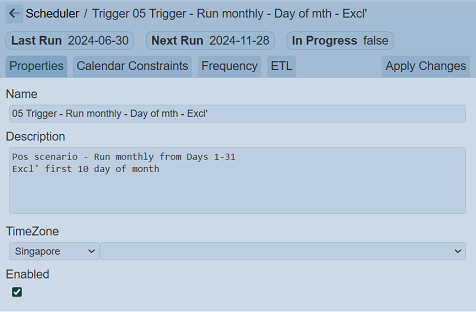
Properties Tab
The Properties tab allows user to set the various properties of the trigger.

| Field | Description | Mandatory | Input Type | Constraints | Default Value |
|---|---|---|---|---|---|
| Name | Unique name assigned to the trigger. | Y | Text field | Any text. | Empty string |
| Description | Brief description of the trigger. | Y | Text field | Any text | Empty string |
| TimeZone | Time zone of the trigger to be run. | N | Drop-down list | Select from list | System default |
| Enabled | Enable or disable trigger. | Y | Checkbox | Enable or disable | Enabled |
The value in the “Name” field is as per defined in the previous dialog box. Provide a brief description of the trigger in the “Description” field. The “Enabled” field is enabled by default, allowing the trigger to fire.
The “TimeZone” field is by default set to the your system’s time zone. If you are unsure of the time zone set on your deployment server, then selecting an explicit time zone, rather than using the system default will ensure your trigger runs at the time you choose.
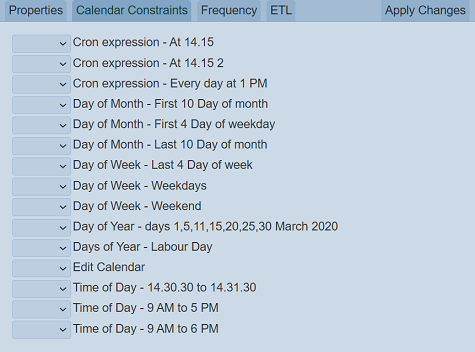
Calendar Constraints Tab
This tab allows user to select the appropriate constraint(s) by including or excluding it.
| Field | Description | Mandatory | Input Type | Constraints | Default Value |
|---|---|---|---|---|---|
| List of calendar constraints | A list of calendar constraints defined in the Calendar page. Each calendar constraint can be unselected (not used) or selected (to include or exclude). |
Y | Drop-down list | Select from list | Not selected |
Refer to Calender for more information on how to set calendar constraint.
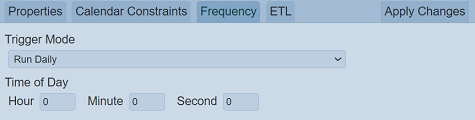
Frequency Tab
In the “Frequency” tab, select the appropriate “Trigger Mode” and its corresponding fields.
| Field | Description | Mandatory | Input Type | Constraints | Default Value |
|---|---|---|---|---|---|
| Trigger Mode | Select the trigger mode from the list of options: - Run once only - Run hourly - Run daily - Run weekly - Run monthly - Cron expression |
Y | Drop-down list | Select from list | Run daily |
| Field(s) for above selection | Depending on the above selection, one or more fields may appear. By default, the field “Time of Day” is shown, since Run daily is the default. |
Y | Varies | Varies | Varies |
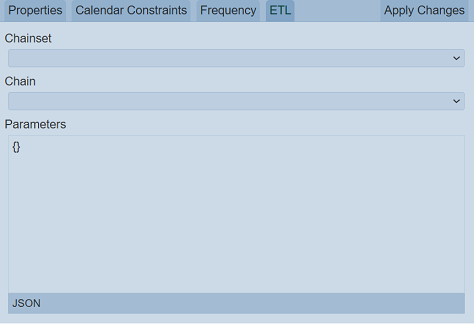
ETL Tab
The ETL tab allows user to select the appropriate ETL chainset and chain to run, and set up “Parameters” field if it is required to pass any parameters into the chain.
| Field | Description | Mandatory | Input Type | Constraints | Default Value |
|---|---|---|---|---|---|
| Chainset | Selects the appropriate chainset for the report. | Y | Drop-down list | Select from list | Empty string |
| Chain | Selects the appropriate chain from the chainset. | Y | Drop-down list | Select from list | Empty string |
| Parameters | Defines any parameters required to be passed to the the chain. | N | Text field | Any text | Empty string |
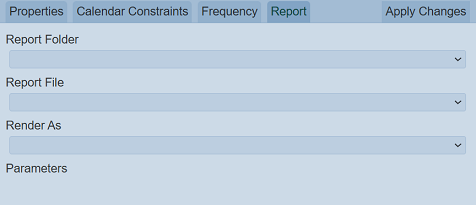
Report Tab
The Report tab allows you to select the desired report file in the Repository folder to generate a report and set up “Parameters” field if it is required to pass amy parameters into the DocX/RML file.
| Field | Description | Mandatory | Input Type | Constraints | Default Value |
|---|---|---|---|---|---|
| Report Folder | Select the folder where the report resides in the Repository. | Y | Drop-down list | Select from list | None |
| Report File | Select the DocX/RML report file. | Y | Drop-down list | Select from list | None |
| Render As | Select the report output format. | Y | Drop-down list | Select from list The format available may vary, depending on the type of file selected. |
None |
| Parameters | Sets up the parameters to be passed into the report. | N | Textbox | Default settings are used if this field is left empty. | Empty |
Select the desired folder and report file from the drop-down lists, as well as the output format. If no parameters are required, the “Parameters” field will be disabled. If parameters are required, the list of parameters will be displayed, allowing user to define the values. The parameters required for each report vary. Below is an example.
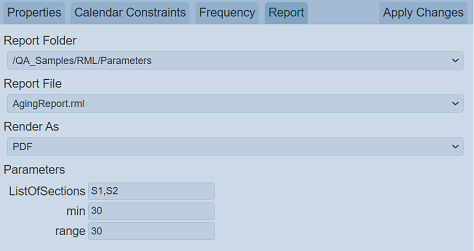
Do note that the default parameters will apply if the required parameters are not set up in the “Parameters” field
Click on the “Apply Changes” button to save the changes. To abort the action, click on the  “Previous” icon at the upper left corner of the page. This will bring the user back to the management page.
After saving the trigger successfully, a message will appear.

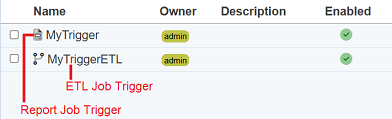
Do note that there are different icons for ETL and Report job triggers, which help users to differentiate them apart.
Below is an example on how to set up the time zone and calendar constraints for a trigger to run a daily report at 8pm (Japan time) for each working day.
- For TimeZone, select Japan time zone
- For Calendar Constraint:
- Add a Calendar called “Weekdays” and mark it as Included
- To avoid running the report during public holidays, add a Calendar called “PublicHolidays” and mark it as Excluded
- Add another Calendar called “OffpeakHours”, which is set to 8pm to 9pm, and mark it as Included
Refresh Trigger
Some job triggers may have just started running and some may have have completed. The manual “Refresh” button is available and is particularly useful to check the status of the triggers.
The “Refresh” button is found on the upper right corner of the page. Clicking on it reloads the status of the triggers.
Search
There is a cross-field search function for the list of triggers. It is located at the upper left corner of the page.

This provides an easy way to search through the list. It is case-insensitive and displays the triggers that have the entered search value in any of the values of the fields below:
- Name
- Owner
- Description
- Last Run
- Next Run
Manually Run Trigger
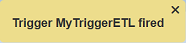
Once a trigger has been set up and enabled, it will run automatically once the defined date and time is reached, and will calculate the next run time. When the trigger is not due to run, you can manually run the trigger by clicking on the  “Run Now” icon under the “Actions” column corresponding to the trigger.

Once the job is fired, a message will appear.
Do note that the icon is not available for jobs that are currently running (i.e., in progress). A job that is running is indicated by a green ring under the “In Progress” column corresponding to the trigger.
Edit Trigger
To modify an existing trigger, click on the name of the trigger under the “Name” column.
The “Edit” page displays the selected trigger’s attributes. The same fields and constraints in Add Trigger are applied.
Click on the “Apply Changes” button to save the changes made. Clicking on the icon aborts the action and returns to the management page.
Delete Trigger
To delete an existing trigger, click on the  “Delete” icon under the “Actions” column corresponding to the desired trigger.
There is an option to undo the deletion. A notification with an “Undo” button appears right after clicking on the “Delete” icon.
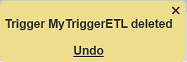
Upon clicking on the “Undo” button, the deleted trigger is restored and is added back to the list of triggers. Do note that the notification will disappear after five seconds.
More Actions
This feature allows user to perform actions on multiple triggers at the same time.
When the “More Actions” button located at the upper right corner of the page is clicked, a list of available actions are displayed.
If no trigger is selected prior clicking the button, there will be fewer actions available. To select a trigger, select the checkbox next to the name of the trigger.
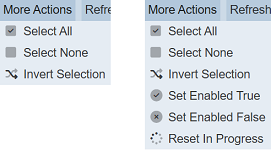
| Option | Description |
|---|---|
| Select All | Selects all triggers in the list. |
| Select None | Unselects all triggers. |
| Invert Selection | Inverts the current selection. That is, any triggers selected will be unselected and vice versa. |
| Set Enabled True | When selected, sets the selected triggers to enable. |
| Set Enabled False | When selected, sets the selected triggers to disable. |
| Reset In Progress | Resets the in progress status of selected triggers. |
Set Enabled True / False
To enable or disable the trigger, click on the “More Actions” button and select the “Set Enabled True” or “Set Enabled False” option respectively.
The selected triggers will be enabled or disabled as selected.
An enabled trigger is represented with a green tick under the “Enabled” column, while a disabled trigger is represented with a red cross.
Reset Trigger
A trigger marked as “In Progress” will not fire again until it has finished. The in progress state may be incorrect if one of the server nodes crashed while the job is running. If you are sure that it is not running, you can reset the status of the trigger by selecting the trigger, click on the “More Actions” button and select the “Reset In Progress” option.
The in progress status will be removed and the job is stopped.