
Users
Description
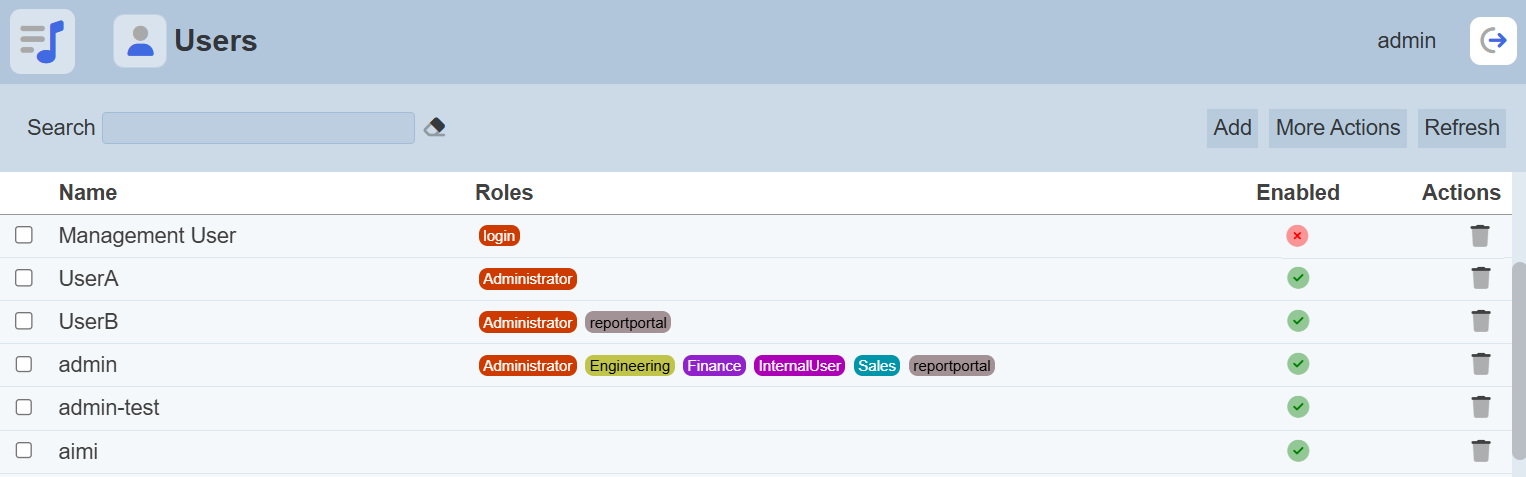
The Users module provides a simple interface to manage user authorization.
Privileges or access rights to the different Ambience modules can be granted to a user either by adding the user to a role that has those privileges, adding those privileges directly to the user’s set of extra privileges or both of the mentioned options.
Privileges added through roles and extra privileges are both read. For instance, if a user’s role only has the mod-dashboard privilege but the user has the mod-dashboard-edit privilege as an extra privilege, the user would benefit from both privileges.
Users must be added through this module first before privileges can be granted. Suspending user access can also be done by disabling users. This action can easily be undone by enabling disabled users.
Another option for assigning roles to existing users is to use the Roles module. There is no difference in the effect of role assignments between assigning roles to users through the Users module and assigning users to roles through the Roles module.
Note that authentication is managed separately (e.g. Identities module or externally). The name assigned to the user through the Users module should match the username used by the authentication mechanism to be able to successfully authorize the user.
Features
- Add user
- Edit user
- Enable and disable user
- Add and remove role
- Add and remove extra privilege
- Delete user
- Refresh list
- Search
Module Interfaces
| Interface | Description | Required Privilege |
|---|---|---|
| Users | Allows adding, modifying and deleting users. | mod-users |
Add User
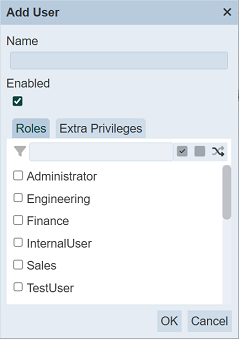
To add a user, start by clicking on the “Add” button on the upper right corner of the page.

On the “Add” panel, set the new user’s properties, roles and privileges.
Input Fields
| Field | Description | Mandatory | Input Type | Constraints | Default Value |
|---|---|---|---|---|---|
| Name | Unique username assigned to the user that would be used as its identifier. | Y | Text field | String made of alphanumeric characters, special characters such as - dash (-) - at sign (@) - underscore (_) - full stop (.) - space ( ) Other special characters and symbols are not allowed. Only space between characters are allowed, leading and trailing spaces will be trimmed. The value must not exist in the current list, regardless of status (enabled or disabled). The value is case-sensitive. |
Empty string |
| Enabled | Indicates if the user is enabled (selected) or disabled (unselected). | Y | Checkbox | True (selected) or false (unselected) | True (selected) |
| Roles | List of roles that are assigned to the user. | N | Checkbox | Multiple values can be selected. All roles are listed as available options. | No value selected |
| Extra Privileges | List of additional privileges that are assigned to the user. | N | Checkbox | Multiple values can be selected. All privileges are listed as available options. | No value selected |
Under “Properties”, key in the username to be given to the user into the “Name” field. Only the “Name” field is mandatory and it must be a unique value (not used by any other user). The user is enabled by default. Simply deselect the checkbox to disable the user.
In the “Roles” tab, you can select the roles that you wish to allow access to the user. Alternatively, you can search for the role by using the search function at the top of the section. There are options to select all, select none and invert selection by clicking on their respective icons next to the search function.
In the “Extra Privileges” tab, add any extra privileges by selecting the checkboxes. By default, users are required to change their password during their first login. Select the privilege mod-no-force-password-change if it is not desired to insist that the user change the password immediately. Certain “system” users, eg. those accounts used to run scheduled ETLs for example, are often required to be exempt from enforced password change.
Click on the “Save” button located on the upper right corner of the “Add” panel to proceed with adding the new user. Clicking on the “Cancel” button aborts the action.
Usename Case Insensitive
The usernames by default are case sensitive. Some third party SSO servers do not properly handle case (allowing case-insensitive user names). To enable the User module to accept mixed case characters from these authentication services, it is possible to configure how they should be handled.
In the application.conf file, the following code defines the ID case (which by default is case sensitive):
elixir.sso.client {
    ...
    openid-case = ""
    ...
}
The value of openid-case defines the case condition of the ID:
""- case sensitive (default)"lower"- lower case"UPPER"- upper case
Change the value of openid-case to the desired value.
For example, if the value "lower" is used for openid-case, and the external SSO provides “UserX” or “userX” etc., Ambience will always look for a user called userx.
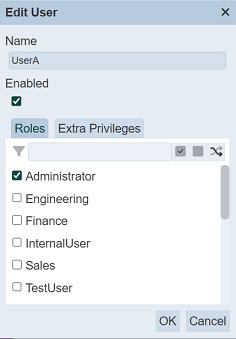
Edit User
To modify an existing user’s attributes, click on the name of the desired user under the “Name” column. The “Edit” dialog box displays the selected user’s attributes. The same fields and constraints in Add User are applied.
Click on the “Save” button located on the upper right corner of the “Add” panel to proceed with saving the changes made to the existing user. Clicking on the “Cancel” button aborts the action and retains the user’s attributes prior to opening the “Edit” panel.
Note that changes would only take effect upon the next login of the affected user. It is advised that the modified user logout then login again if the said user is logged in while the changes were being made.
More Actions
This feature allows user to perform actions on multiple users at the same time.
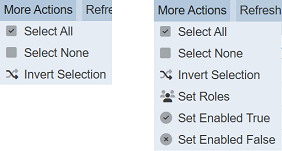
When the “More Actions” button located at the upper right corner of the page is clicked, a list of available actions are displayed.
If no files is selected prior clicking the button, there will be fewer actions available. To select a file, select the checkbox next to the name of the file.
| Option | Description |
|---|---|
| Select All | Selects all users in the list. |
| Select None | Unselects all users. |
| Invert Selection | Inverts the current selection. That is, any users selected will be unselected and vice versa. |
| Set Roles | Selects the roles to be assigned to the users. |
Set Roles
To set the roles for the selected users, click on the “More Actions” button and select the “Set Roles” option. The “Set Roles” dialog box will appear.
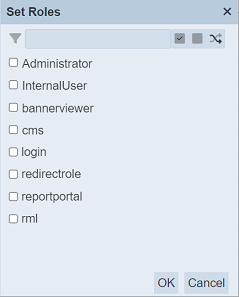
Select the users to have access to the users by selecting the checkboxes. Alternatively, you can search for the desired role by keying in the keyword in the search function at the top of the dialog box. You can also choose to select all, select none or invert selection by clicking on their respective icons on the right of the search function.
Click on the “OK” button to save the changes or click on the “Cancel” button to abort the action.
Set Enabled True / False
Disabling a user temporarily suspends all privileges or access rights granted to the user without manually changing any of the configuration. Although deleting and disabling users have the same effect on the affected user, it is advisable to disable users instead of deleting them from Ambience for audit purposes. Disabled users would be able to login but would have no access to any module. Disabled users who attempt to login would encounter an “unknown user” message.
To enable or disable the users, click on the “More Actions” button and select the “Set Enabled True” or “Set Enabled False” option respectively.
The selected users will be enabled or disabled as selected.
An enabled user is represented with a green tick under the “Enabled” column, while a disabled user is represented with a red cross.
Enable and Disable User
Enabling and disabling a user can be done through adding a new user or editing an existing user.
Delete User
Deleting a user removes it from the records, which means another user with the same username as the deleted user can be added.
To delete an existing user from Ambience, click on the  “Delete” icon under the “Actions” column corresponding the said user.
There is an option to undo the deletion. A notification with an “Undo” button appears right after clicking on the “Delete” icon.
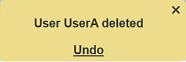
Upon clicking on the “Undo” button, the deleted user is restored and is added back to the list of users.
Refresh List
After performing actions (e.g. add user, delete user) on the browser window/tab, the list is reloaded to display the updated data. The manual “Refresh” button is available and is particularly useful if there are others making changes on the same page and/or making changes to user assignments in the Roles module.
The “Refresh” button is available on the upper right corner of the page. Clicking on it reloads the list of users.
Search
The search bar appears on the upper left corner of the page.

This provides an easy way to search through the user list. It is case-insensitive and displays records that have the entered search value in any of the values of the fields below:
- Name
- Roles
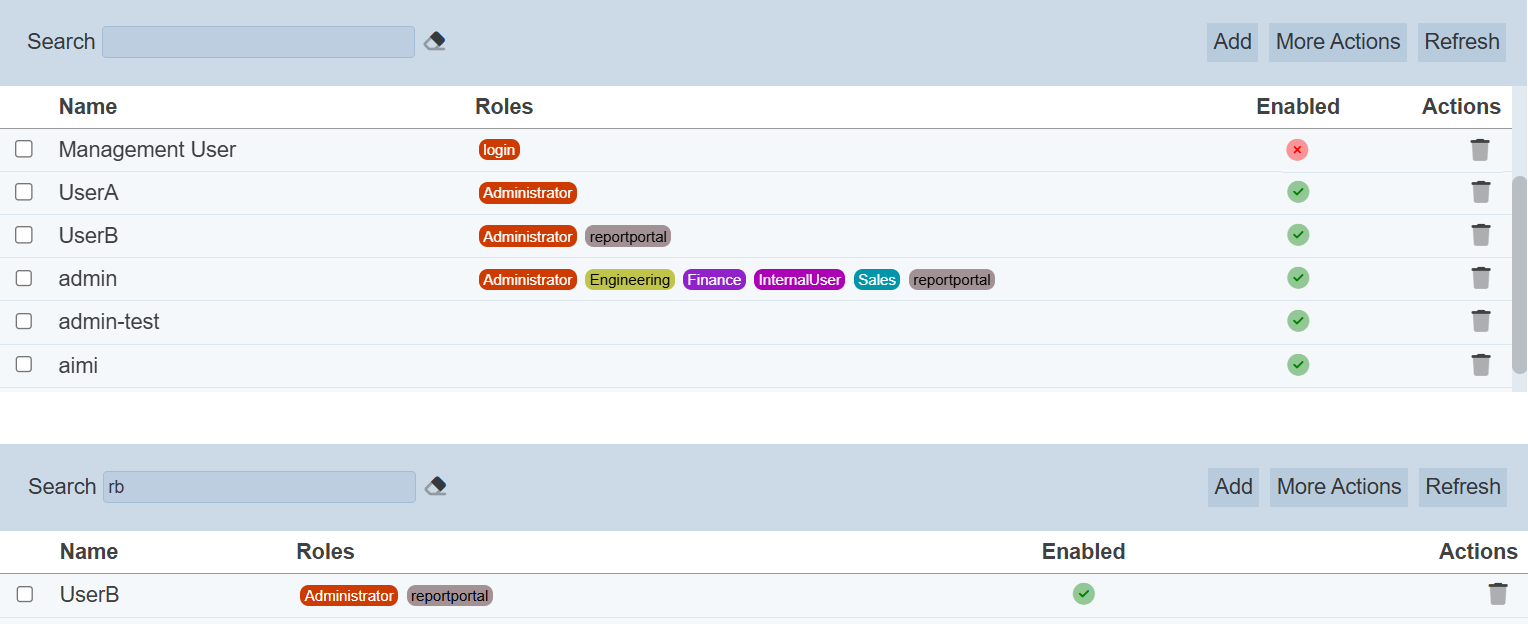
Alternatively, you can click on the any role under the “Roles” column to aid the search for the files in the page.

In the example above, users that are assigned with roles “Administrator” are shown.
These two search methods can be combined together, with each criteria separated by a comma.