This example uses the sample file Telephone-Mod.xml. You can either
place this file in the repository, or reference it from any location on
your disk. When the file contents are fairly static, it is preferable
to place the file in the repository so that it can be deployed to the
server and maintained along with the data source. If the file contents
are dynamic, you might prefer to reference the file, rather than
copy it into the repository. Alternatively, you could have a web server
provide the XML data on demand.
Create an XML DataSource using the Add DataSource Wizard and give it a unique name. For the URL value, you can use repository:/some-path (reads from the repository), file:/some-path (reads from any location on your machine) or http://host/some-path to get the data from a web server. You can also use the file chooser [...] to choose a file: location.
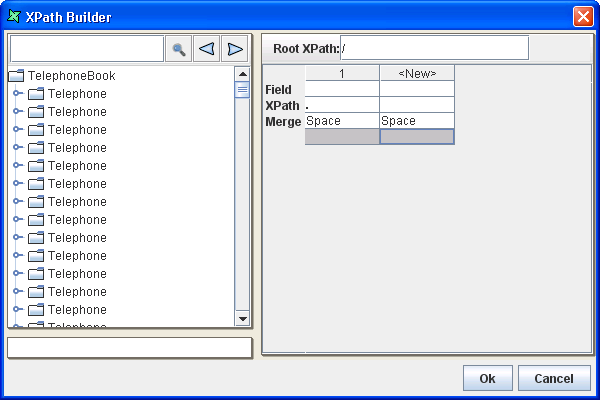
Choose Next and click XPath Builder. This will load the XML document from the URL you have just provided, as show in Figure 7.6, “XPath Builder”. Enter the Root XPath that will identify the record locations. For this example, use
/TelephoneBook/Telephone
which will select each of the Telephone elements that are children of Telephone book. After keying in the root XPath, press Enter.
Note
In this example, there is another inner Telephone element
nested within Telephone. Hence we cannot specify the path as //Telephone
or it would select
those too. In any case, // XPath operations will be slower than /, so
avoid them unless you need to select from a combination of depths in
the XML tree.
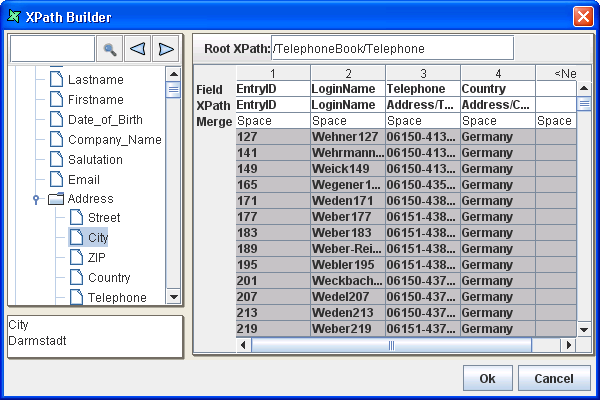
When you press Enter, you will see a number of empty (grey) rows appear in the XPath Builder table. We now need to choose what attributes we want to extract. Expand the XML tree shown on the left to see the children of the first Telephone element. Drag the EntryID element over the first column in the table and release. See that the EntryID values have been filled in to that column. Repeat the process, dragging LoginName into the <New> column. This shows the LoginName values and adds another <New> column for your next drop. You can also enter the XPath expressions directly into the table if you need more complex constructs.
The next elements we want are the Street and City from inside Address.
Therefore, expand the Address element and drag these in turn over the
<New> column. You should now see Figure 7.7, “XPaths Completed”. Note the
builder has inserted the correct XPaths: Address/Street
and Address/City,
based on the Root XPath we defined earlier.
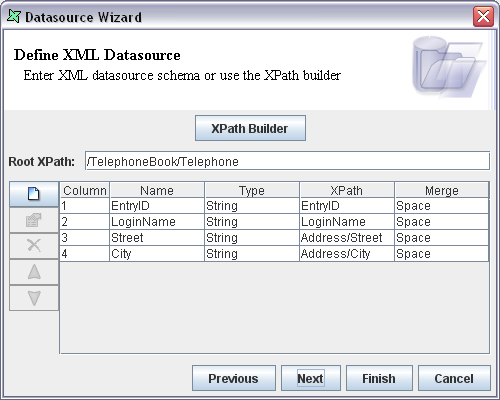
Click Ok to close the XPath Builder. In the wizard you can see the chosen fields along with the default type String, as shown in Figure 7.8, “XML DataSource Schema”, which is correct in this case. If your values are integers or dates etc. you can adjust the data types (or any of the other information) here.
When the wizard has closed, the new data source will be loaded into the workspace. Click Load Data to test the data. The output should appear as shown in Figure 7.9, “DataSource Results”.
