Examples
The following sections provide some simple examples on how to create fixed and dynamic redirects.
Fixed Redirect
A fixed redirect allows you to redirect users to a location where it will not change. For example, a company’s email to a user always have a link that redirect the user to the company’s website. This website usually do not change.
To create such a fixed redirect, the “Default Location” field in the “Properties” section of the redirect must be filled in. In the example below, a redirect is created to a fixed location. leaving the “Chainset” and “Chain” fields empty.
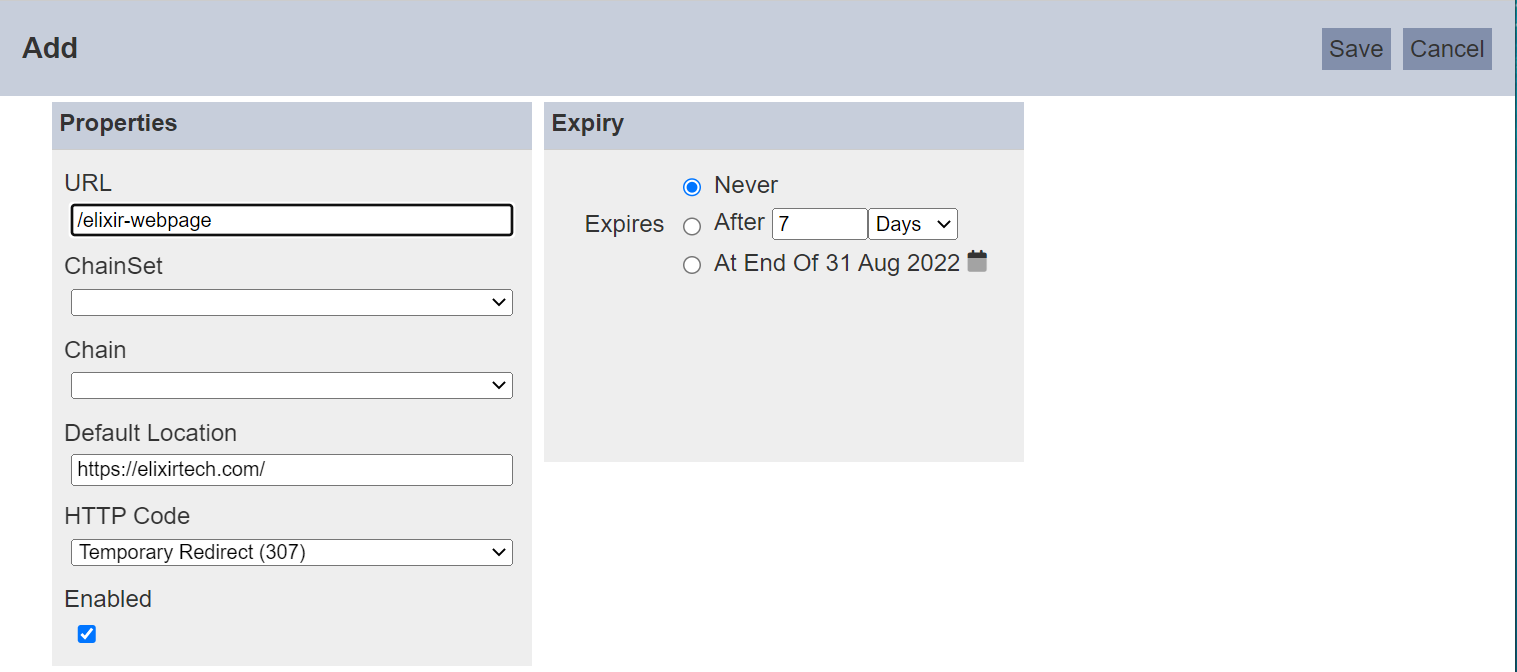
Since the website do not change, in the “Expiry” section, ensure “Never” is selected. Click on the “Save” button to change the redirect.
To test the redirect, click on the  “Open URL” icon under the Actions column corresponding the redirect. The defined fixed location will appear in a new window tab.

Dynamic Redirect
A dynamic redirect uses ETL chainset to dynamically change the redirect location.
The ETL chain with the Redirect Endpoint can be referred to by the redirect and used to derive the location it will redirect to. To run an ETL, the user must be an ETL user which has a role that is added to the appropriate chainset. This is needed as the user being redirected may not have permission to run the ETL, so this user acts as a proxy to run the chain the Redirect uses. The ETL user us defined in the application.conf file.
ambience.modules.redirect-edit.etl-user = "<user name>"
When the redirect is run, it passes the ETL a record with the fields “from”, “queryString” and “query” and returns “to” and “code” which are used as the location and code for the redirect. “queryString” is a full parameters list as a string (e.g., “a=1&b=2”) whilst “query” is the parameters presented as nested name-value pairs. The former is to aid passing through parameters unchanged whilst the latter is for performing operations upon it.
In the ETL module, there is the Redirect category, which has the following ETL steps:
- Add Redirect - Adds a new redirect (mimics the Redirect Manager functionality)
- Disable Redirect - Disables a redirect given a URL
- Enable Redirect - Enables a redirect given a URL
- List Redirects - Returns a list of all redirects
- Remove Redirect - Removes a redirect given a URL
Example 1: Redirect Dashboard
This example creates a redirect to an existing dashboard.
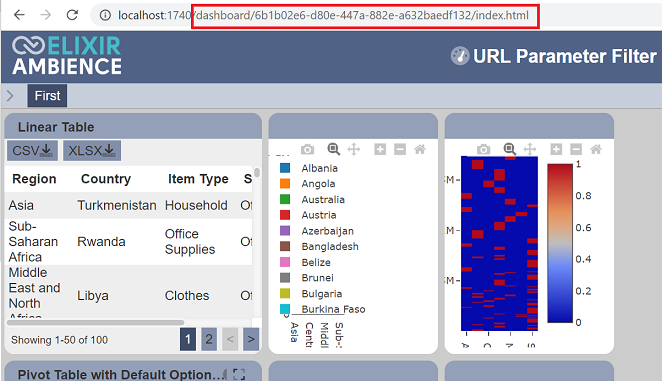
First, create a dashboard. Note the URL of the dashboard.
In the ETL module, create a new ETL chainset. Add the following steps:
- JSON Record
- Redirect Endpoint
Setup the JSON record as per screenshot.
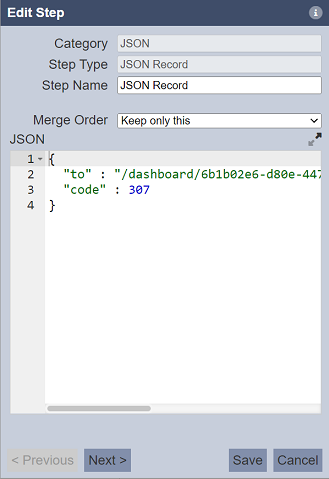
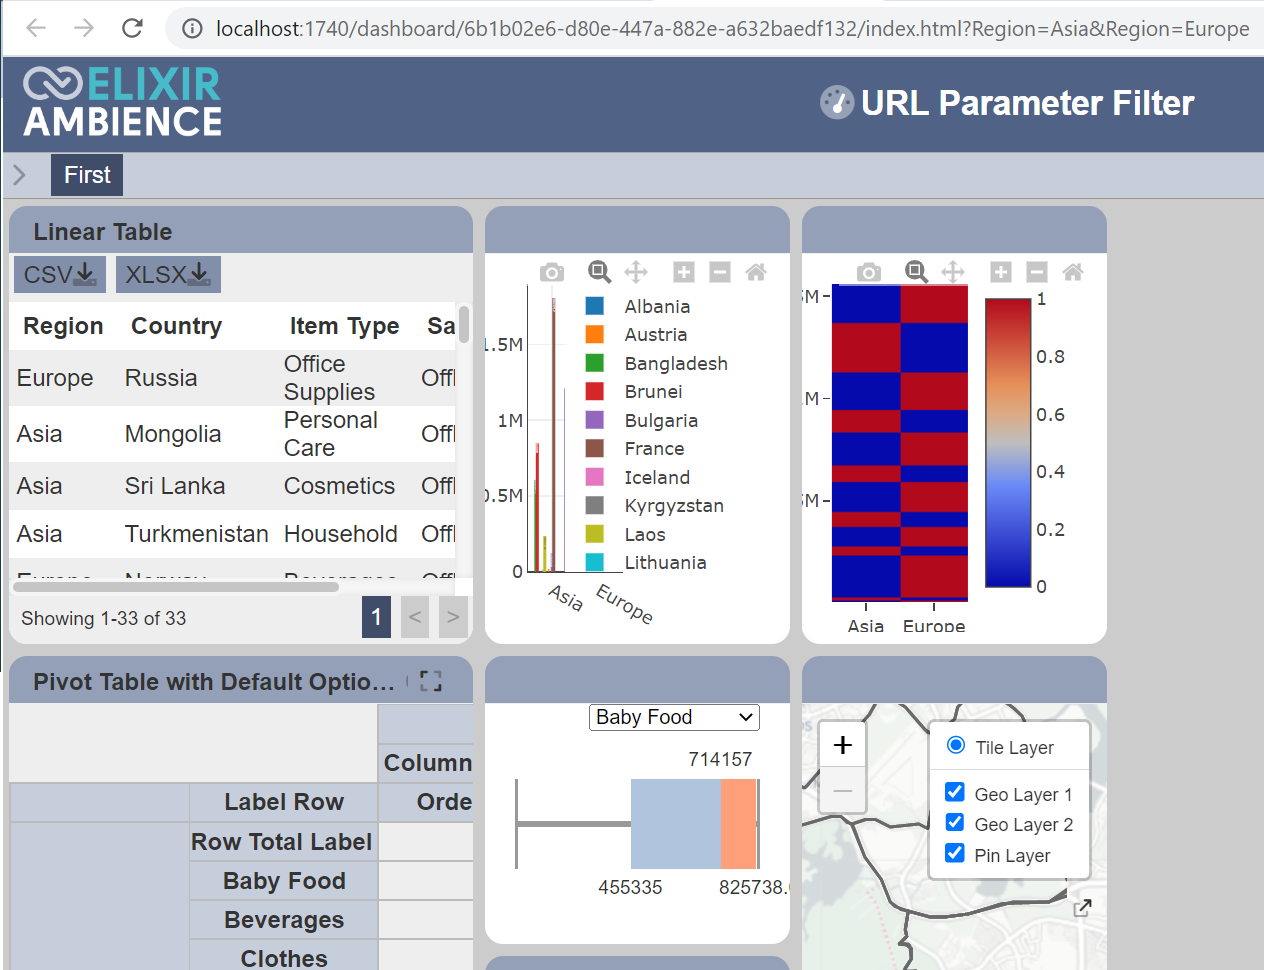
In the JSON Record ETL step, the “to” field defines the URL to the dashboard and “code” field defines the HTTP response status code. You can add parameters after the URL, for example to add filter to display only two regions, Asia and Europe:
?Region=Asia&Region=Europe
The Redirect Endpoint does not require any parameters.
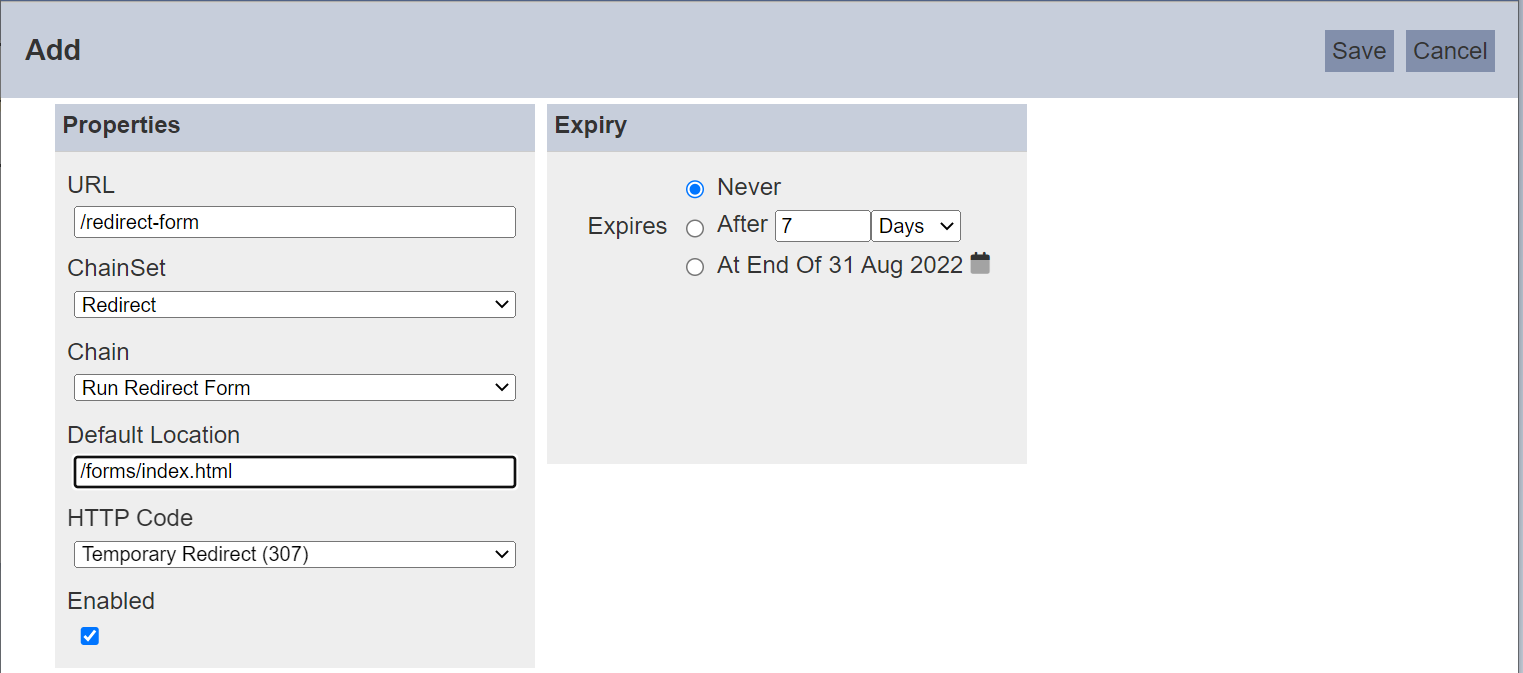
In the Redirect module, create a new redirect. In the “Add” panel, in the “Properties” section, key a unique URL in the “URL” field. Select the desired chainset and ETL chain in the “ChainSet” and “Chain” fields from their respective drop-down list.
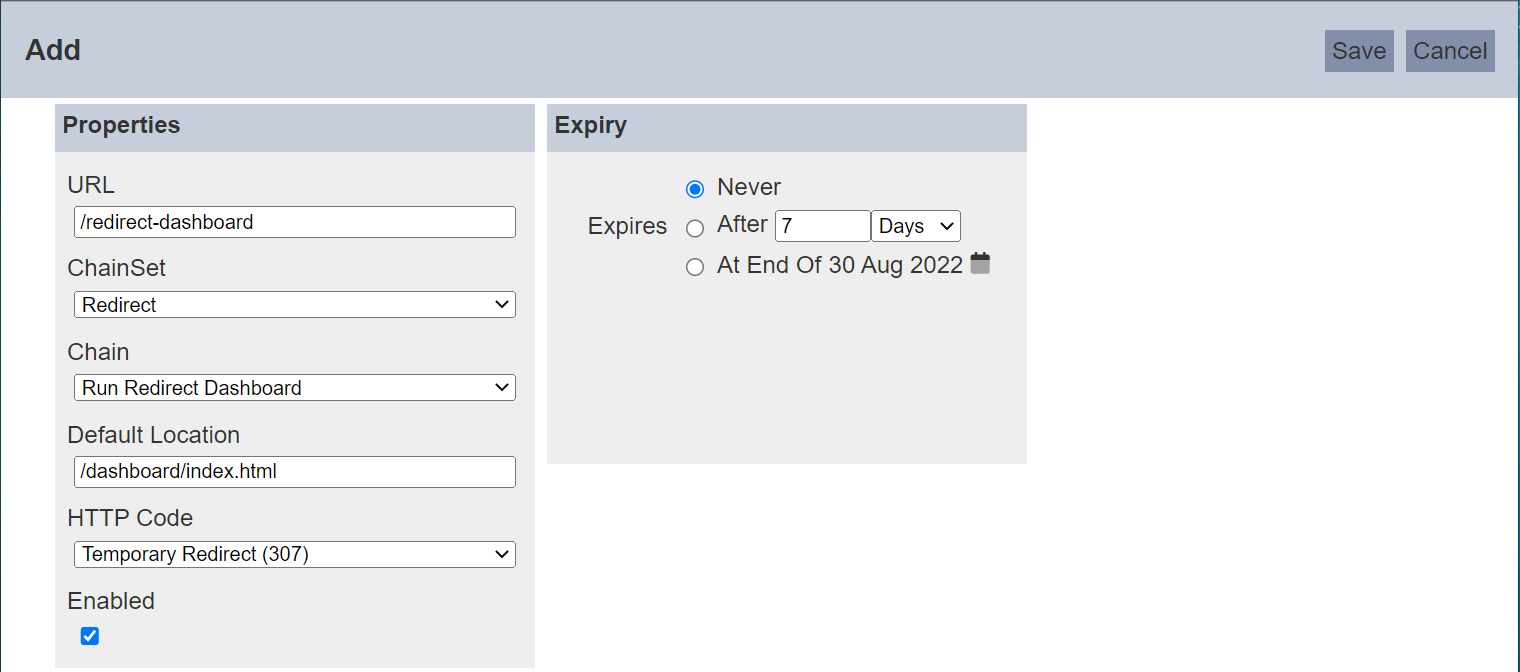
Key in a URL in the “Default Location” field. This field is optional but it is a good practice to provide a default location, just in case the dynamic location for any reason fails to be located, the redirect is still able to provide a decent response to the user. The “Enabled” field is selected by default.
In the “Expiry” section, the value “Never” is selected by default.
Click on the “Save” button at the upper right corner of the panel to save the new redirect.
To test the redirect, click on the “Open URL” icon under the Actions column. A new window tab will appear, displaying the redirected URL which display only two regions, Asia and Europe.
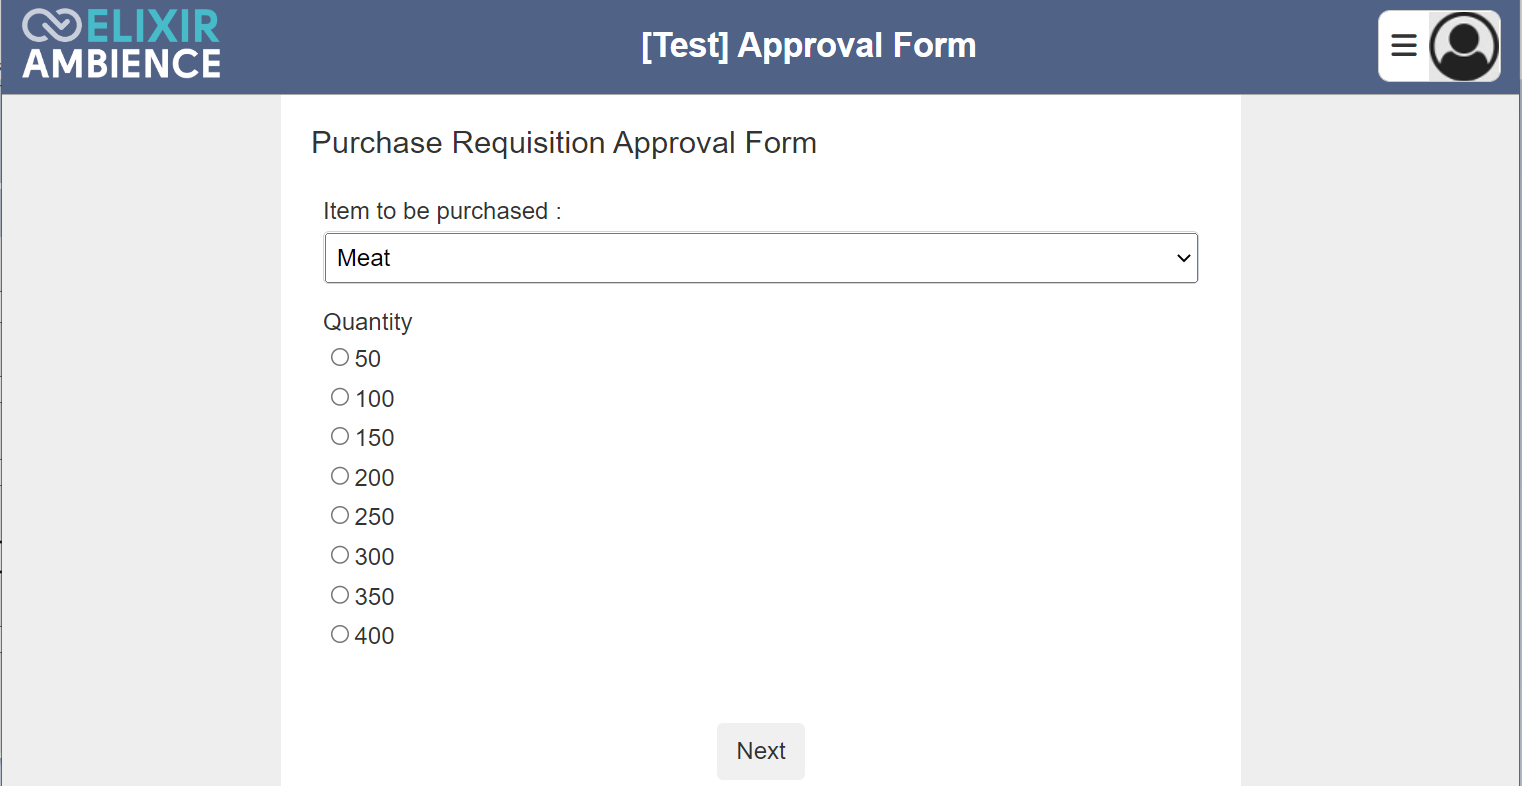
Example 2: Redirect Form
In this example, instead of redirecting to a dashboard, it redirects to a form. You can use this redirect link to whoever needs to use this link to fill the form.
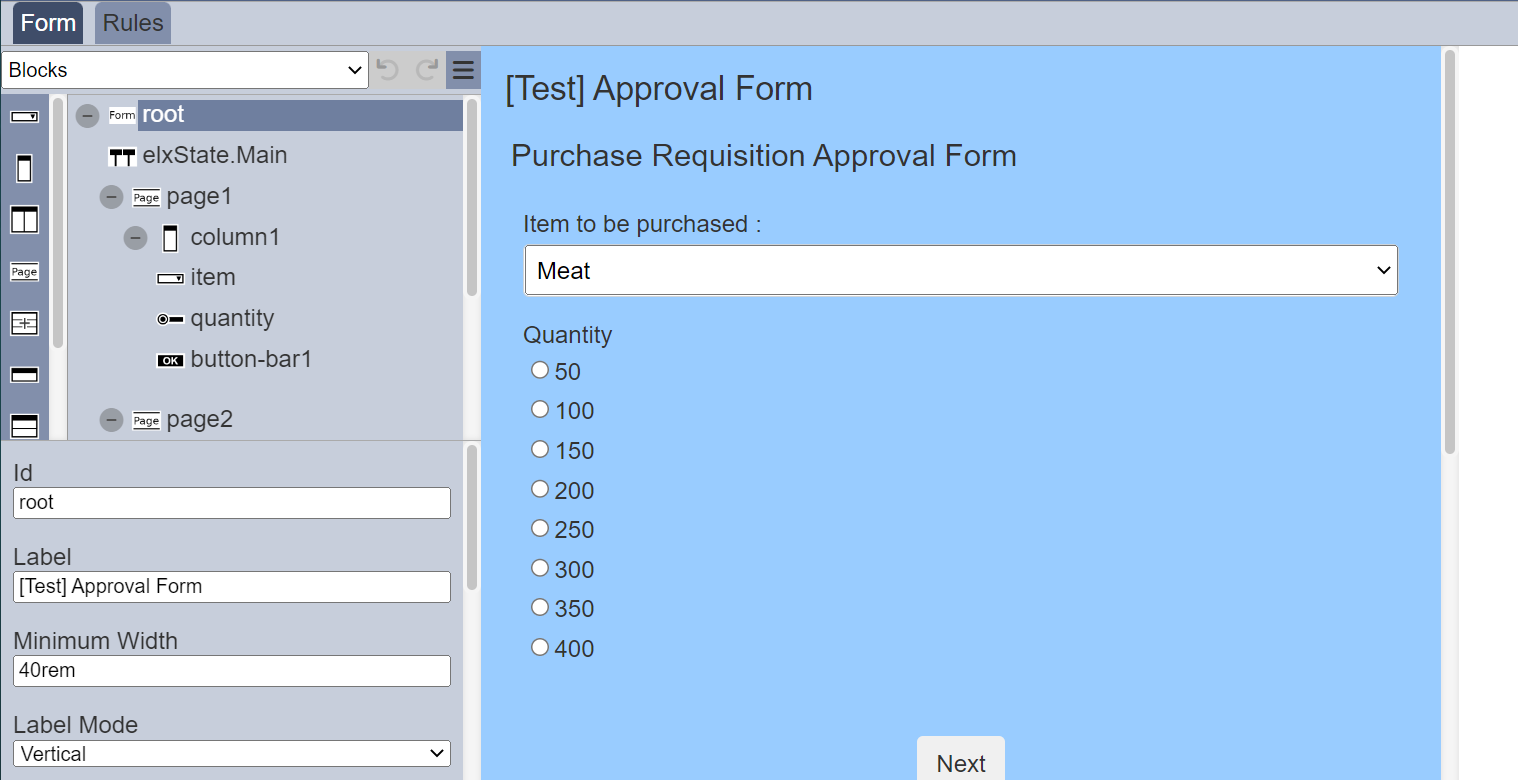
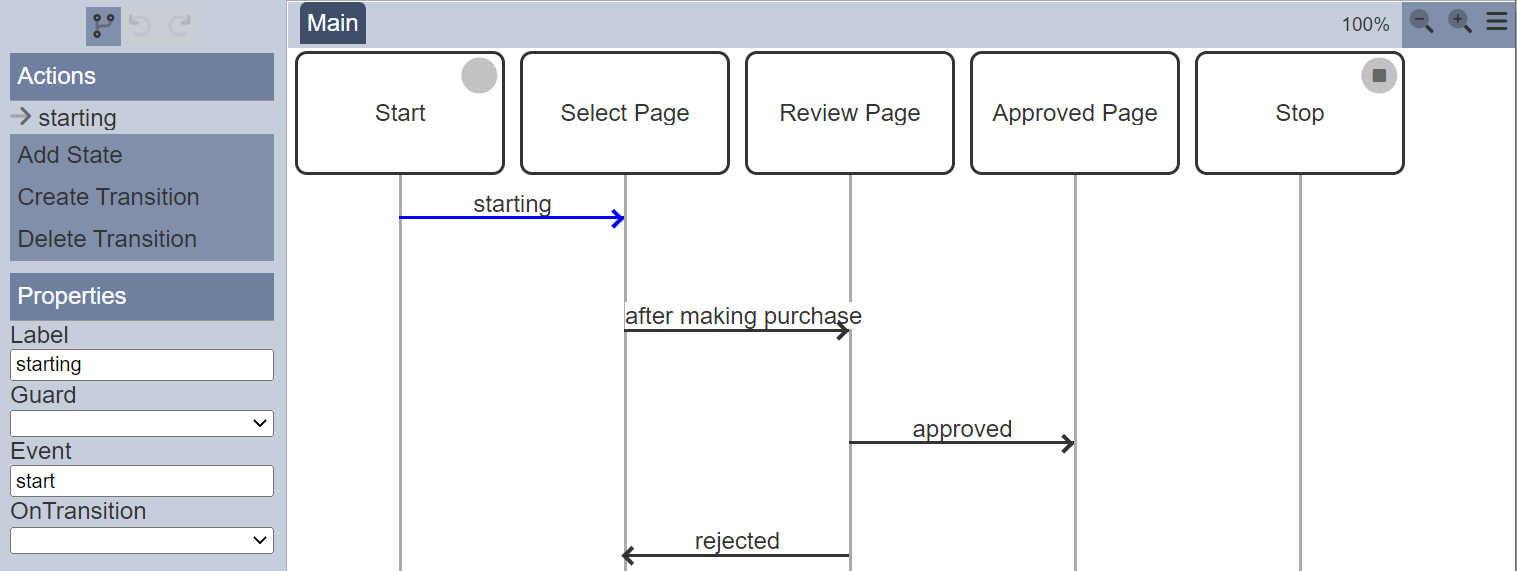
Create the form as desired and the workflow for the form (if applicable).
In the ETL module, create a ETL chainset with the following ETL steps:
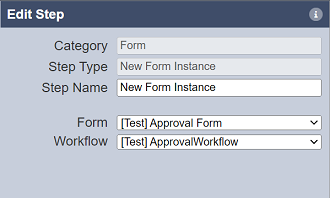
- New Form Instance
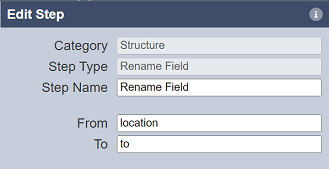
- Rename Field
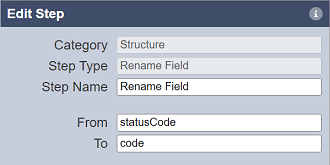
- Rename Field
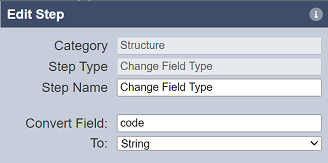
- Change Field TYpe
- Retain Fields
- Redirect Endpoint
The first ETL step calls for the instance of the the form with the workflow.
The second and third ETL steps rename the fields to the desired name, which are required in the redirect. In this case, location is renamed as to and statusCode is renamed as code.
In the fourth ETL step, the type of the field code is changed to string type.
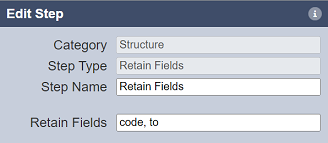
The fifth ETL step retains the two fields code and to.
The last ETL step is the Redirect Endpoint does not require any parameters.
In the Redirect module, create a new redirect. In the “Add” panel, in the “Properties” section, key a unique URL in the “URL” field. Select the desired chainset and ETL chain in the “ChainSet” and “Chain” fields from their respective drop-down list.
Key in a URL in the “Default Location” field. THis field is optional but it is a good practice to provide a default location, just in case the dynamic location for any reason fails to be located, the redirect is still able to provide a decent response to the user. The “Enabled” field is selected by default.
In the “Expiry” section, the value “Never” is selected by default.
Click on the “Save” button at the upper right corner of the panel to save the new redirect.
To test the redirect, click on the “Open URL” icon under the Actions column. A new window tab will appear, displaying the redirected URL which display only two regions, Asia and Europe.