
Report Portal
Description
The Report Portal module gathers DocX and RML reports from the Repository tree into a single interface with simplified navigation, providing users an easy way to render reports. Important information, such as job queue status and rendered reports are also easily accessed from this module.
See Report Job Queue for more information on job queue.
This module is available in both Ambience and Repertoire software suite.
Module Interface
| Interface | Description | Required Privilege |
|---|---|---|
| Report Portal | Allows access to the Report Portal page. | mod-report-portal |
GUI
The Report Portal page can be divided into three panels:
- Left panel
- Centre panel
- Right panel
Left Panel
The left panel consists of a top menu bar and a list of available options.
The menu bar consists of icons that launch the following Ambience modules when selected (subject to user privileges, some icons may not appear):
- Adhoc Report
- Repository
- Messages
- Queue Monitor

The list of available options below the menu bar allows users to select the report to render, view the rendered reports and view the queue status of the reports.
Centre Panel
The centre panel displays the list of reports. The list of reports varies, depend on the selection on the left panel.
It has a search function and a  “Refresh” button at the top. The search function can be used to aid the search of the desired report, It is case-insensitive.
The button at the upper right corner allows user to refresh the list of reports.
Right Panel
The right panel displays the results generated from the centre panel:
- Output report if its format is supported
- DocX or RML report rendering engine
- Report details
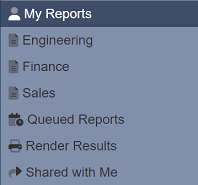
My Reports
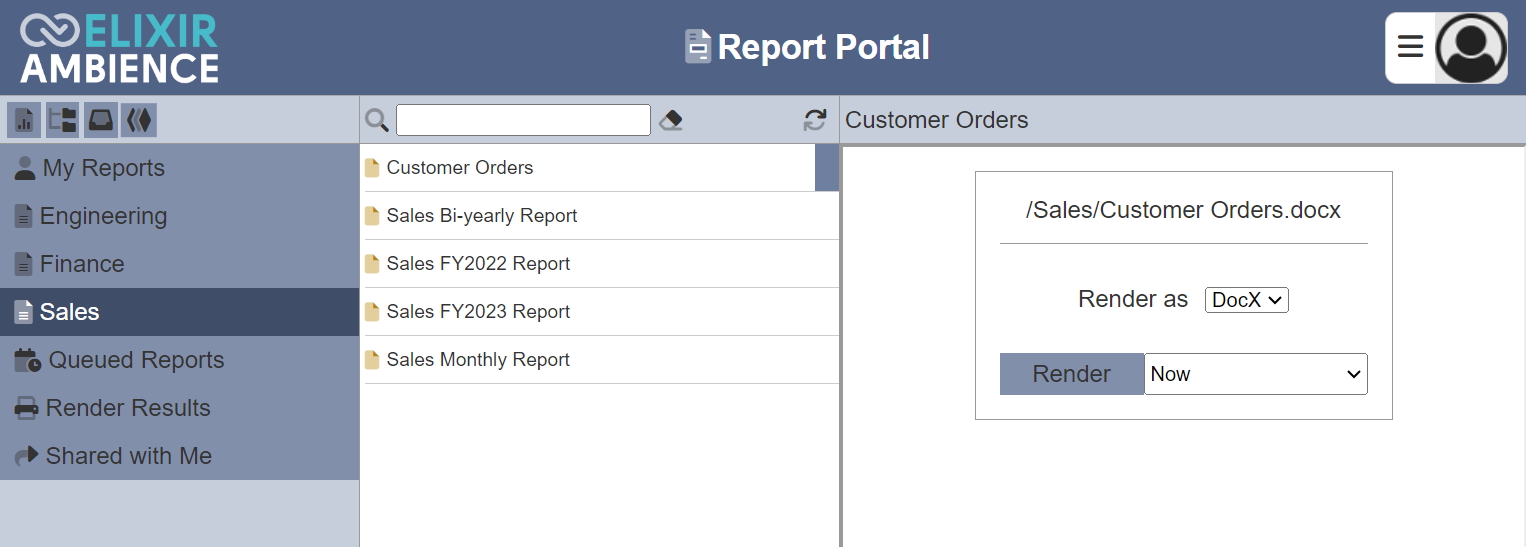
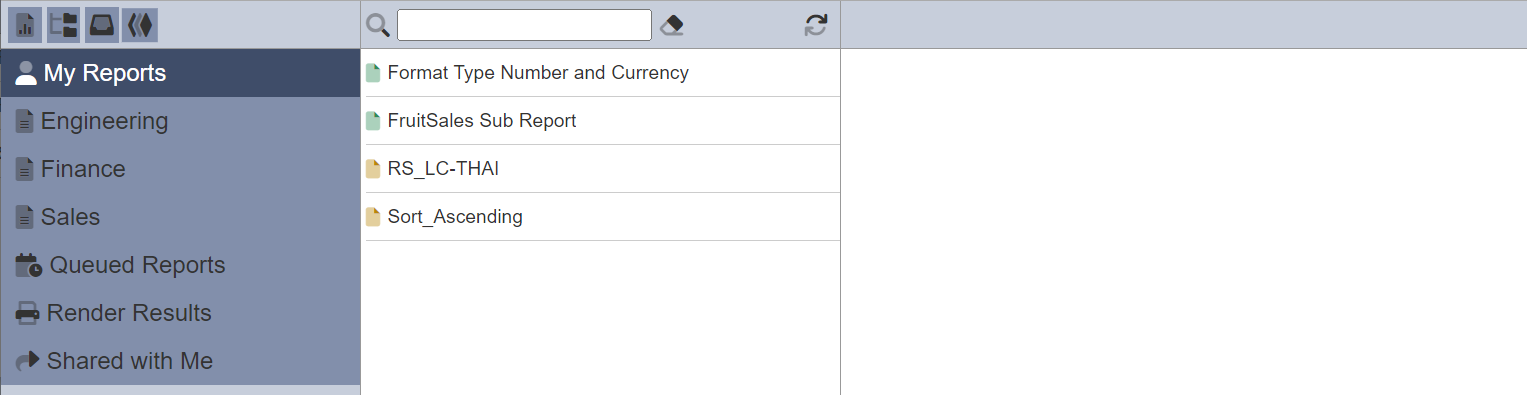
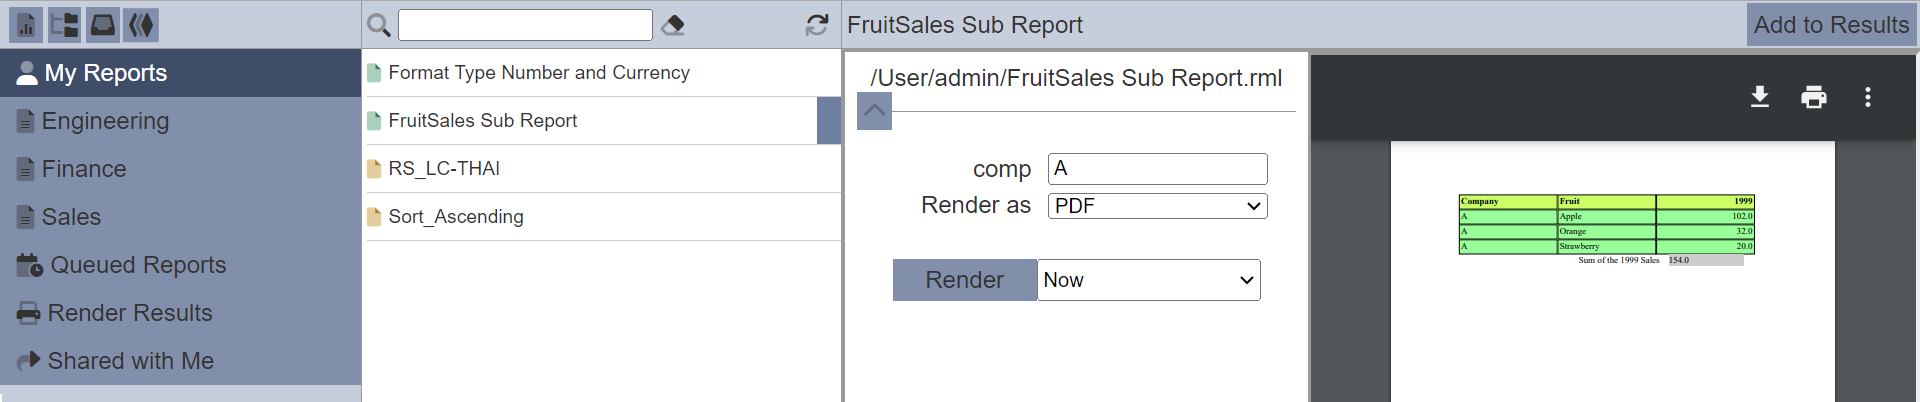
The My Reports option when selected, lists the available reports under the user’s folder in the Repository module is displayed in the centre panel.
To hide a particular report in these folders or to hide a sub-folder, add the tag ReportPortal-Hidden to the report file. See Edit Tags section in Repository for more details on how to tag the file/folder.
The list of available reports are DocX and/or RML files.
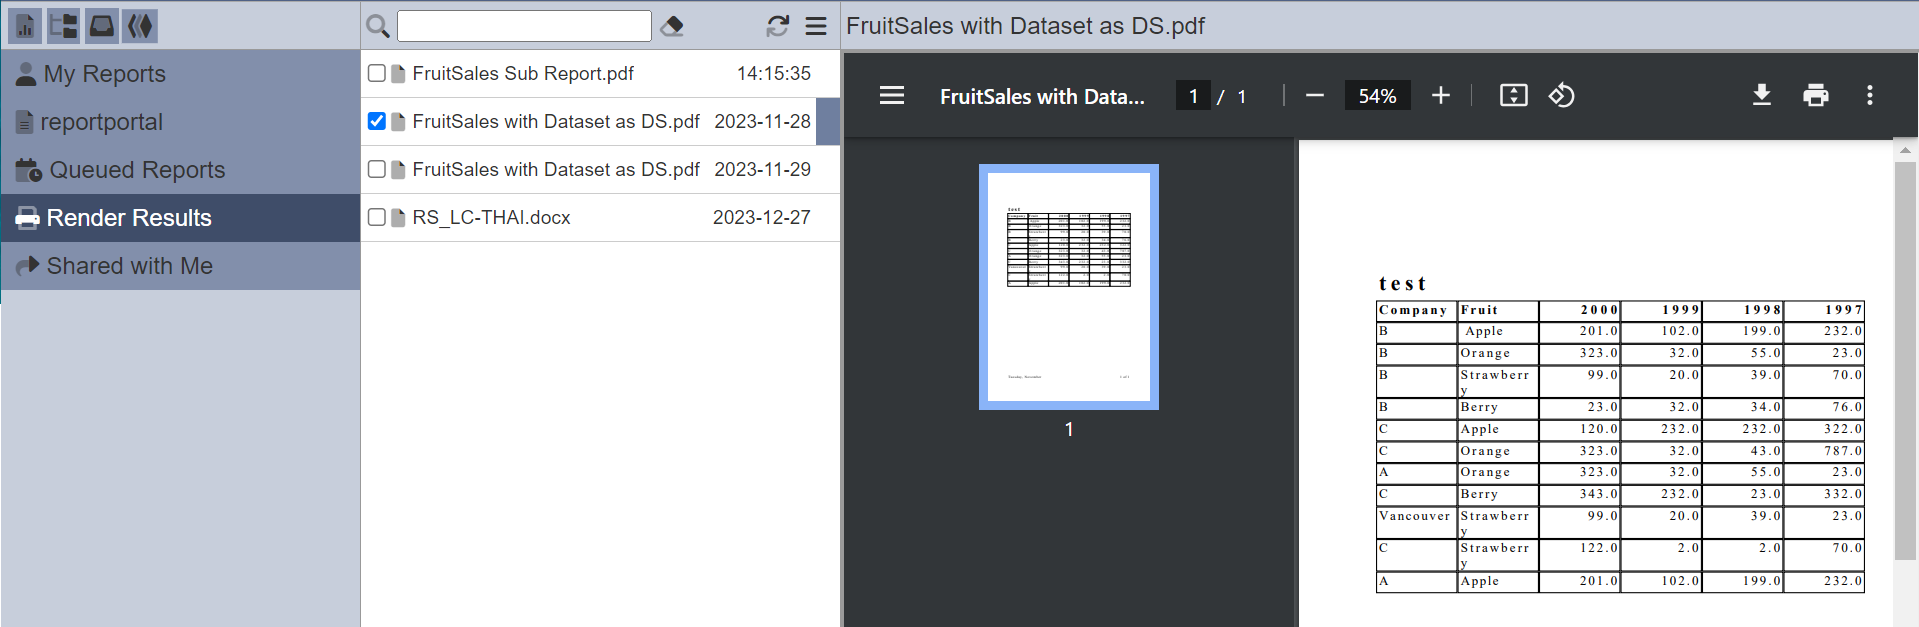
To generate a report, select the desired file from the list. Once a file is selected, the right panel will display the report rendering engine.
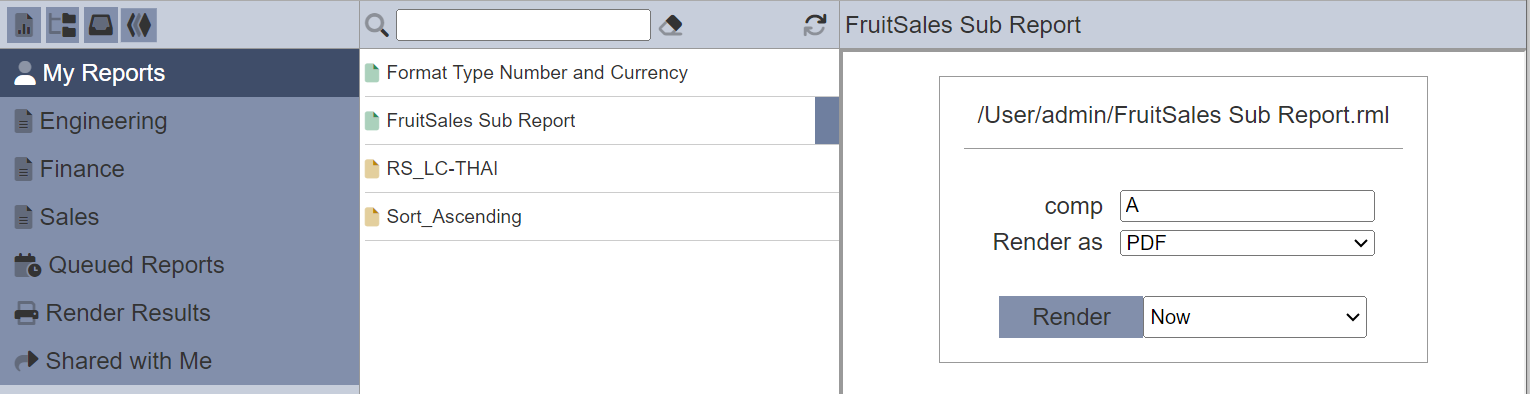
Key in or select the desired parameters (if any) and select the desired output format from the “Render as” field. Depending on whether RML or DocX file is selected, the options may vary. In this example, the company name is required. Enter the company’s name into the “comp” field.
In the next field, select when to render the report. By default, the report is rendered immediately.
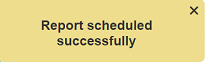
To render the report at predefined timing, select the desired timing from the drop-down list next to the “Render” button, then click on the “Render” button. A message will appear once the report is scheduled.
To render the report immediately, select “Now” from the drop-down list next to the “Render” button. Then click on the “Render” button to render the report. Do note that no message will appear if the report is rendered immediately.
If the output format is supported by the browser (e.g., PDF), the output report will appear in the right panel.
To view the output report entirely in the right panel, click on the ![]() “Hide Parameters” icon.
“Hide Parameters” icon.
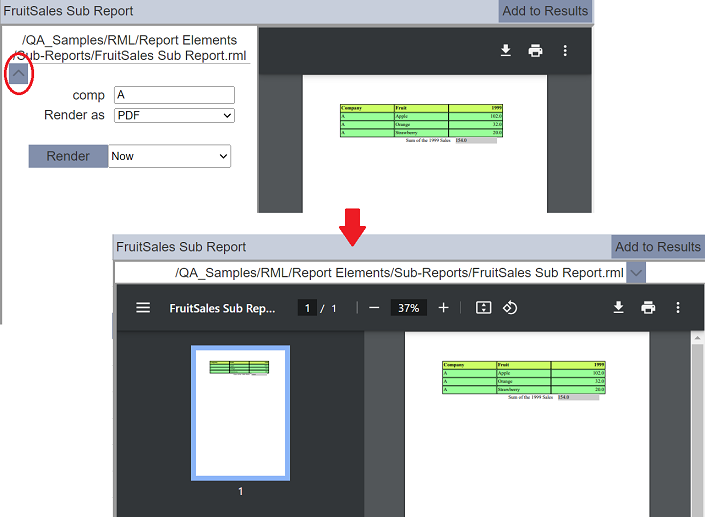
To view the parameters again, click on the ![]() “Show Parameters” icon.
“Show Parameters” icon.
After the report is rendered, the “Add to Results” button will appear at the upper right corner of the right panel. This allows you to add the report onto the Render Results list.
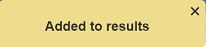
Click onto the “Add to Results” button to add the results onto the list. Once the report is added successfully, a message will appear.
Tagged Reports
The tagged report option in the left panel depends on the tagging of the folders in the Repository module. The name that will appear as an option depends on the tag in the folder. The tag will have a prefix ReportPortal-, followed by a “name”. For example, a folder has a tag ReportPortal-Sales assigned to it. The name Sales will appear in the Report Portal as an option in the left panel.
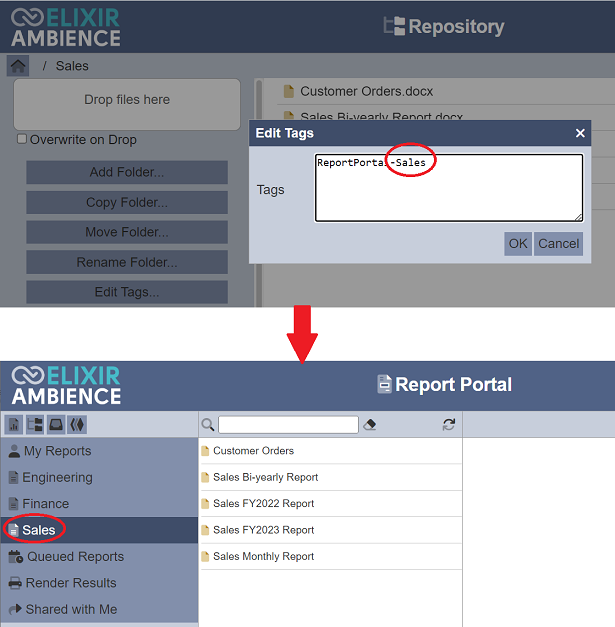
Once a folder is tagged, all its sub-folders and reports will appear in the Report Portal. To hide a particular report in the folder or to hide a sub-folder, add the tag ReportPortal-Hidden to the report file.
The process to generate a report is the same as for the My Reports option.
The access to the folder is controlled by the Access Control function in the Repository. Different access control can be set for the folders for different roles/users, thus different roles/users may see different reports in the Report Portal.
In the example below, three roles are created, namely “Sales”, “Finance” and “Engineering”. The tags for the “Sales”, “Finance” and “Engineering” added to the folders in the Repository.
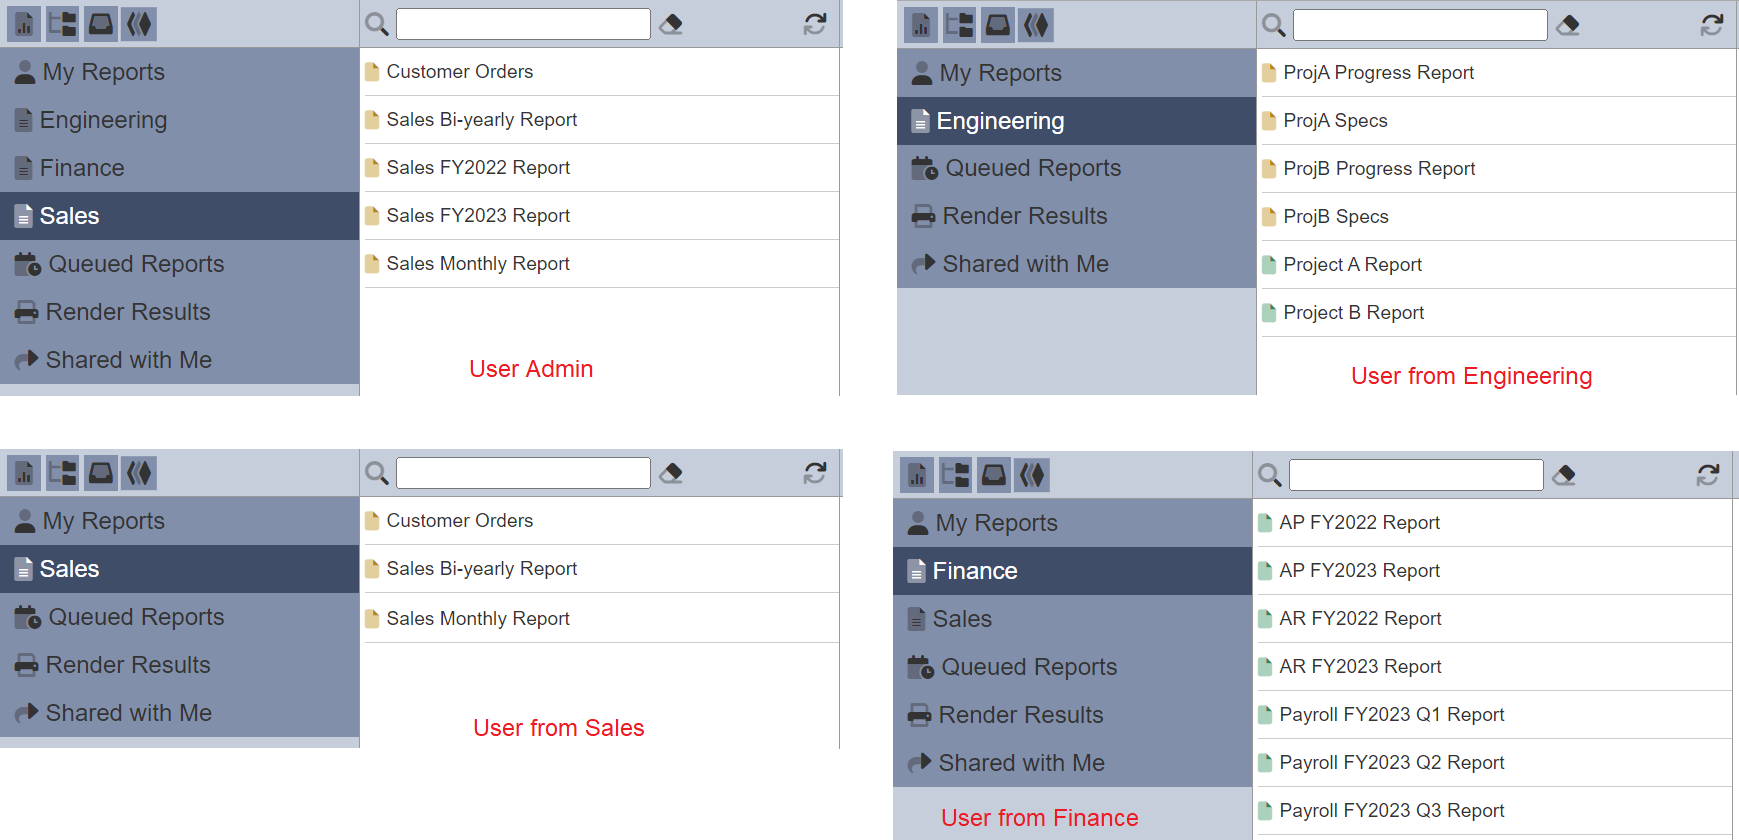
User, such as administrator who is given all the roles, will be able to see all options in the Report Portal. A user from the Sales Department (who has the Sales role) may only see the “Sales” option and a user from the Finance Department may only see the “Finance” option.
Users will only see reports that the access control list allows them to see. For example, if a sub-folder in the Repository has access control assigned to a particular role/user, then if the report file is tagged ReportPortal-Sales, any person from Sales who does not have that role or who is not that user will not be able to see the report.
See Access Control and Edit Tags sections in Repository for more details.
Do note that if no file or folder has the tag ReportPortal-<name>, the Report Portal option will not appear in the left panel.
Queued Reports
The Queued Reports option when selected, displays the list of reports rendered and/or scheduled reports in the centre panel.

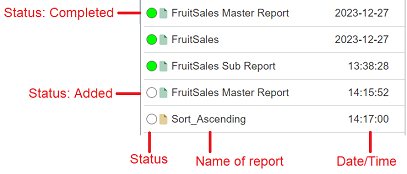
Each row shows the status of the report, name of the report and when the report is rendered (i.e., the date or time if it is current date). The completed reports will be visible in the list for 24 hours.
See Queue Monitor for more information on the job status.
You can view the render details by selecting the desired report.
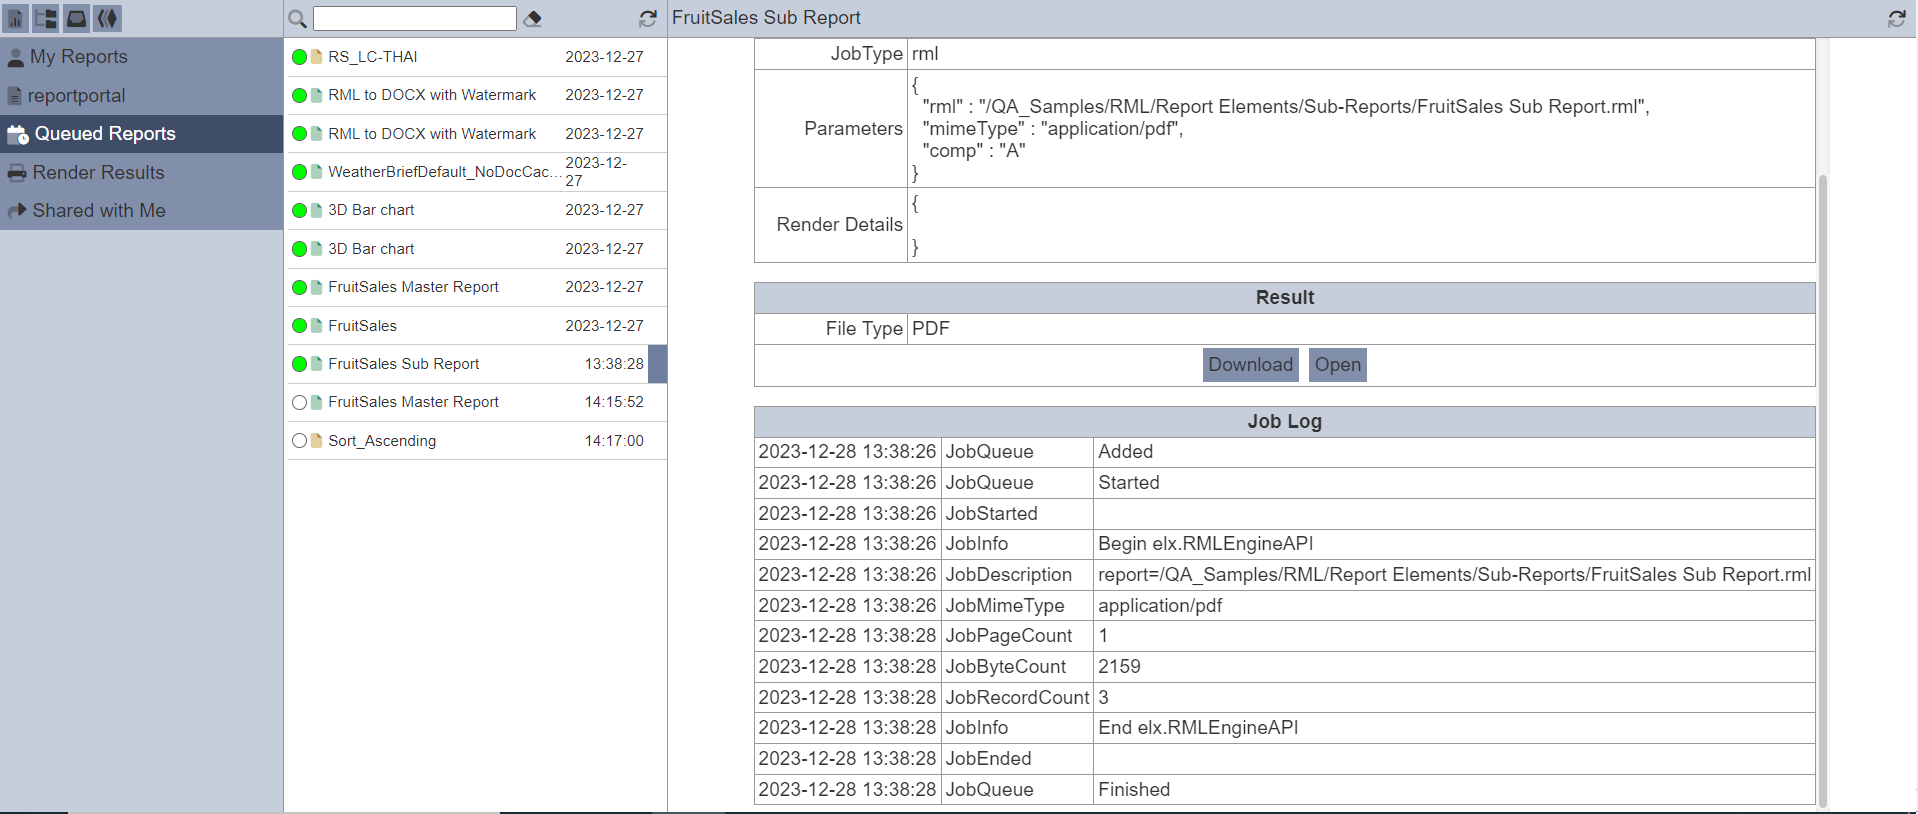
If the report is rendered, the “Result” section will appear in the details. You can download the result by clicking on the “Download” button in the “Result” section. If the browser supports the output format of the report (e.g., PDF), the “Open” button will appear next. Click on the “Open” buttons to view the result.
Render Results
The Render Results option when selected, displays the list of reports rendered (i.e., completed).

The centre panel displays the list of rendered reports. Scheduled reports (yet to be rendered) will not be included here.
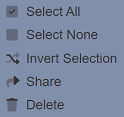
The  “More Actions” button at the top of the panel shows the list of available actions for the reports.
View Report
To view a report, select the desired report and the right panel will display the report.
If the format of the report is not supported by the browser, a “Download” button will appear.

Share Report
This function allows you to share this report to a role and/or user, as well as edit existing shared report.
To share a report, select the desired report and click on the button. Select the  “Share” option. Do note that if more than one report is selected, the option will not appear in the list.
The “Share Result” dialog box will appear.
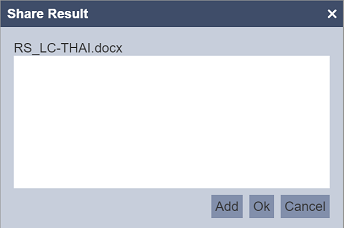
To add a new role or user, click on the “Add” button in the dialog box. The “Users and Roles” dialog box will appear.
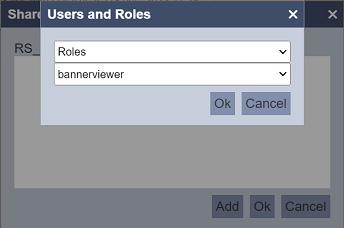
Select the desired role or user from the list and click on the “OK” button. The role/user will be added to the list.
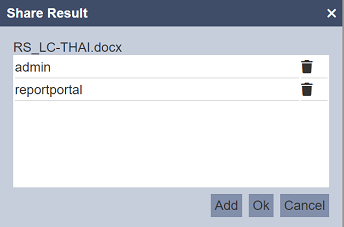
Click on the “Add” button in the “Share Result” dialog box to add more roles/users.
To remove any role/user, click on the  “Delete” icon on the right of the desired role/user.
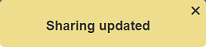
Once the desired roles and/or users are selected, click on the “OK” button to save the selection. A message will appear once the sharing is completed.
You can edit the roles/users that are selected to share the report using the same method above.
Delete Report
To delete one or more report, select the desired reports. To assist the selection, you can click on the button and use the Select All, Select None or Invert Selection options. After selecting the desired reports, click on the button and select the “Delete” option. The selected report will be deleted.
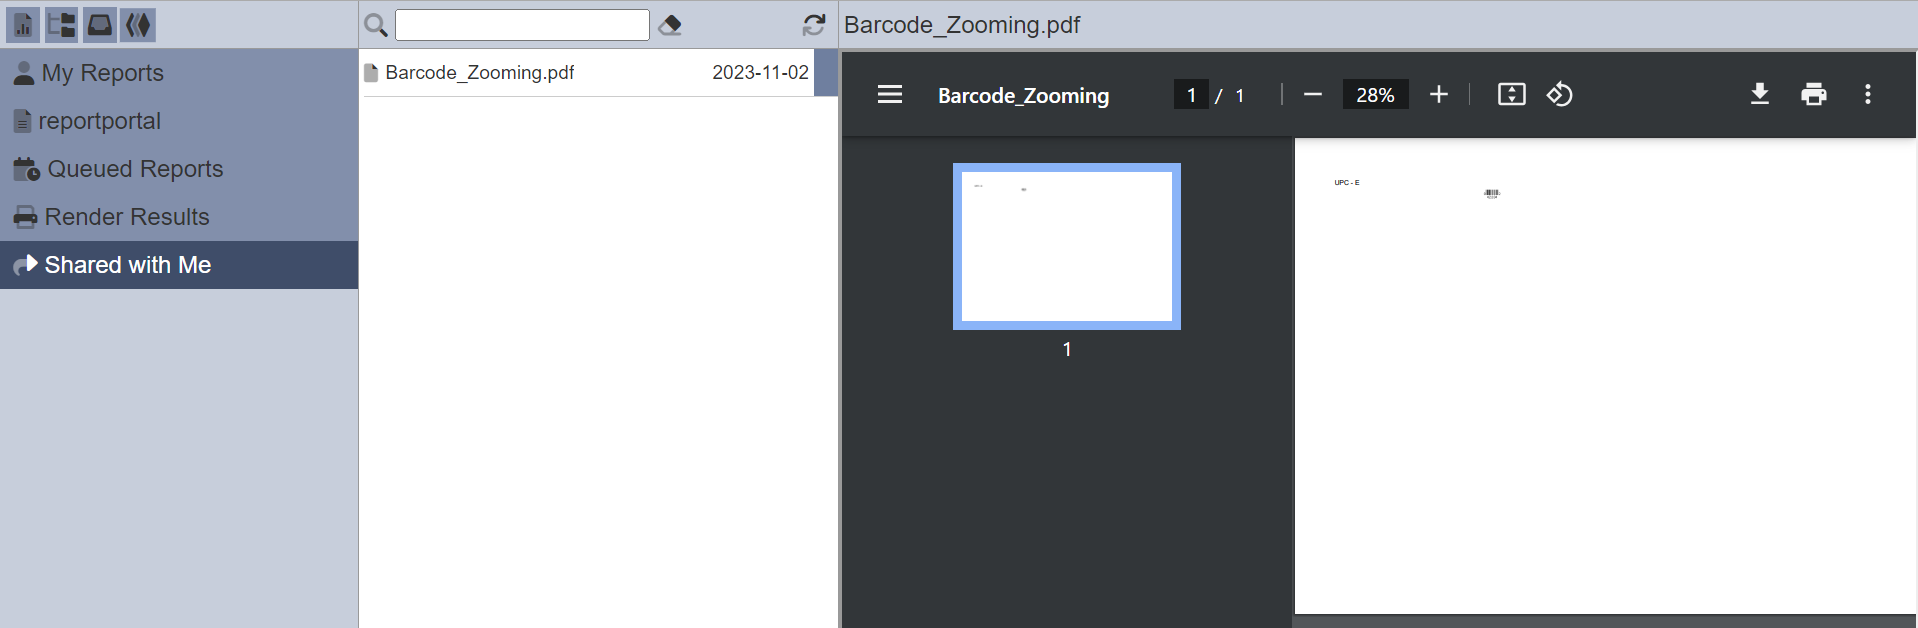
Shared with Me
The Shared with Me option when selected, displays the list of reports that are shared to you by other users.
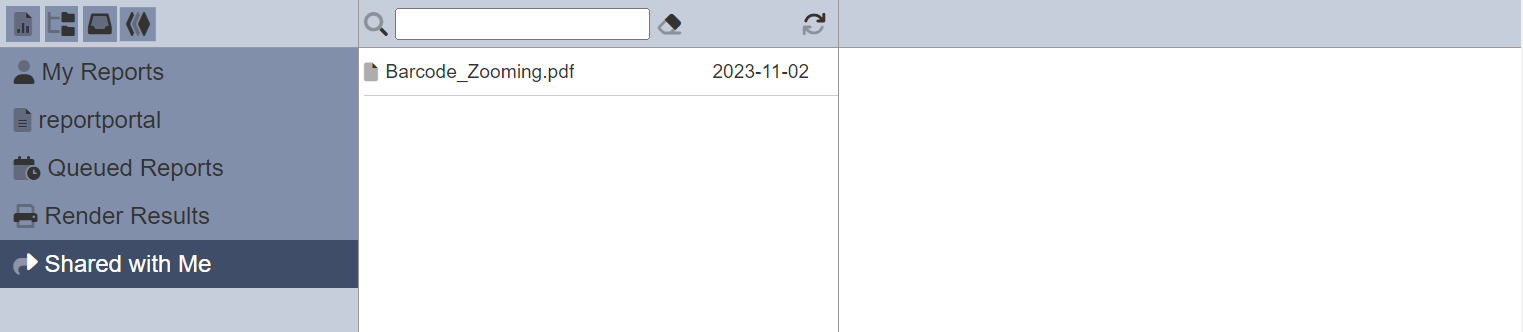
To view the report, click on the desired report in the centre panel. The right panel will display the report.
Clean Report Portal
Reports are generated daily and they accumulate in the server (or another location depending on whether a binary store has been defined in the system configuration:
ambience.modules.report-portal.binary-store = "<BinaryStoreName>"
It is advisable to clean up and remove old unwanted reports for housekeeping and to make space for newer reports.
In the ETL module, under the “Ambience” category, the “Clean Report Portal” ETL step can be used to remove old rendered reports from both the “My Reports” and “Shared Reports” lists from a defined period of time.
This step also removes the associated binary store content which holds the rendered output.
Only users with the mod-lifecycle privilege can run this ETL step.
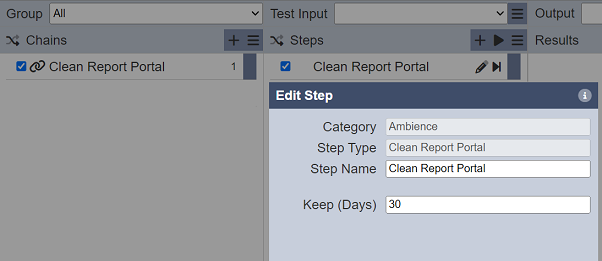
In the example above, any old reports in the server and binary store that are more than 30 days old will be removed.