Support Documents
Install Standalone Repertoire
To begin, two pre-requisites for the Elixir Repertoire software are:
- Java 17 LTS (Long Term Support) or higher
- Repertoire 202x
Java 17
You need download and install any Java 17 LTS or higher for the Repertoire software.
Repertoire
Contact our representatives for the Elixir Repertoire 202x software. The Repertoire 202x comes in a form of a zip file. A license is required to run the software.
To install Repertoire 202x, extract the zip file to the desired location.
There are two ways to launch Repertoire:
On Windows
From the Windows Explorer/File Explorer, go to the “Bin” folder. Double-click on the “run-designer.bat” file for Windows.
If this is the first time Repertoire software is launching, a dialog box will appear.
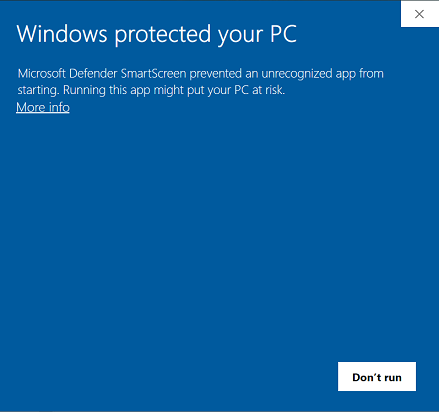
Click on “More Info” in the dialog box.

Click on th “Run anyway” button at the bottom.
A command window will appear. DO NOT close this command window.
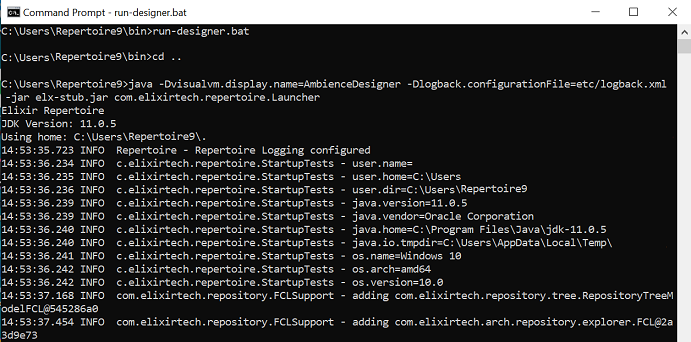
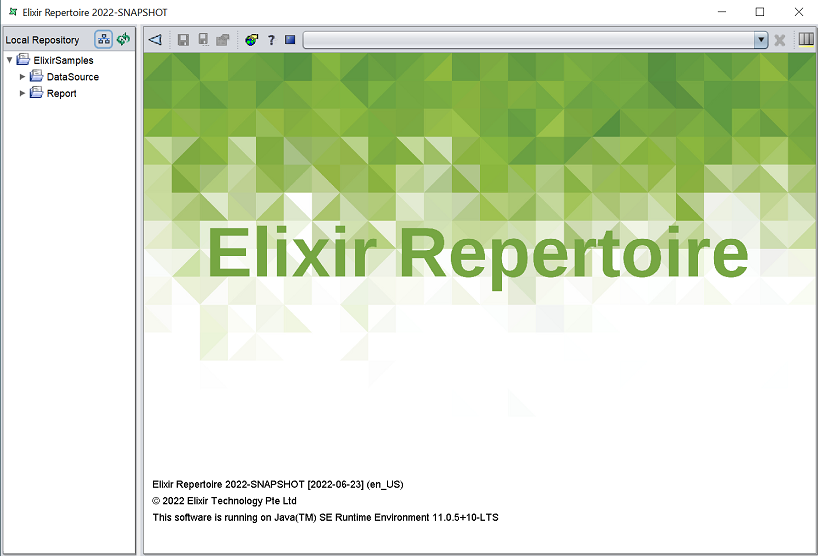
The Repertoire software will launch as well.
On Terminal Window
Open a terminal window, navigate to the “bin” folder and execute the command:
run-designer(for Windows)./run-designer(for Ubuntu/macOS)
The Repertoire software will appear. DO NOT close the terminal window.
Connect Server
You can connect to a server (such as Repertoire Server or Ambience 202x software suite).
The “application.conf” file of the server need to allow the Repertoire to connect to it. To do so, add the line below into the “application.conf”:
elixir.sso.server.resource-owner-password-enabled = true
Save the “application.conf” file and launch the server.
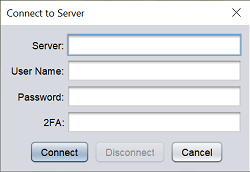
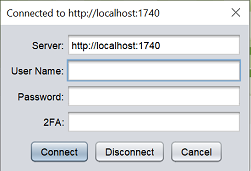
On the Repertoire, click on the  “Connect” button at the top of the Repository panel. A “Connect to Server” dialog box will appear.
| Field | Description |
|---|---|
| Server | Name of server. |
| User Name | Name of user to log into server. |
| Password | Password of user to log into server. |
| 2FA | 2FA of user (if applicable) to log into server. |
Key in the name of the server in the “server” field. For example, if Ambience is used, hostlocal:1740 should be entered. Key in the user name and password of the user to log into the server. 2FA is optional, depending on the setup of the user.
Click on the “Connect” button to connect to the server. Once the server id connected, the Repository panel will display the file system of the repository of the server.
Do note that the “Recent Files” panel will be empty. Any files used when connected to the server will be displayed. Once the server is disconnected, the “Recent Files” panel will be empty again, as the files are not accessable anymore.
Disconnect Server
To disconnect from the server, click on the “Connect” button at the top of the Repository panel. The “Connected to http://
Click on the “Disconnect” button to disconnect from the server. The Repository panel will now display the file system of the Repertoire and its recent files (if any).
Server With Client Certificate
To connect the Designer to the server with client certificate, both the Designer and server need to be configured.
Certificate and Private Key for Server
First, the certificate and private key need to be generated.
-
Generate a self-signed certificate and private key in the “etc/https” folder using the following command:
oepnssl req -x509 -nodes -days 365 -newkey rsa:4096 -kryout private-key.pem -out certificate.pem -subj "/CN=qa.com"
Two files will be created:private-key.pemandcertificate.pem. -
Create a PKCS12 keystore.
openssl pkcs12 -export -in certificate.pem -inkey private.pem -out keystore.12 -name <name>
One file is created:keysore.p12. -
Import PKCS12 keystore into Java Truststore (mandatory).
keytool -importkeystore -srckeystore keystore.p12 -srcstoretype PKCS12 -destkeystore "$JAVAPATH/cacerts"
Enter the keystore password in step 2. -
Export the self-signed certificate from the keystore (keystore.p12) that was created for the website.
keytool -exportcert -alias <name> -file self_signed_certificate.crt -keystore qa.pkcs12 -storetype PKCS12
One file is created:self_signed_certficate.crt. -
Create the Truststore and import the self-signed certificate.
keytool -importcert -alias Mname> -file_signed_certificate.crt -keystore truststore.pkcs12 -storetype PKCS12
One file is created:truststore.pkcs12.
Server
Ensure the server’s application.conf file in the “etc” folder has the following:
ambience {
  systemid: "system"
  bindAddress: "0.0.0.0"
  bindPort: ${internal-port}
  https {
    enabled = true
    keystore = "https/keystore.p12"
    keystore-type = "PKCS12"
    keystore-password = "elixir"
  }
}
Note that SSO for user and token need to be set as “local” under the elixir.sso.client section in the application.conf file. Change from:
  token = ${sso-internal-server-baseurl}"/simple-sso/token"
  userinfo = ${sso-internal-server-baseurl}"/simple-sso/userinfo"
to:
  token = "local"
  userinfo = "local"
Certificate and Private Key for Designer
For the Designer, generate the client certificate and private key.
-
Generate a self-signed certificate and private key using the following command:
openssl req -x509 -nodes -days 365 -newkey rsa:4096 -keyout client-private-key.oem -out client-certificate.pem -subj "/CN=qa.com"
Two files are created:client-private-key.pemandclient-certificate.pem. -
Create a PKCS12 keystore using the two files created.
openssl pkcs12 -exoprt -in client-certificate.pem -inkey client-private-key.pem -out qa.pkcs12 -name <name>
One file is created:qa.pkcs12. -
Import the server’s certificate from the pa.pkcs12 keystore using the following command:
keytool -exportcert -alias olgaaqaks -file client_self_signed_certificate.crt -keystore keystore.p12 -storetype PKCS12
One file is created:client_self_signed_certificate.crt -
Copy the created in step 3 into the server’s “https” folder.
-
Import the client self signed certificate (in step 3) into the
truststore.pkcs12(server’s).keytool -importcert -alias client-self-signed-cert -file client_self_signed_certificate.crt -keystore truststore.pkcs12 -storetype PKCS12
Designer
Place the https/qa.pkcs12 file in the Designer’s “etc” folder and set the following in the application.conf file.
elixir.remote-connection {
  client-certificate {
    enabled = true
    keystore = "https/qa.pkcs12"
    keystore-type = "PKCS12"
    keystore-password = "<password>"
  }
}
Restart
Restart the server and Designer.