
Workflow Designer
The Workflow Designer page allows you to create and edit the processes of the workflow. You need to have the mod-workflows and mod-workflow-edit privileges to access and edit the workflow.
Once a workflow has been created, instances of that workflow can be created and executed via the Workflow Engine which is also part of the Workflow Module. The Workflow Engine accepts events via its REST interface. The events can fire transitions and execute ETL chainsets that change the state of the current workflow instance.
The Workflow Designer page is divided into 4 parts:
Task Bar
The Task Bar is located at the top of the page.

It consists of 3 icons on the left of the page, the state machine tabs and another 3 icons of the right of the page.
Save
The  “Save” icon allows you to save the changes done on the workflow.
Do note that the workflow is auto-saved. After auto-save, the icon on the upper left corner of the page will grey-out. Upon performing some edits, the icon will re-appear for a few seconds. After which the workflow will be saved automatically.
Undo/Redo
The  “Undo” icon and
  “Redo” icon allows you to undo and redo the last action done on the workflow. If there is no action to undo or redo, the icon will grey-out.
State Machine Tabs
The state machine tabs allows you to switch between state machines in the workflow. The selected tab is highlighted in bold. To select the other tabs, simply click on the tab to switch to the desired tab.
Zoom Out/In
You can zoom out and in of the workflow diagram using the “Zoom Out”, “Zoom In”  icons. The number before the icons indicates the current zoom percentage. The zoom range is from 25% to 150%, in steps of 25%. The default initial zoom factor is 100%. Once the minimum or maximum zoom is reached, the respective icon will grey-out.
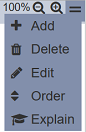
More Actions
The  “More Actions” icon allows you to access to other actions, such as:
The “Add” action allows you to add a new state machine onto the Workflow. To add a new state machine into the workflow, click on the “More Actions” icon to display the list of actions available.
Select the “Add” action from the list and a “Add” dialog box will appear.
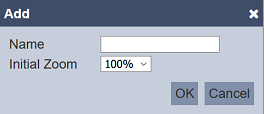
Key in an unique name for the new state machine in the “Name” field and select the desired initial zoom factor from the drop-down list for the “Initial Zoom” field. Click on the “OK” button to add the new state machine or click on the “Cancel” button to abort the action. If the name already exist, an error message will appear.

The newly added state machine will have the default states and transitions automatically added into the workflow.

The “Delete” action allows you to delete the selected state machine from the workflow. To do so, first select the state machine to be deleted. Click on the “More Actions” icon to display the list of actions available.
Select the “Delete” action from the list. The selected state machine will be deleted. You can undo the deletion by clicking on the icon at the upper left of the page and the deleted state machine will be added back into the Flow Panel.
If there is only one state machine in the workflow, the “Delete” action will not be available.
The “Edit” action allows you to change the name of the state machine and the initial zoom factor. To do so, click on the “More Actions” icon to display the list of actions available.
Select the “Edit” action from the list and the “Edit” dialog bo will appear.
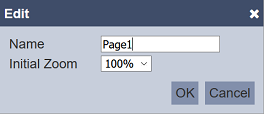
Make the necessary changes and click on the “OK” button to save the changes. Clicking on the “Cancel” button aborts the action. Do note that the name must be unique.
The “Order” action allows you to rearrange the state machines in the workflow. To do so, click on the “More Actions” icon to display the list of actions available.
Select the “Order” action from the list. The “Order” dialog box will appear.
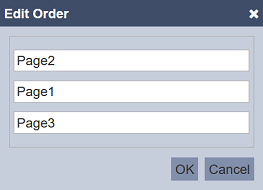
Simply drag and drop the state machines to the desired location. Click on the “OK” button after the state machines are rearranged. If there is only one state machine in the workflow, the “Order” action will not be available.
The “Explain” action allows you to display the details of the workflow. To do so, click on the “More Actions” icon to display the list of actions available.
Select the “Explain” action from the list and the “Explain Workflow” page will appear.
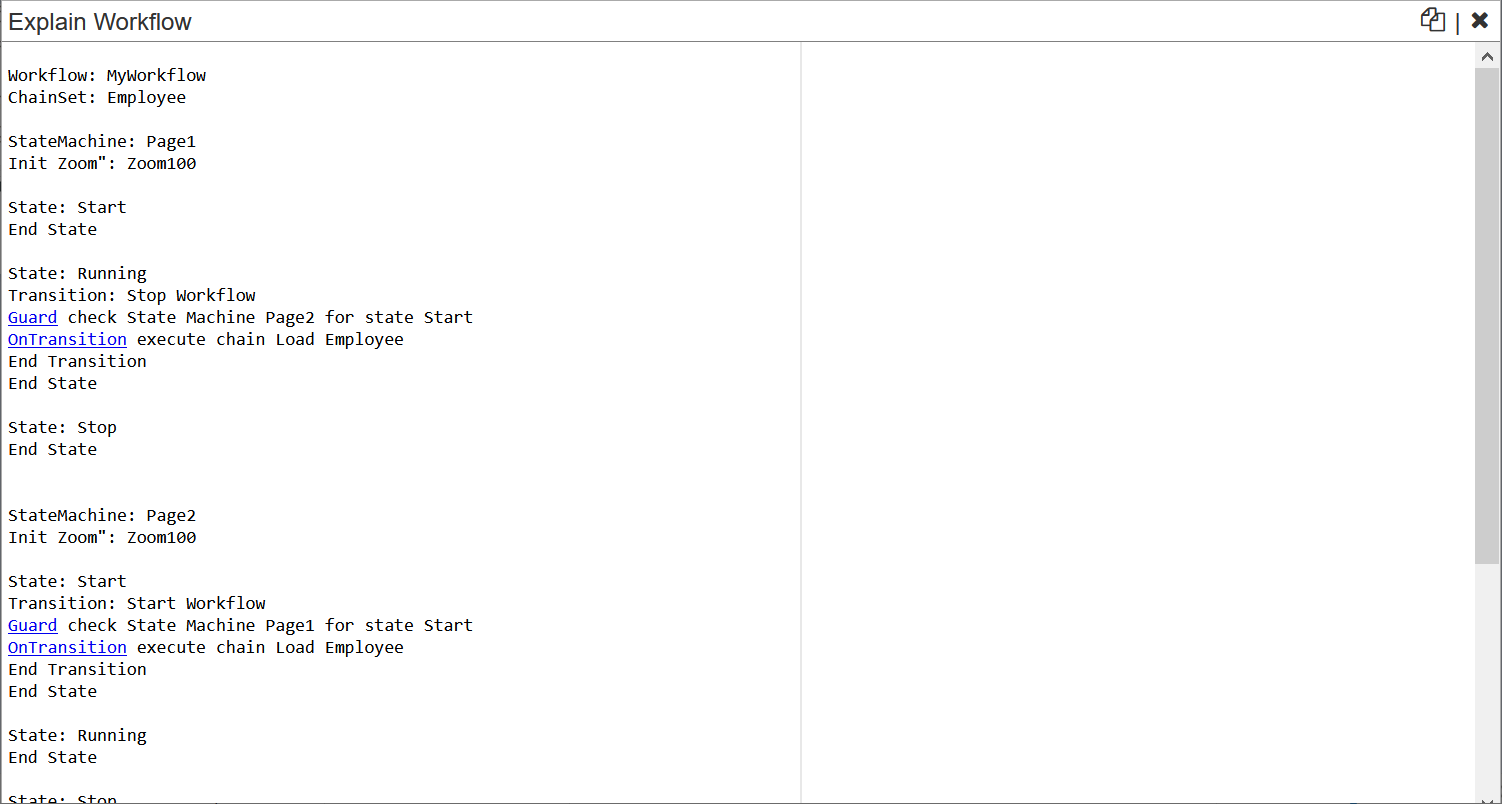
In the “Explain Workflow” page, you can copy the details of the workflow by clicking on the  “Copy” icon on the upper right corner of the page. To close the page, click on the
  “Close” icon on the upper right corner of the page.
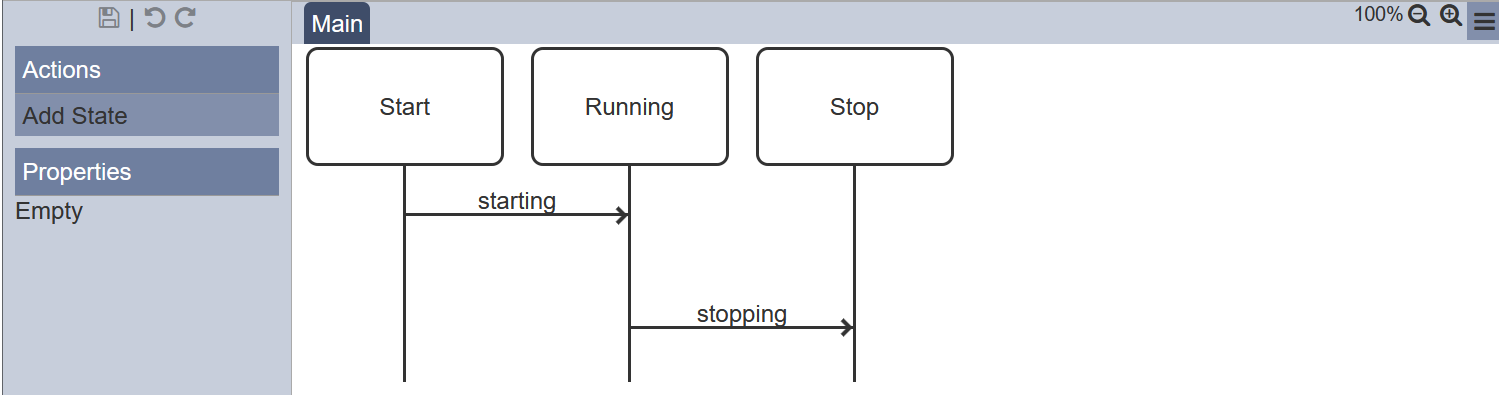
Flow Panel
A workflow consists of states and transitions. It can be everything from from a task management, leave entitlement, sensor monitor application, email change request, etc.
The Flow Panel is located on the right of the page. It displays the states and transitions of the workflow in the form of a flow diagram. The initial workflow consists of the following processes:
-
3 states
StartstateRunningstateStopstate
-
2 transitions
Start WorkflowtransitionStop Workflowtransition
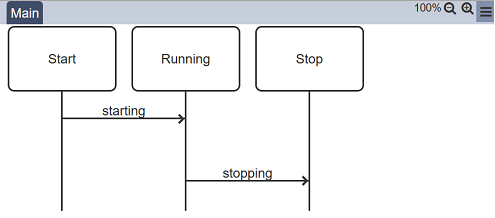
The first state is always Start and the last state is always Stop. They are the starting and ending points of a workflow respectively. There are no property for these 2 states and they cannot be relocated.
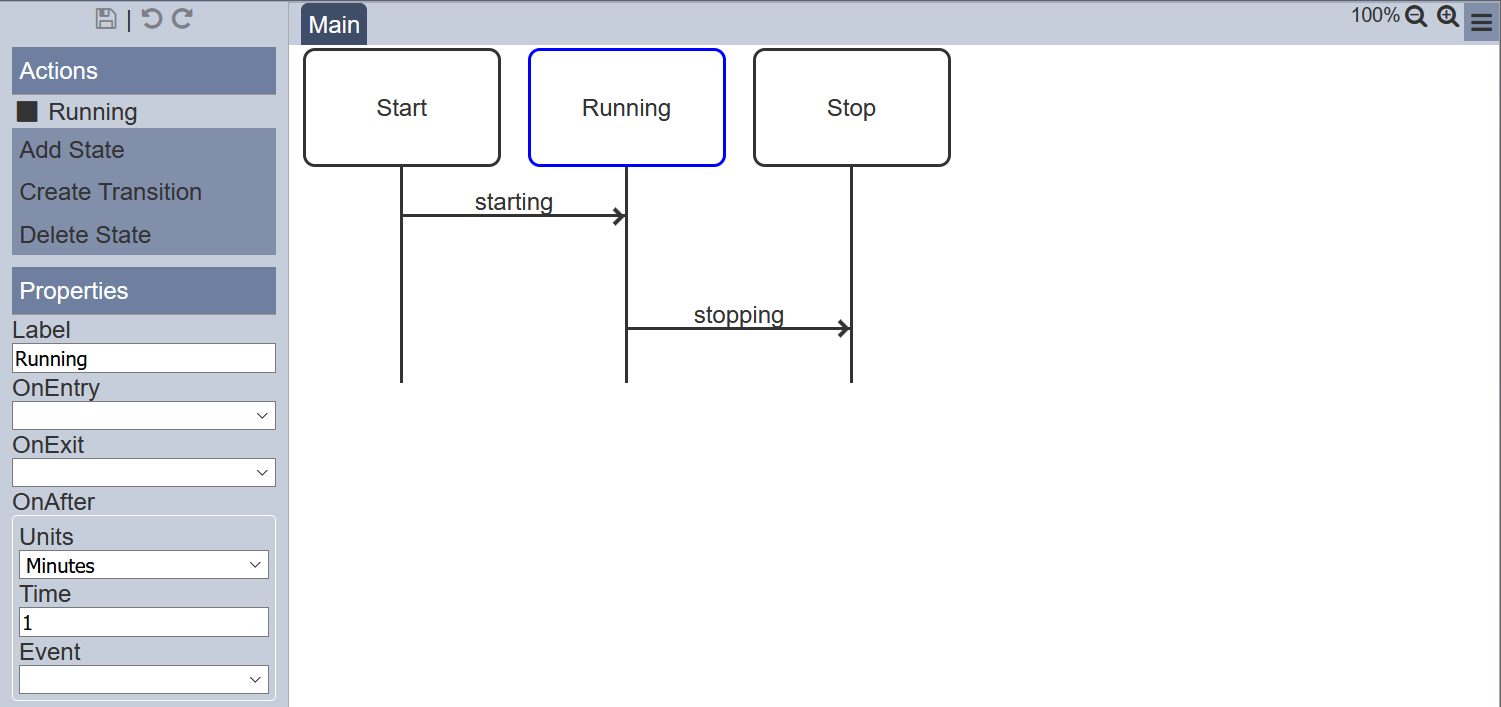
When the second state, which is Running or any of the transitions is selected, the actions available and its properties will be displayed in the Actions and Properties Panels respectively.
In the Flow Panel, you can select any state or transition clicking on the desired process. The selected process will be highlighted in blue. The available actions and the properties of the selected process will appear in the Actions and Properties Panels.
You can then edits the properties or add new process using the actions in the Actions and Properties Panels.
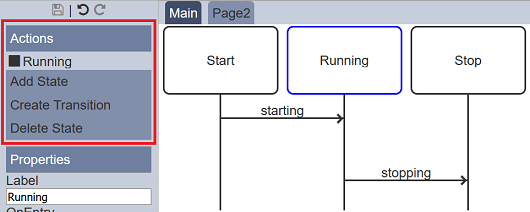
Actions Panel
The Actions panel is located on the left of the page. It consists of 2 parts:
- Name of selected state or transition
- List of available actions (vary)
![]()
| Action | Description | Process |
|---|---|---|
| Add State | Adds new state into the workflow. | State / Transition |
| Delete State | Removes selected state from the workflow. | State (except Start and Stop) |
| Create Transition | Creates a transition between selected source and target states. | State (except Stop) |
| Delete Transition | Removes selected transition in the workflow. | Transition |
Add State
To add a new state, click on the “Add State” button on the Actions Panel. The (New State) new state will always be added before the Stop state. You can drag-and-drop the new state to the desired location if the current location is not desired.
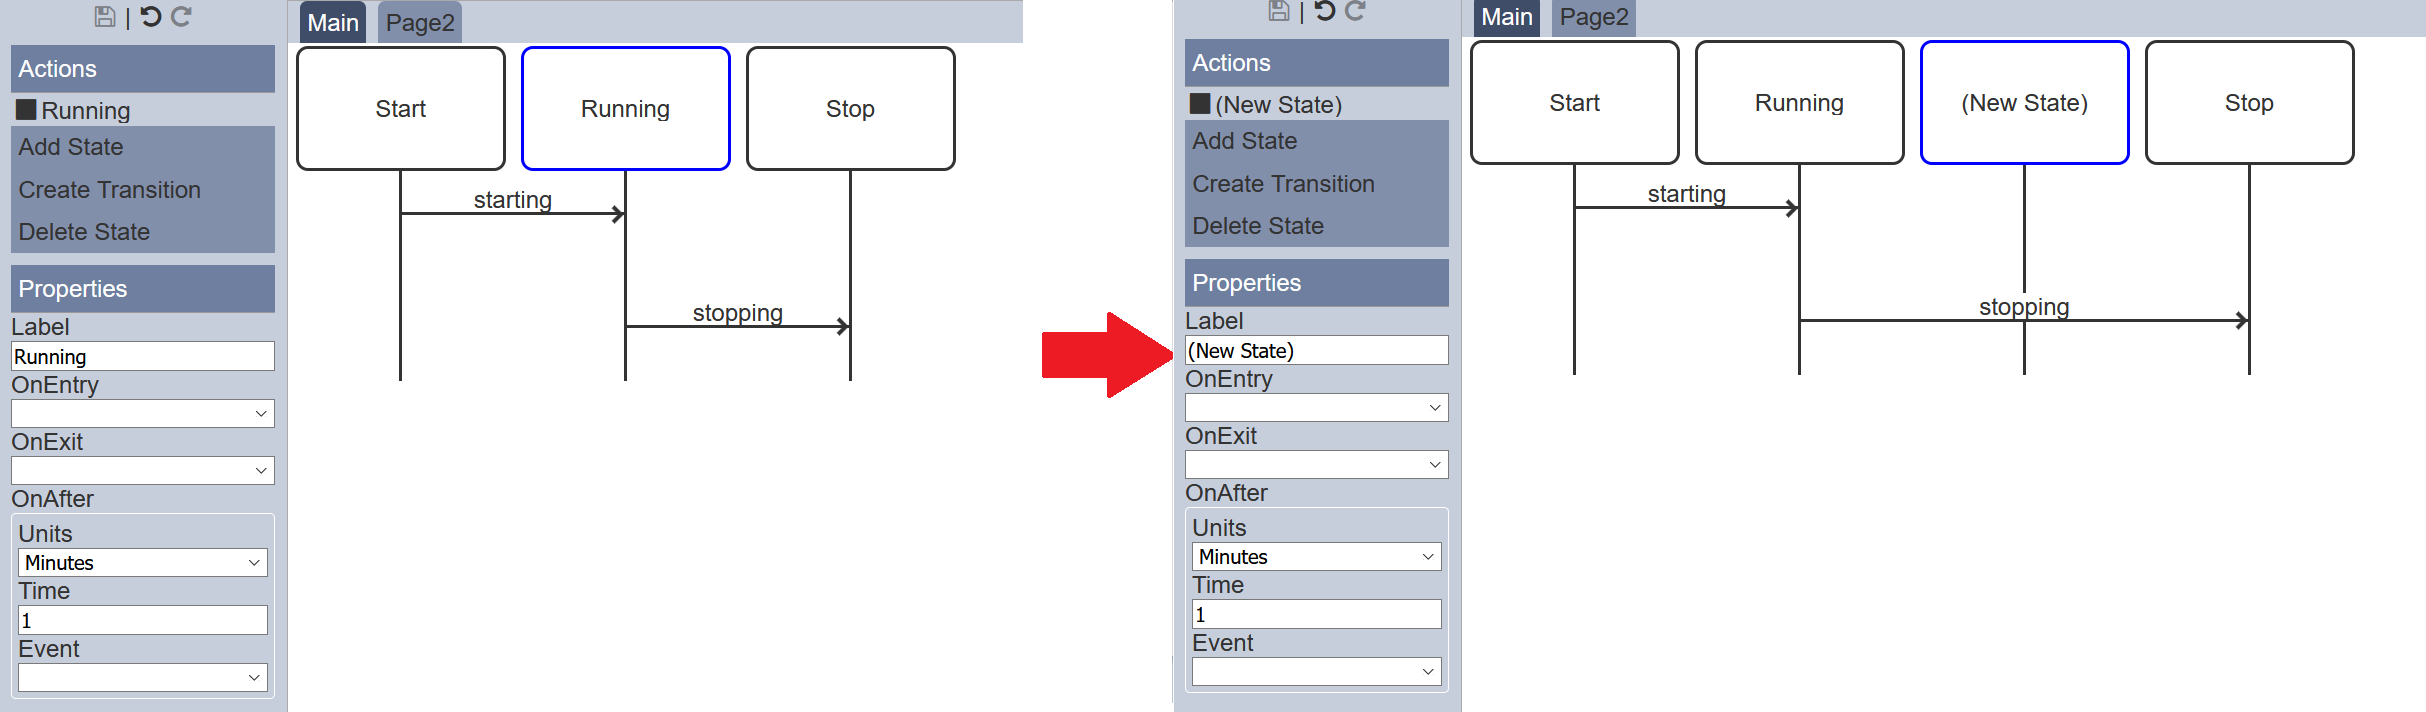
The label and the properties of the newly added state (by default, the label is (New State)) can be changed in the Properties Panel.
Delete State
To delete a state, select the state to be deleted and click on the “Delete State” button on the Actions Panel. Any transitions linked to the selected state will be deleted as along with the state.
You can undo the action by clicking on the icon at the top of the Actions Panel.
Create Transition
To add a new transition, select a state as the source state for the new transition. The available actions for the state will appear in the Actions Panel. Click on the “Create Transition” button then click on a state as the target state for the transition. The new transition is added between the source and target states.
In the example below, a transition is added between Running and (New State) states. First, select the source state Running, then click on the “Create Transition” button on the Actions Panel on the left. A message will appear in the Actions Panel to prompt you to select the target state. Click on the (New State) state and a new transition (new transition) is added between the 2 states.
![]()
The source and target states of the transition can be changed simply by drag-and-drop the start or end point of the transition to the desired state. Do note that you can select the same state as the source and target states of the transition, making a loop transition.
![]()
You can also re-order the transitions by drag-and-drop the transitions up or down.
The label and properties of the newly added transition (by default, the label is (new transition)) can be changes in the Properties Panel.
Delete Transition
To delete a transition, select the transition to be deleted and click on the “Delete Transition” button on the Actions Panel.
You can undo the action by clicking on the icon at the top of the Actions Panel.
Properties Panel
The Properties panel is located below the Actions Panel of the left of the page. It displays the properties of the selected state or transition. The properties vary according on the selected process. You can edit the properties of the states and transition to execute an ETL chain or state machine under certain condition or value.
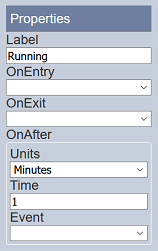
State Properties
The below screenshot and table shows the properties for a state.
| Field | Description | Mandatory | Input Type | Constraints | Default Value |
|---|---|---|---|---|---|
| Label | Display the name of the state selected. | Y | Text field | Any text | Name of selected process |
| OnEntry | Executes the ETL chain defined. | Y | Drop-down list | Select from drop-down list | Empty |
| OnExit | Executes the ETL chain defined. | Y | Drop-down list | Select from drop-down list | Empty |
| OnAfter | |||||
| Units | Defines the unit for the Time field. Options: - Days - Hours - Minutes |
Y | Drop-down list | Select from drop-down list. | “Minutes” |
| Time | Defines the time to execute the event. | Y | Text field | Numeric | “1” |
| Event | Defines the event to be executed in the workflow at the defined time. | N | Drop-down list | Select from drop-down list | Not selected |
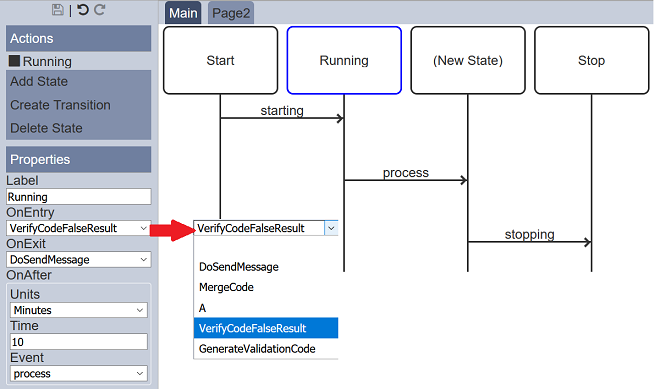
The “Label” property allows you rename the state to a more meaningful name.
The “OnEntry” and “OnExit” properties will execute a ETL chain. The chain can do anything from sending an email to updating the workflow instance state with a new value.
The “OnAfter” property has 3 sub-fields. This property allows you to executes an Event asynchronously to the workflow at a specified Time (in defined Units) in the future. The lists of event are taken from the available transitions.
Transition Properties
The below screenshot and table shows the properties for a transition.
![]()
| Field | Description | Mandatory | Input Type | Constraints | Default Value |
|---|---|---|---|---|---|
| Label | Display the name of the transition selected. | Y | Text field | Any text | Name of selected process |
| Guard | Evaluates the true or false of the input to the transition before executing the transition and moving to the next state on true condition. | Y | Drop-down list | Select from drop-down list | Empty |
| Event | Defines the event that must be sent to Workflow engine. If no event is specified, any event will trigger this transition. |
N | Text field | Any text | Empty |
| OnTransition | Executes an ETL chain. | Y | Drop-down list | Select from drop-down list | Empty |
The “Label” property allows you rename the transition to a more meaningful name.
The “Guard” property performs an evaluation the true or false of the input to the transition, before executing the transition and moving to the next state on true condition.
There are 2 options for the “Guard” property, namely “Chain” and “State Machine”. If the ETL chain or state machine is not available, their respective option will not be selectable. For the ETL chain to be selectable for the workflow, the Guard Endpoint ETL must be present in the ETL chainset. When one of the option is selected, their respective sub-field(s) will appear, which allows you to define the ETL chain or state for evaluation.
| Field | Description | Input Type | Default Value | |
|---|---|---|---|---|
| Chain | ||||
| Chain | Selects either Chain or State Machine option. | Drop-down list | Empty | |
| Name | Name of ETL chain to execute. | Drop-down list | Empty | |
| State Machine | ||||
| State Machine | Selects either Chain or State Machine option. | Drop-down list | Empty | |
| Name | Name of state machine. | Drop-down list | Empty | |
| State | Selects the state of the state machine. | Drop-down list | Empty | |
![]()
The “Event” property can have a specified event or left empty. If left empty, any event coming into the workflow will fire the transition, otherwise only an event with a matching name will fire the transition. Events can come into the workflow externally through the WorkflowAPI or internally through the “onAfter” property.
The “OnTransition” property will execute an ETL chain. The chain can do anything from sending an email to updating the workflow instance state with a new value.