Results
The Results tab in the Developer module displays the results of any operations carried out by the other three tabs.

The Results page consists of two portions. The upper portion (in grey) shows the database and collection selected on the left, and the actions that can be performed on the right. The lower portion displays the list of records (result) from the other tabs.
In this tab, you can perform the following:
- Re-order the columns either in ascending or descending order
- Add, edit and delete records listed
- Download the records listed
Re-order Records
By default, the order of columns are displayed according to the order of the fields in the records. You can re-order the columns of the records listed in the page by selecting either ascending or descending from the drop-down list in the “Columns Order” field.
Add Record
To add a new record or document into the selected collection, click on the “Add” button at the upper right corner of the page.

The “Create Document” dialog box will appear. The new document uses the structure of the existing records and a unique ID is randomly generated.

You can maximize the dialog box by clicking on the  “Maximize” icon at the upper right corner of the dialog box. To restore, click on the
  “Restore” icon at the upper right corner of the dialog box.
After all the necessary fields are filled in, click on the “OK” button to save the new document. Click on the “Cancel” button to abort the action.
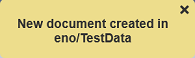
A notification will appear and the new record will be added at the end of the list.
Edit Record
To edit a single record, first select the record to be edited by selecting the checkbox under the  column corresponding the desired record. Then click on the “Edit” button at the upper right corner of the page.
The “Edit Document” dialog box will appear.

The “Next” and “Previous” buttons at the bottom of the dialog box are greyed out since there is only one record to edit.
You can maximize the dialog box by clicking on the “Maximize” icon at the upper right corner of the dialog box. To restore, click on the “Restore” icon at the upper right corner of the dialog box.
Edit the record as required and click on the “Done” button to save the changes. Click on the “X” icon to abort the action.
A notification will appear after the record has been updated.

To edit multiple records, select the desired records by selecting the checkboxes. The icon at the top row allows you to select all records (if none is currently selected) or revert your selection. Then click on the “Edit” button at the upper right corner of the page. The “Edit Document” dialog box will appear.

At the bottom of the dialog box, the number of records selected and the current record is displayed. In the above example, there are eight records selected and is currently viewing the second record. You can move to the next or previous record by clicking on the “Next” or “Previous” button respectively at the bottom of the dialog box.
Delete Record
To delete a single or multiple records, select the desired records to be deleted by selecting the checkboxes under the column corresponding the desired record. Then click on the “Delete” button at the upper right corner of the page.
Do note that this action is irreversible.
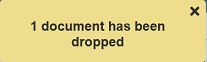
A notification will appear when the deletion is completed.
Download Records
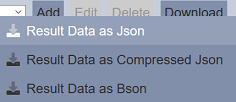
To download the records listed, click on the “Download” button at the upper right corner of the page.
A list of available formats will appear. Select one of the format to download the records listed.