Report Designer
The Report Designer allows you to configure, design/edit a layout report and render a report.
The Report Designer is divided into three tabs:
- Config - Allows you to set up the properties and report field mappings
- Layout - Allows you to edit the layout of the report (requires
mod-layout-report-editprivilege) - Render - Allows you to render the report with the desired output format or location
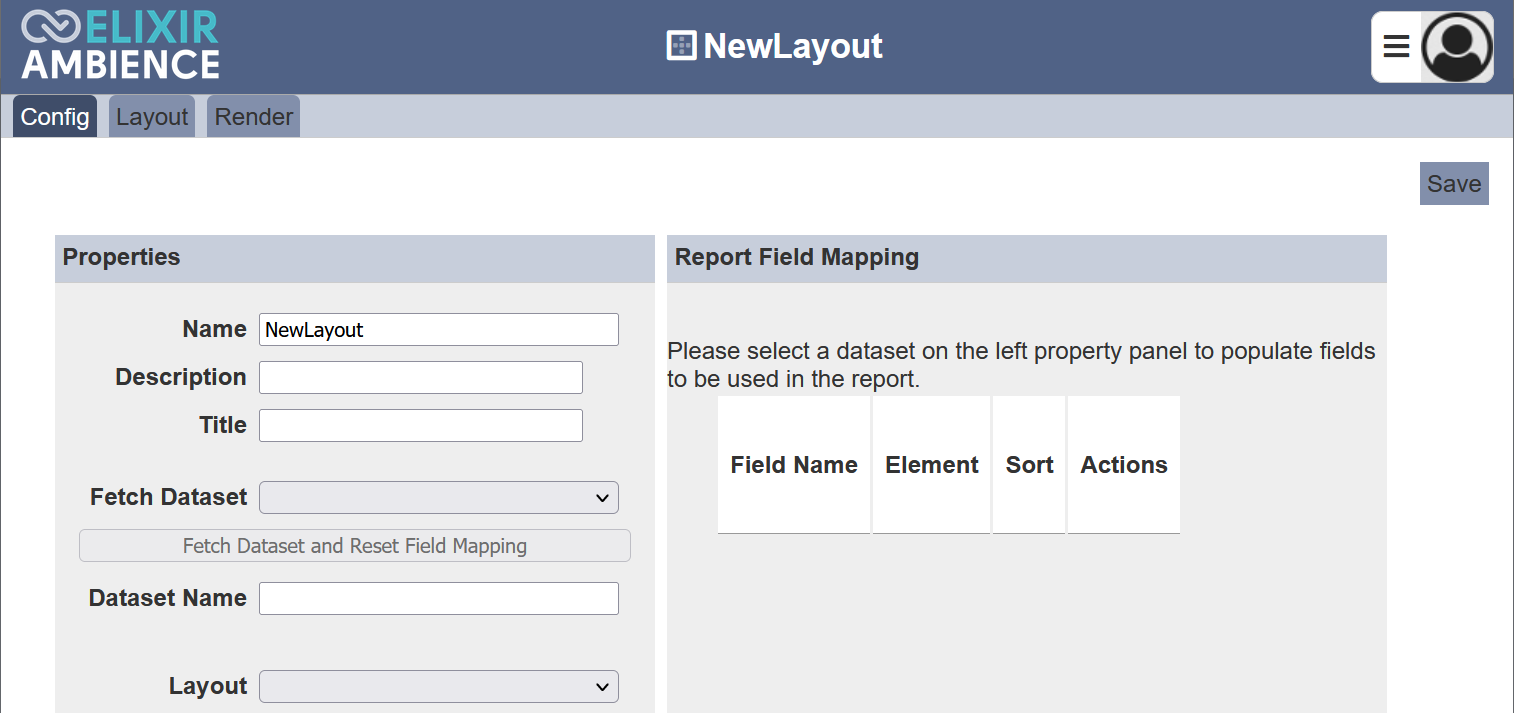
Config
THe Config tab allows you to set up the properties such as dataset to be used and the layout, as well as the the report field mappings. It consists of two sections; Properties and Report Field Mapping.
Properties
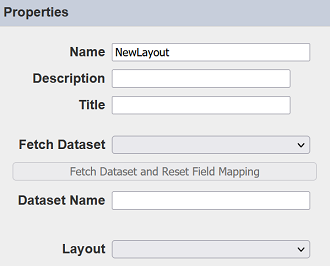
The Properties section sets up the dataset to be used for the report and selects desired layout from the Layouts module.
The table below list of fields in the Properties section.
| Field | Description | Input Type | Default Value |
|---|---|---|---|
| Name | Name of layout report. | Text field | Name of report |
| Description | Brief description of layout report (optional). | Text field | None |
| Title | Title of layout report (optional). | Text field | None |
| Fetch Dataset | Selects the dataset to be used in the report. | Drop-down list | Not selected |
| Dataset Name | Name of dataset selected. This field is not editable and will be filled automatically once the “Fetch Dataset” field is selected. |
Text field | None |
| Layout | Selects the layout to be used. | Drop-down list | Not selected |
To set up the properties of the layout report, select the desired dataset from the drop-down list in the “Fetch Dataset” field. Click on the “Fetch Dataset and Reset Field Mapping” button below the “Fetch Dataset” field. The “Dataset Name” field and the Report Field Mapping section will be automatically filled.
In the “Layout” field, select the desired layout from the drop-down list. Or you may leave it blank for a new layout that is to created in the Layout tab.
To save the settings, click on the “Save” button at the upper right corner of the page. To return to the management page, click on the ![]() icon next to the name of the layout report at the title bar.
icon next to the name of the layout report at the title bar.
Report Field Mapping
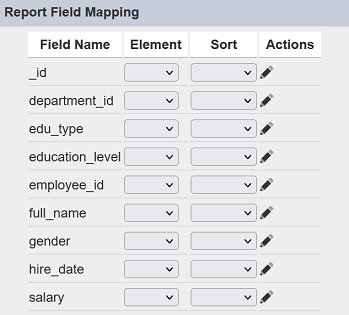
The Report Field Mapping section allows you to set up and select the desired fields to be used in the report.

Upon creating the layout report, the Report Field Mapping section is empty (as above screenshot). Once the dataset is selected and the data is fetched, the fields will be populated into this section.
By default none of the fields are select and set up. The fields need to be selected and mapped according to the layout selected in the “Layout” field in the Properties section or the new layout that is to be created in the Layout tab.
There are four columns in this section.
| Column | Description | Input Type |
|---|---|---|
| Field Name | Name of fields from the dataset. | Text field (not editable) |
| Element | Selects the type of element. Available options: - Empty - field is not selected - Group - groups the data with the selected field - Detail - list the data as per in the dataset |
Drop-down list |
| Sort | Selects the sorting order of the field. Available options: - Empty (not sorted) - Ascend - Descend |
Drop-down list |
| Actions | Defines the properties and style of the field. | Dialog box |
Field Name
The Field Name column list all the fields from the dataset. It is not editable.
Element
The Element column allows you to define the type of element the selected field is in the report. There two values; Group and Detail. The value Group allows you to group the data according to this field. The value Detail will display the data as per in the dataset. If none is selected, the field will not be mapped in the report.
Sort
The Sort column allows you to sort the field in either ascending or descending order. If none is selected, the data will be displayed in the sequence in the dataset.
Actions
The Actions column consists of a  “Edit” icon and/or
  “Move Up” and
  “Move Down” icons.
The and icons will only appear if there are more than two selected fields. They allows you to organise the order of the fields to correspond to the selected layout report.
The icon, when clicked will display the “Field Detail” dialog box. The two tabs in the dialog box allows you to edit the properties of the field, as well as the style of the field.
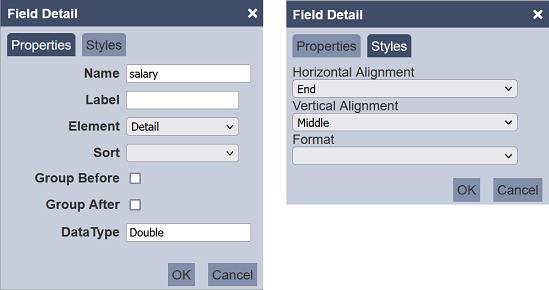
| Field | Description | Input Type | Default Value |
|---|---|---|---|
| Properties | |||
| Name | Name of the field. | Text field | Name of dataset |
| Label | Label of the field. | Text field | None |
| Element | Element type of the field. Available options: - Empty - Detail - Group |
Drop-down list | Empty |
| Sort | Sorting order of the field. Available options: - Empty - Ascend - Descend |
Drop-down list | Empty |
| Group Before | If selected, groups the data before the field. | Checkbox | Not selected |
| Group After | If selected, groups the data after the field. | Checkbox | Not selected |
| Data Type | Data type of the field. | Text field | As per schema |
| Style | |||
| Horizontal Alignment | Selects the horizontal alignment of the field. Available options: - Start - Centre - End |
Drop-down list | “End” |
| Vertical Alignment | Selects the vertical alignment of the field. Available options: - Top - Middle - Bottom |
Drop-down list | “Middle” |
| Format | Selects the format of the field. | Drop-down list | None (default format) |
Layout
The Layout tab consists of a layout editor which allows you to create or edit the layout for the report. This tab will only appear if the mod-layout-report-edit privilege is granted to the user.
If a new layout is to be created (i.e., the “Layout” field in the Config tab is left empty), a blank layout will appear. You can create the new layout in this tab. Refer to Layouts module on how to create and/or edit a layout.

If a layout is selected in the “Layout” field in the Config tab, the selected layout will appear in this tab.
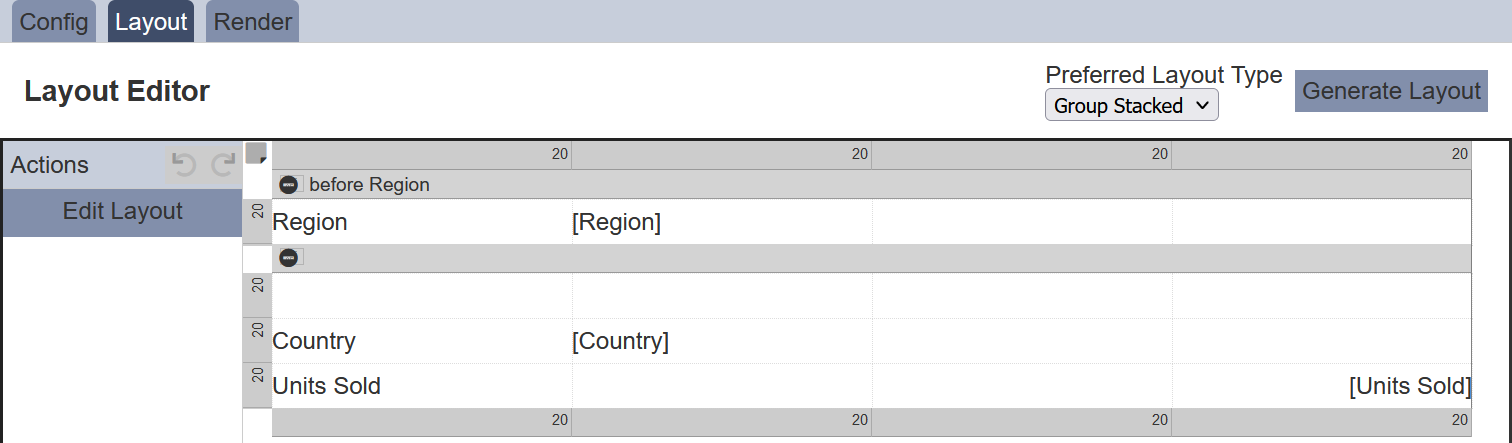
By default the current layout type is used. There are several other layout type that you can choose for the report. This can be done by selecting one of the options from the drop-down list below the “Preferred Layout Type” field and click on the “Generate Layout” button at the upper right corner of the page.
| Layout Type | Description |
|---|---|
| Blank | An empty layout. |
| Group Stacked | Stacked layout grouped according to the field selected as “Group”. 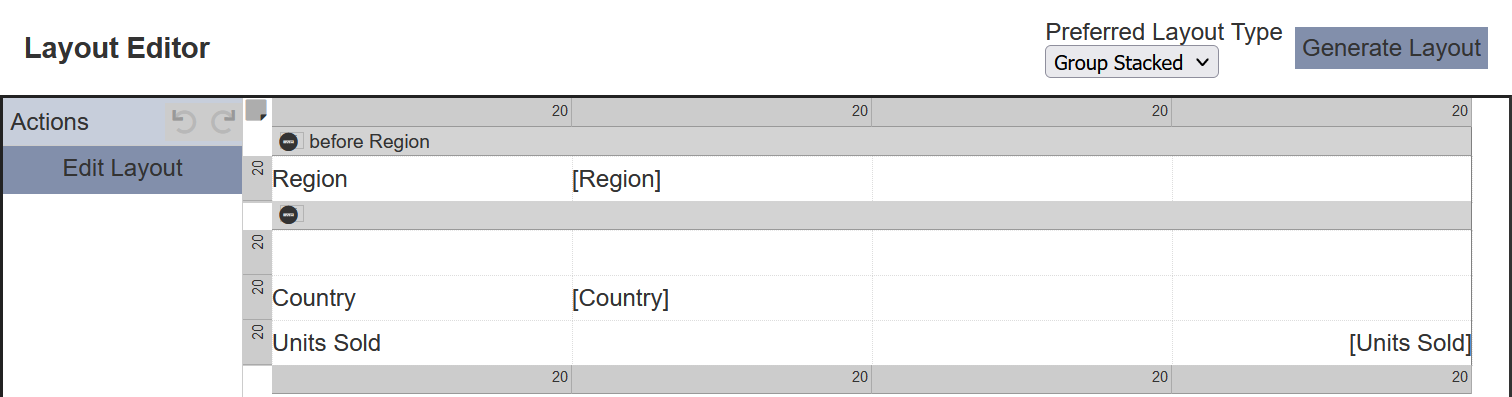 |
| Group Tabular | Tabular layout grouped according to the field selected as “Group”. 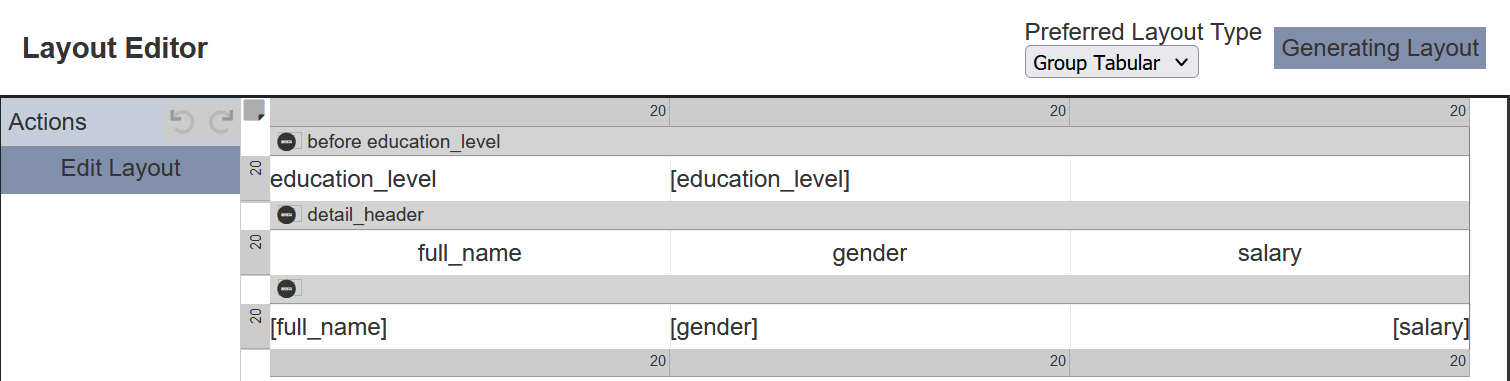 |
| Stacked | Stacked layout ignoring field selected as “Group”.  |
| Tabular | Tabular layout ignoring field selected as “Group”. 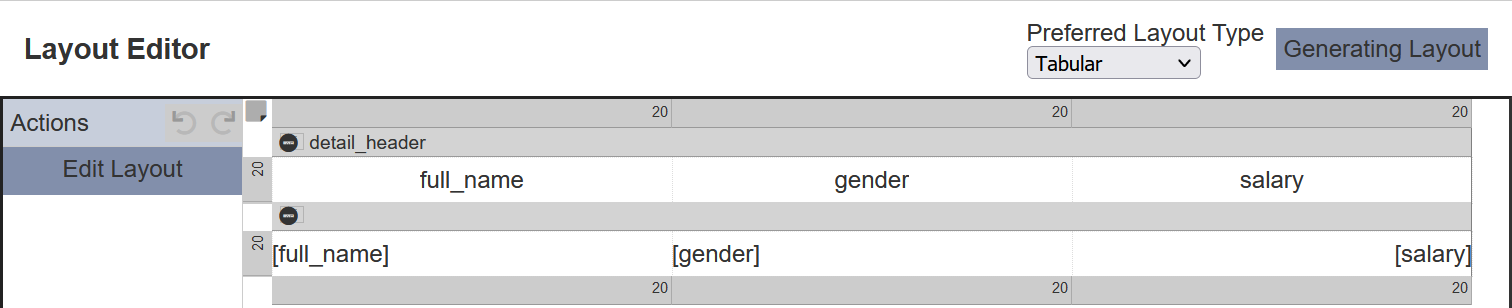 |
The type of layout can be selected and generated as per required. Do note that the layout type selected will affect the outlook of the report rendered.
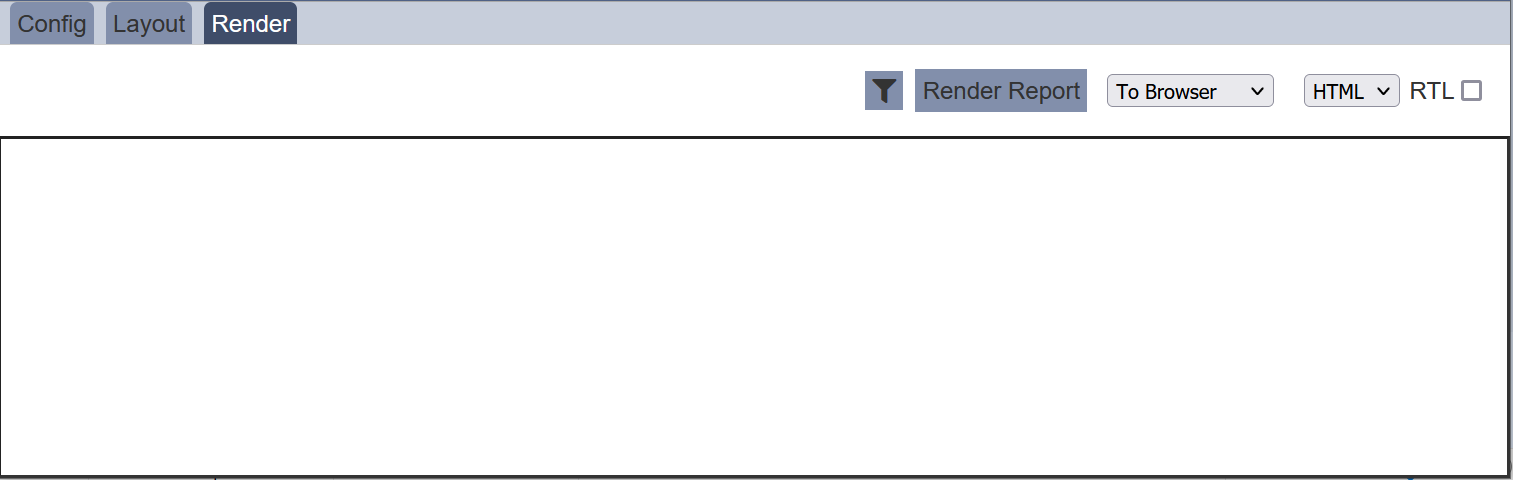
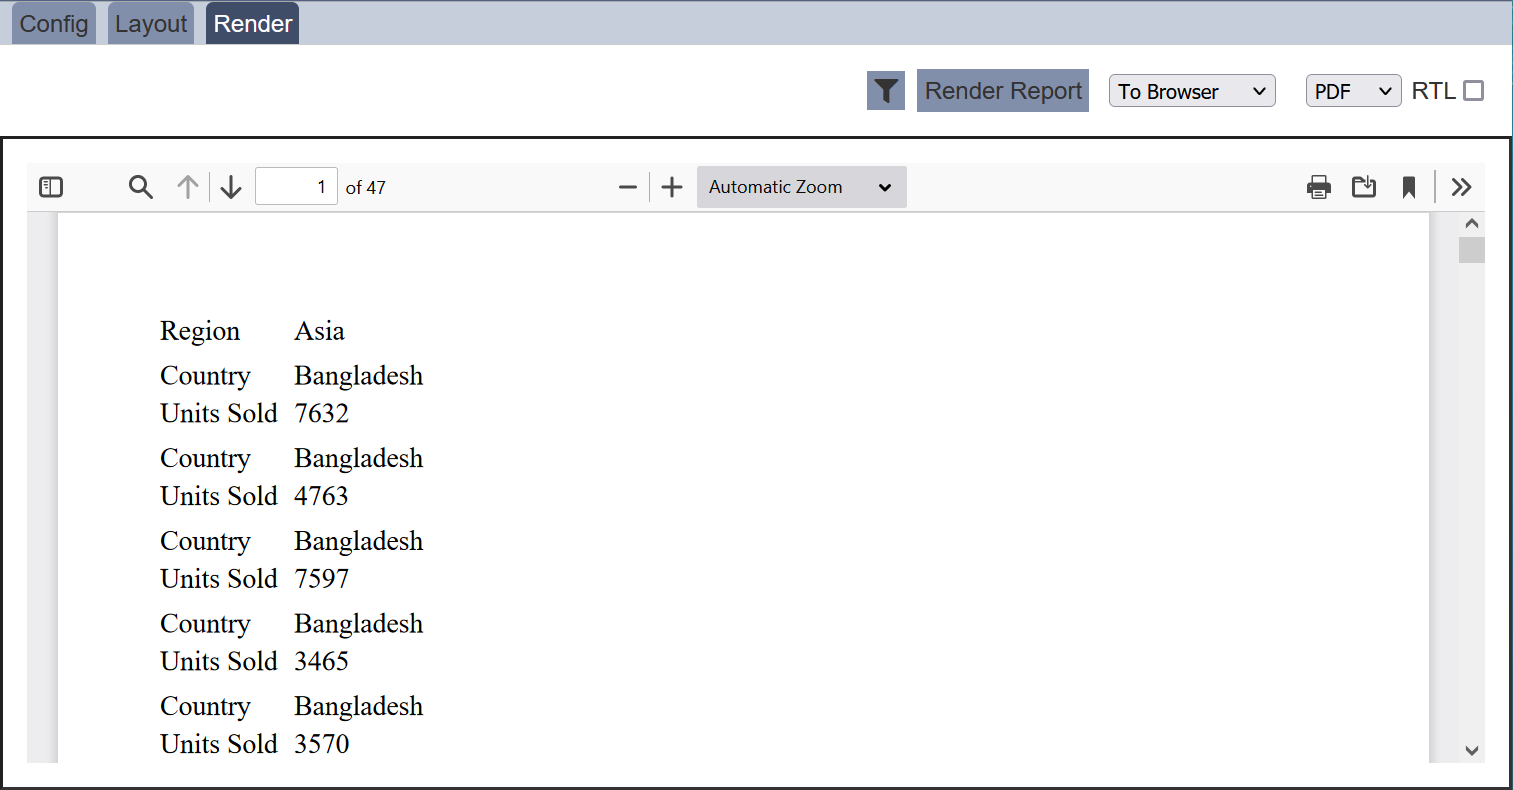
Render
The Render tab allows you to render the report with the dataset and layout selected in the Config tab. The layout of the report to be rendered will depends on the layout type selected and generated in the Layout tab.
Filter
The first icon in the Render tab is the  “Open” icon. Click in this icon opens the “Set Filter” dialog box. It allows you to key the code to set the default filter for the report.
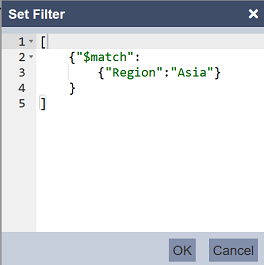
After the code is key in, click on the “OK” button to save the settings. Clicking on the “Cancel” button aborts the action.
Render Report
The next button is the “Render Report” button. The report rendered according to three conditions:
- Layout defined in the Layout tab
- Dataset and mappings defined in the Config tab
- Filter set using the “Set Filter” dialog box
There are two drop-down lists and a checkbox next to the “Render Report” button.
The two drop-down lists allows you to select the location and the format of the report prior rendering the report. The location can be selected is either “To Browser” and “To Repository”. The latter will result in the report being added into the Repository module.
While most languages are written from left to right, some language, like Arabic or Hebrew are written from right to left. If the report to be generated are these languages, select the “RTL” field checkbox, which will display the text from right to left.
To render a report, select the desired output format and location.
Select the desired location and output format from the drop-down lists beside the “Render Report” button respectively. Select the “RTL” checkbox if required.
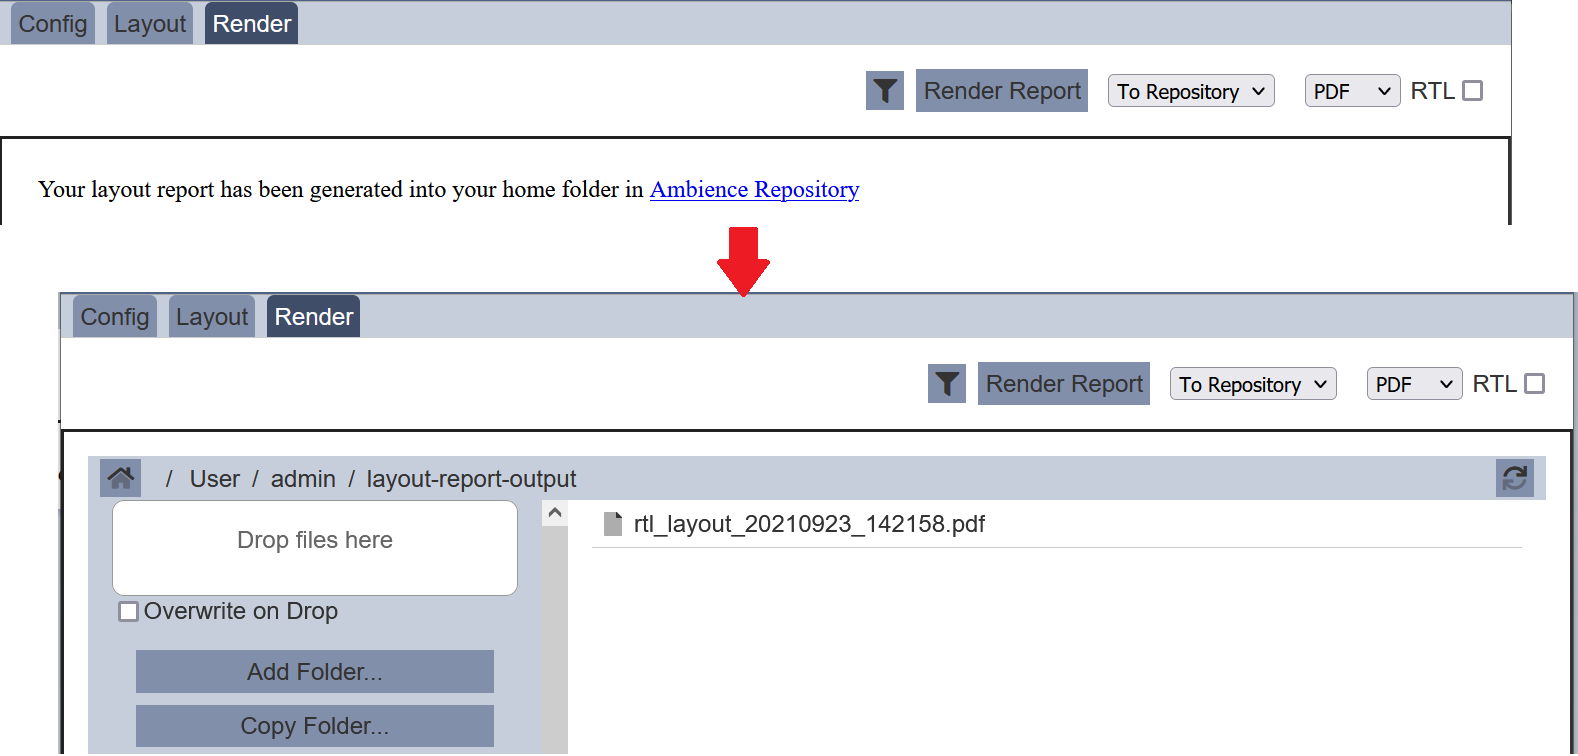
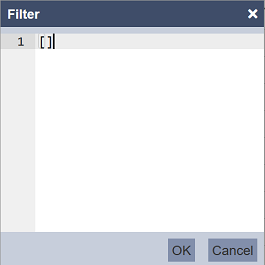
Then click on the “Render Report” button. The “Filter” dialog box will appear. If no filter has been set prior, the dialog box will be empty. If a filter has been set, you can edit the filter as required and click on the “OK” button. Do note that this change in the filter is only for this report. The default filter remains unchanged.
If the selected location is “To Browser”, the report will be displayed in the Render tab.
If the selected location is “To Repository”, a notification will appear to inform that report has been generated and added to the home folder. Click onto the link in blue will load the home folder in the Repository module.