
Editor
The Editor page allows you to create and edit the I18N data in the translation. The following privileges are required to access this page:
mod-i18n-editormod-i18n-translator

After a new translation is created in the management page, a blank Editor will appear. Do note that any action performed in the editor is automatically saved.
Interface
The Editor page is divided into four panels.
- Language
- Property
- Master
- Translation
Each panel has a title bar.
Language Panel
The Language panel consist of three icons at the title bar and rows of selected languages below.
| Icon | Description |
|---|---|
 “Invert Select” icon “Invert Select” icon |
Allows users to invert the selected languages listed in the panel. |
 “Add” icon “Add” icon |
Allows users to add a new language. |
 “More Actions” icon “More Actions” icon |
List all other available actions when clicked. It has the following options: - Import - Export - Delete |
Property Panel
The Property panel consist of three icons and a search function at the title bar and rows of properties below.
| Icon | Description |
|---|---|
| “Invert Select” icon |
Allows users to invert the selected property listed in the panel. |
| “Add” icon |
Allows users to add a new property. |
| “More Actions” icon |
List all other available actions when clicked. It has the following options: - Rename - Delete |
| Search function | Allows users to conduct a search for the rows below. |
Do note that this search function can be used by the Master and Translator Panels.
Master Panel
The Master panel consists two icons at the title bar and rows of master text to be translated below.
| Icon | Description |
|---|---|
 “Search” icon “Search” icon |
When enabled, allows users to conduct a search in the Master Panel based on the text entered in the search function in the Property Panel. It is disabled by default. |
| “More Actions” icon |
List all other available actions when clicked. It has the following options: - Import - Export |
Translator Panel
The Translation panel consists of an icon and a “Show Empty Only” checkbox at the title bar and the same number of rows of translated text below. The translated text may differ based on the language selected.
| Icon | Description |
|---|---|
| “Search” icon |
When enabled, allows users to conduct a search in the Translator Panel based on the text entered in the search function in the Property Panel. It is disabled by default. |
| “Show Empty Only” checkbox | When selected, will display only rows that has no translation (i.e., empty). |
Language
The Language panel allows you to add, edit, delete, import and export languages.
Add
In the Language panel, click on the “Add Language” icon to add a new language. The “Add New Language” dialog box will appear. Alternatively, you can use “Alt + L” shortcut key to launch the dialog box.
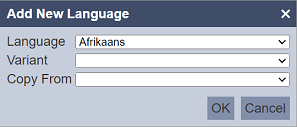
In the “Language” field, select the desired language from the drop-down list. Select the desired variant for the selected language from the drop-down list in the “Variant” field. In the “Copy From” field, you can either copy from an existing translation or create a blank translation by selecting blank option from the drop-down list. Click on the “OK” button to add the new language or click on the “Cancel” button to abort the action. Do note that a language (with a particular variant) can be added only once.
Delete
To remove a language, select the checkbox on the left of the desired language and click on the icon that appear. Select the “ Delete” option. The “Confirm Delete” dialog box will appear.
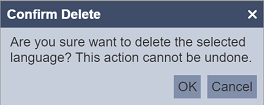
Do note that this action is irreversible, proceed with caution. To confirm the deletion, click on the “OK” button. To abort the action, click on the “Cancel” button.
Import
This function allows you to import the language translation.
To import a language, click on the “More Actions” icon at the title bar and select “Import” from the list of options. The “Import” dialog box will appear.
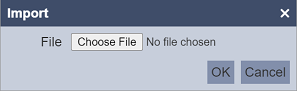
Click on the “Choose File” to browse to the location of the desired file. Once the desired file is selected, click on the “OK” button to import the translation.
A message and the “import Wizard” dialog box will appear.
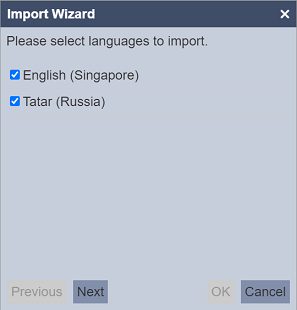
The first page of the import wizard displays all the available languages in the selected file. By default all languages are selected. Select or unselect the languages as desired and click on the “Next” button.
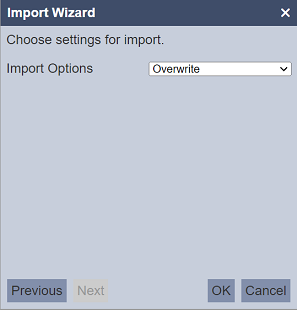
The second page of the import wizard allows you to choose either to overwrite existing translations or merge the translations.
To go back to the previous page, click in the “Previous” button. To abort the import action, click on the “Cancel” button.
In the “Import Options” field, select the desired option from the drop-down list. If “Overwrite” is selected, no other fields need to be defined.
If “Merge” is selected, the “Merge Options” field will appear.
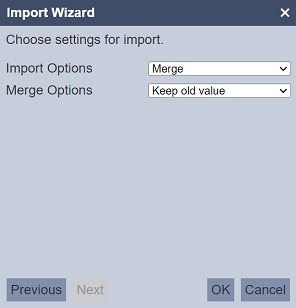
Select either to keep or replace the old value from the drop-down list.
Click on the “OK” button to import the translations.
If the wrong file is selected, an error message will appear.

Export
This function allows you to export language.
To export a language, select the checkbox next to the desired language. Click on the “More Actions” icon at the title bar and select “Export” from the list of options. The “Export Language” dialog box will appear.
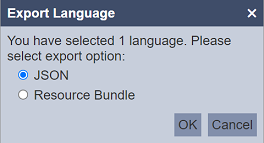
There are two options available:
- JSON
- Resource Bundle
For the JSON option, one or more languages can be selected to export. While for the Resource Bundle option, only one language can be selected at one time.
By default, JSON is selected. Select as desired and click on the “OK” button to export the language.
A message will appear after the translation is exported.

Depending on the selected output format, the exported file will have either one of the following format:
<filename>_transliation.jsonfor JSON<filename>_<en>_<cc>.propertiesfor Resource Bundle (where<en>is the language code and<cc>is the country code)
Property
This panel allows user to add, delete, and rename the property name, as well as the master data (optional).
Add
To add a property, click on the “Add Property” icon. The “Add New Property” dialog box will appear. Alternatively, you can use “Alt + P” shortcut key to launch the dialog box.
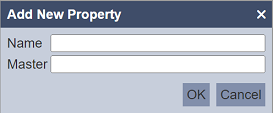
Key in an unique property name in the “Name” field. In the “Master” field, enter the master data (optional). Click on the “OK” button to save the property or click on the “Cancel” button to abort the action.
If the property name already exist, an error message will appear.

Once the property is added, the property and the master data will appear in the Property and Master panels respectively.

View
If the text in the Property is too long, it may not to be displayed in full. To view the text in full, hover over the text and the  icon will appear. Click on the icon and the “Property Name” dialog box will appear.
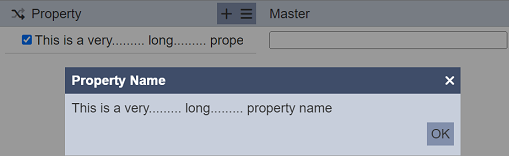
Click on the “OK” button to close the dialog box. Note that the property name is not editable in the dialog box. To edit the property name, use the “Rename” option in the menu from the icon.
Rename
To rename a property, select the checkbox next to the desired property and click on the icon. Select the “Rename” option. The “Rename Property” dialog box will appear.
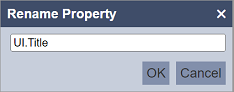
Rename as desired and click on the “OK” button to save the change.
Delete
To delete a property, select the checkbox next to the desired property and click on the icon. User can select more than one property to be deleted at the same time. Select the “ Delete” option. The “Confirm Delete” dialog box will appear.
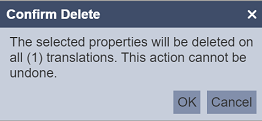
Do note that this action is irreversible, proceed with caution. To confirm the deletion, click on the “OK” button. To abort the action, click on the “Cancel” button.
Master
The Master panel displays the master data entered via the Property panel. With the correct privilege, user can edit the master data in the textbox.
Edit
The textbox in the Master panel will be empty if no master data is entered prior. If the text is too long and cannot be displayed entirely, hover over the textbox and the “Expand” icon will appear. Click on the icon to display the “Edit” dialog box.
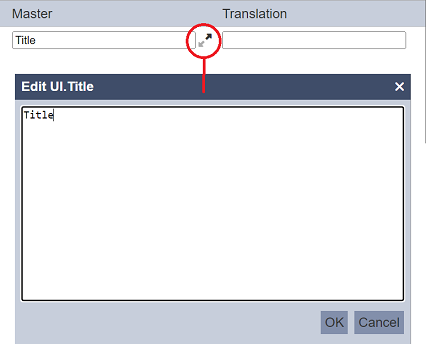
Edit as desired and click on the “OK” button to save the change. To abort, click on the “Cancel” button.
Import
This function allows you to import the master text, along with the properties and translations.
To import a master text, click on the “More Actions” icon at the title bar and select “Import” from the list of options. The “Import” dialog box will appear.
Click on the “Choose File” to browse to the location of the desired file. Once the desired file is selected, click on the “OK” button to import.
A message and the “import Wizard” dialog box will appear.
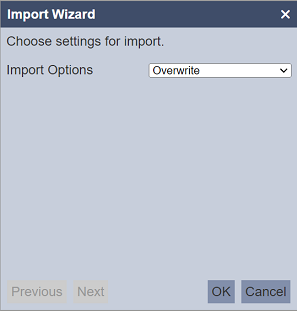
The first page of the import wizard allows you to choose either to overwrite existing master text or merge the master text.
To abort the import action, click on the “Cancel” button.
In the “Import Options” field, select the desired option from the drop-down list. If the “Overwrite” option is selected, no other fields need to be defined.
If the “Merge” option is selected, the “Merge Options” field will appear.
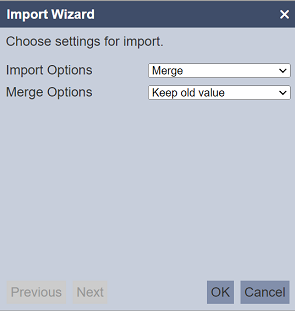
Select either to keep or replace the old value from the drop-down list.
Click on the “OK” button to import.
If the wrong file is selected, an error message will appear.
Export
This function allows you to export the master text, along with the properties and translations.
To export master text, click on the “More Actions” icon at the title bar and select “Export” from the list of options. The “Export Master” dialog box will appear.
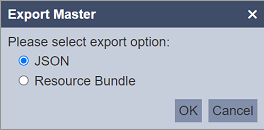
There are two options available. One is JSON format and the other is Resource Bundle. By default, JSON is selected. Select as desired and click on the “OK” button to export the master text.
A message will appear after the master text is exported.
The exported file will have either one of the following format:
<filename>_master.jsonfor JSON<filename>_master.propertiesfor Resource Bundle
Translation
The Translation panel displays the translation text. With the correct privilege, user can edit the text in the textbox.
Edit
The textbox in the Translation panel will not appear if no language is selected in the Language panel.
If the text is too long and cannot be displayed entirely, hover over the textbox and the icon will appear. Click on the icon to display the “Edit” dialog box.
![]()
The dialog box displays both the master data and the translation data. Edit as desired and click on the “OK” button to save the change. To abort, click on the “Cancel” button.
Show Empty Only
The “Show Empty Only” checkbox at the title bar when selected, displays rows that does not have translations.
![]()
Search
The search function allows you to conduct a search in the Property, Master and/orTranslation panels.
The “Search” icon at the title bar of the Master and Translation panels are disabled be default.
To conduct a search, key in the relevant text in the textbox at the Property panel title bar. By default, the search is conducted on the Property panel.

To add the search on the Master panel, click on the icon in the title bar. The search result now includes the Master panel.

The same can be done on the Translation panel.