Chart Designer
The Org Chart module allows user to construct organisation charts and also link them to ETL steps and vice versa to allow functions, such as querying the charts to find an employee’s superior for escalation.
Besides constructing organisation charts, the Org Chart module is integrated with the Data Catalog module to allows for it to be used to construct directed tree diagrams of any kind.
An organisation chart can hold multiple hierarchies (i.e., directed trees). All the hierarchies within an organisation chart share the same pool of nodes that can be added to them.
A hierarchy is a directed tree meaning that it has no cycles and nodes may only have a single parent. Representation of multiple parents (e.g., reporting to multiple bosses) can be represented across multiple hierarchies denoting the different relations.
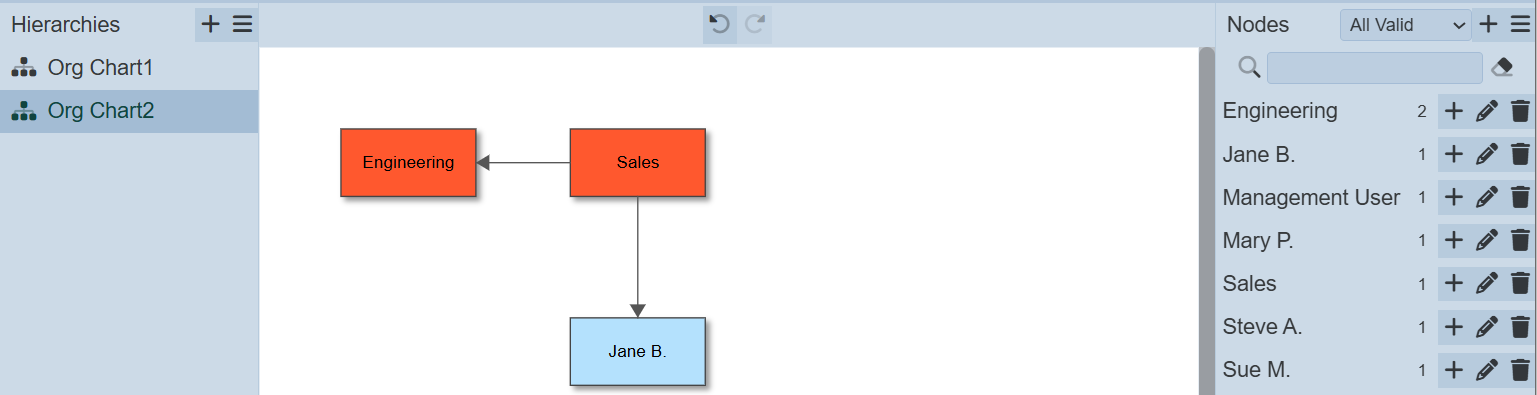
The tree itself is composed of nodes and relations from parent node to child node. The arrows flow down the tree (i.e., from parent to child). The nodes are assigned types that come from the Data Catalog and have fields associated them.
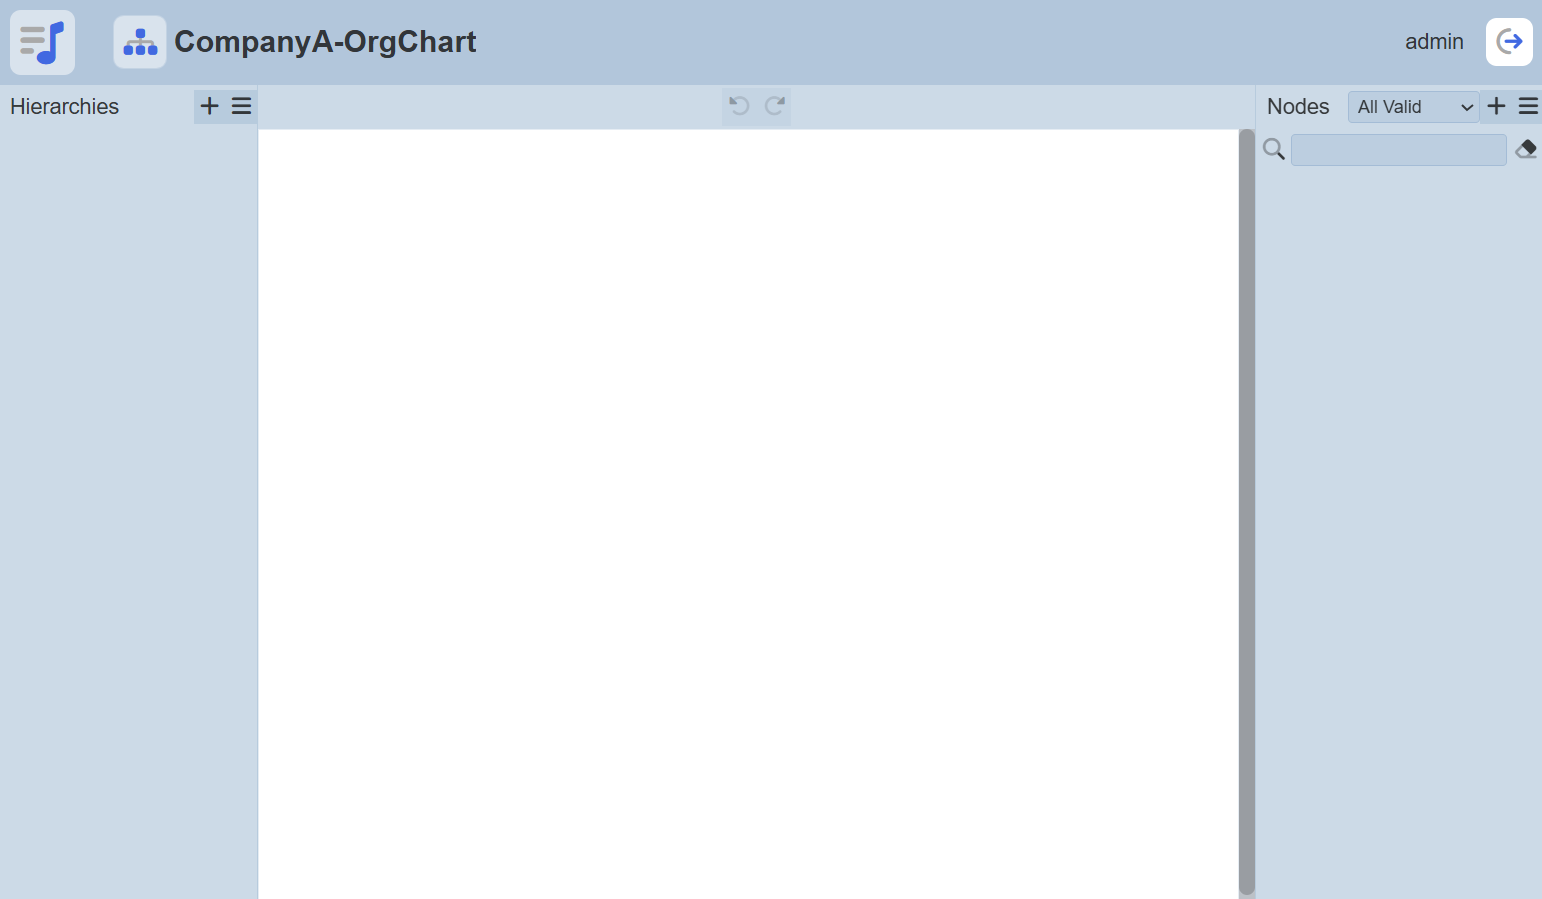
During initial creation, a blank organisation chart will appear.
The Chart Designer page is divided into three parts:
- Hierarchies Panel
- Design Area
- Nodes Panel
Hierarchy Panel
In the Hierarchy Panel, it can be divided into two parts:
- Top Row
- Lower panel
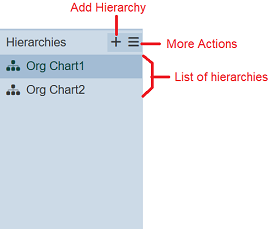
The top row consists of two icons, namely the “Add Hierarchy” and “More Actions” icons. The lower panel displays the list of hierarchies. Only one hierarchy is selected at any one time and its tree is displayed in the Design Area.
Add Hierarchy
To add a hierarchy, click on the “+” icon in the top row. The “Add New Hierarchy” dialog box will appear.
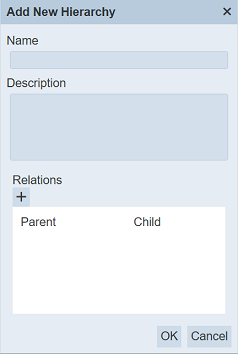
| Field | Description | Mandatory | Constraint |
|---|---|---|---|
| Name | Unique name assigned to the org chart. | Y | Any text (case-sensitive) |
| Description | Brief description of the org chart. | N | Any text |
| Relations | List the parent-child relations. | Y | At least one relation must be defined |
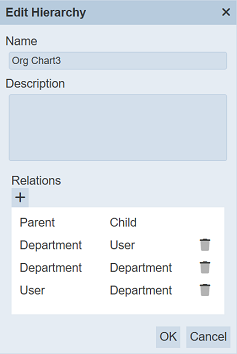
In the “Add New Hierarchy” dialog box, key in the name to be given to the hierarchy into the “Name” field. The “Name” field must be a unique value (not used by other hierarchies) and it is case-sensitive.
Provide a brief description for the hierarchy in the “Description” field.
Click on the “+” icon below the “Relations” field. The “Add Relation” dialog box will appear.
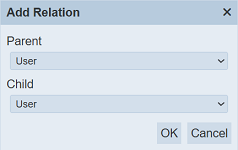
The list of options available in the drop-down lists are provided by the Data Catalog module.
In the “Parent” field, select a value from the drop-down list. Select a value from the drop-down list in the “Child” field. Click on the “OK” button to add the relation to close the dialog box. Do note that more than one relation can be defined. Repeat the above steps until all the desired relations are added.
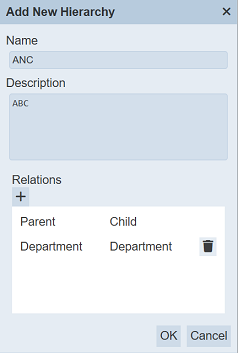
If any of the relations need to be removed, click on the  “Delete” icon on the right of the relation.
Once all fields are set, click on the “OK” button to add the new hierarchy.
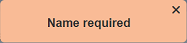
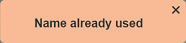
If the “Name” field has no value or the name already exist, the relevant error message will appear.
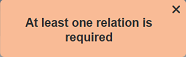
If no relation is defined, an error message will also appear.
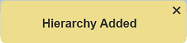
Once the new hierarchy is added successfully, a message will appear.
Edit Hierarchy
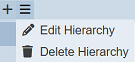
To edit a hierarchy, select the desired hierarchy to edit and click on the  “More Actions” icon. Select the “Edit Hierarchy” option from the list.
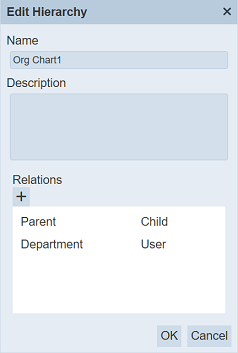
The “Edit Hierarchy” dialog box will appear.
Edit the “Name” and “Description” fields as desired.
To add more relations to the hierarchy, click on the “+” icon below the “Relations” field. Click on the  “Delete” icon to next to the relation to remove it. At least one relation must be defined, else an error message will appear.
Click on the “OK” button to save the changes. A message will appear to confirm the change is saved.
Do note that if only one relation has been defined prior, the “Delete” icon will not appear next to the only relation in the dialog box.
Delete Hierarchy
To delete a hierarchy, select the desired hierarchy to delete and click on the “More Actions” icon. Select the “Delete Hierarchy” option from the list.
A “Delete Hierarchy” dialog box will appear to prompt the user to confirm the action.
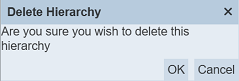
Click on the “OK” button to confirm the action. To abort, click on the “Cancel” button.
Once deleted successfully, a message will appear.
Node Panel
The Node Panel allows user to add, edit, delete and populate nodes for the tree in the Design Area.
The Node Panel consists of two parts, the top row and the list of nodes below.
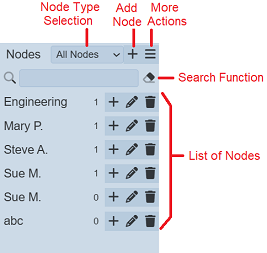
The node type selection at the top of the panel allows user to filter the nodes according to the type selected. The nodes are shared across the hierarchies. By default, any nodes that are not of a type that is allowed in the current hierarchy are not shown by the drop-down list at the top of the panel.
Add Node
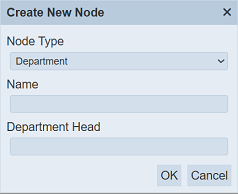
To add a node, click on the “+” icon at the top row. A “Create New Node” dialog box appear.
| Field | Description | Mandatory | Constraint |
|---|---|---|---|
| Node Type | Defines the node type. | Y | Select one |
| Name | Name of node. | Y | Any text |
| Department | |||
| Department Head | Name of department | N | Any text |
| User | |||
| Gender | Defines gender of user. | N | Select one |
| Department | Defines name of department | N | Any text |
| Address | Defines address of user. | N | Any text |
Select the desired option from the drop-down list in the “Node Type” field. The fields below will vary according to the type of node selected.
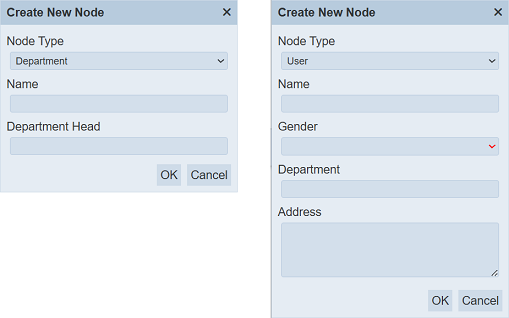
Key in a unique name for the new node in the “Name” field. In the fields, select or key in the desired values.
Click on the “OK” button to save the new node.
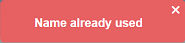
If the name is left empty or the name already exist, the relevant error message will appear.

Upon successful adding the new node, a message will appear.
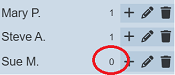
Each node has a number next to it to indicate how many different hierarchies the node is on. By default, the number is 0 for newly added node.
Note
- Once a node has been created, its type cannot be changed.
- If no hierarchy is created, no nodes can be created.
Edit Node
To edit a node, click on the  “Edit” icon on the right of the desired node.
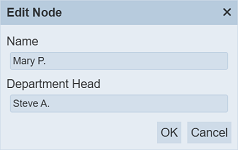
Edit as desired and click on the “OK” button to save the changes.
Delete Node
To delete a node, click on the “Delete” icon on the right of the desired node.
If the node has been added to any hierarchy, a dialog box will appear.
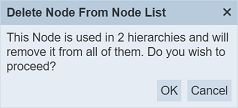
Click on the “OK” button to confirm the action. A message will appear once the delete is completed.
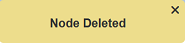
Do note that there is no undo for this action.
Populate Node
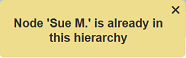
To populate the org chart with a node, click on the “+” icon on the right of the desired node. The node will be added into the Design Area and the number next to the node will increase by one.
A node can only be added to a hierarchy once. If the node has been added prior, an error message will appear.
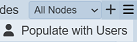
Populate With Users
This function allows user to take the list of Ambience users and populates the Node Panel with them as the selected node type.
To do so, click on the “More Actions” icon in the top row.
The “Populate From User List” dialog box will appear.
Select the desired option in the “Node Type” field and click on the “OK” button. The list of Ambience users will be added into the Node Panel.
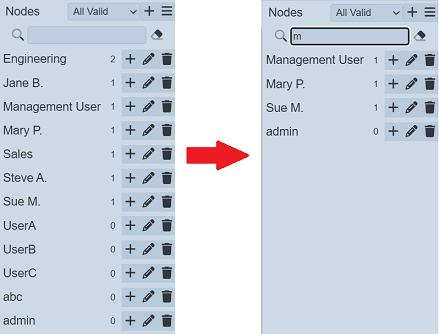
Search Node
There is a cross-field search function for the list of nodes, just below the top row.
This provides an easy way to search through the nodes. It is case-insensitive and displays files that have the entered search value in any of the values of the fields below:
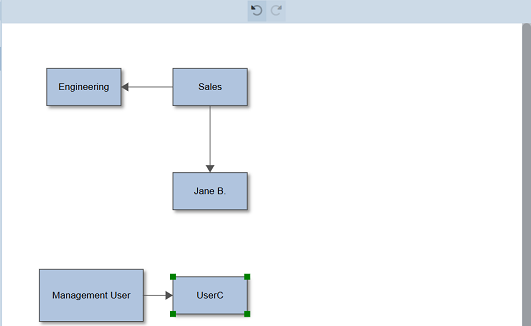
Design Area
The Design Area allows users to create the hierarchy tree.
The two icons at the top centre of the Design Area, namely “Undo Move” and “Redo Move” allows user to undo and/or redo any move action done on the hierarchy.
Select Node
To select a node, simply click on the node itself. Four green squares will appear at the four corners to indicate that the node is selected.

Once the nodes are added to the hierarchy, they can be drag-and-drop to arrange the tree.
Multiple nodes can be selected by clicking on the CTRL key on the keyboard. They can then be moved simultaneously and will retain their relative positioning.
Resize Node
The nodes can also be resized. Simply select a node and drag any corner of the highlighted node.
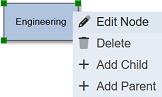
Right click on the node and a list of available actions will appear.
Edit Node
This function allows user to edit the node as per in the Node Panel.
To edit a node in the Design Area, right click on the desired node and select the “Edit Node” option.
The “Edit Node” dialog box will appear.
The fields that will appear in the dialog box vary according to the node type defined prior. Edit as desired and click on the “OK” button.
Delete Node
This function allows user to remove a node from the Design Area but the node still exist in the Node Panel.
To delete a node from the Design Area, right click on the desired node and select the “Delete Node” option.
The node will be removed from the Design Area. In the Node Panel, the number next to the node will decreased by one.
Add Child/Parent
This function allows user to child/parent relation according to the hierarchy’s allowed relations defined prior.
To add a child/parent relation, right click on the desired node and select the desired option.
The “Add Child” or “Add Parent” dialog box will appear.
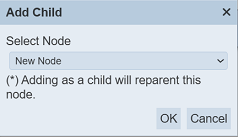
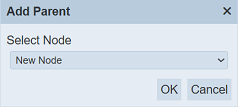
The list of options from the drop-down list in the “Select Node” field allows user to create a new node or select an existing node. Select the desired option from the “Select Node” field and click on the “OK” button to add the child.
If the “New Node” option is selected, the “Create New Node” dialog box will appear, allowing user to create a new node. See Add Node for more details.
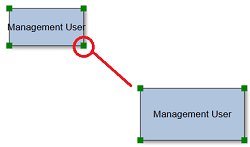
When an existing node is selected as an option, the child node (if not added in the Design Area, the child node will be added) and a line will be drawn between the parent and child nodes, with an arrow pointing towards the child node.
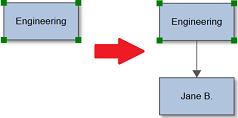
If the node being added as a child already has a parent, then the added node will be reparented.
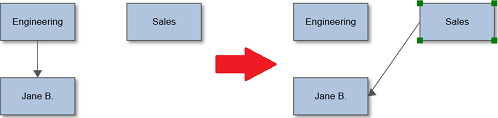
For a parent node, more than one node can be linked to it.
Changing Node Colour
By default, the nodes in the Org Chart has the same colour, LightSteelBlue. User can change the colour of the nodes by using the Lookup module.
In the Lookup module, add a lookup in the format OrgChart.<NodeType> and define the desired colour.
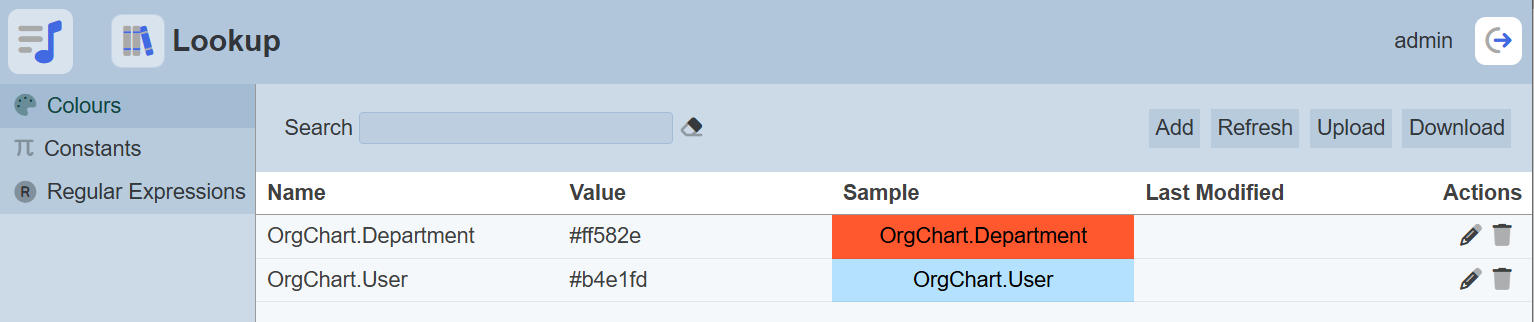
Refresh the Org Chart and the new colours will be displayed.