
Report Job Queue
Ambience/Repertoire stores all state in MongoDB. This means that users can run as many Ambience instances as required to scale up the load. A load balancer can be attached on the front to share the web work amongst a number of instances. Other instances can also be used to provide no web services and to provide job engines for handling RML, DocX and ETL loads.
The default mechanism for scaling Ambience/Repertoire is therefore to add more instances.
Let’s explore how we can use this approach to solve a particular customer’s problem - they have some very slow reports. For example, let’s say they want to dedicate two engines to slow RML reports.
The setup is simple:
- Clone the instance
- Change the runners
- Disable bind
- Add parameters to the RML
Clone Instances
Create two servers, let’s call them Server1 and Server2.
Change Runners
For Server1, use the default settings as per in the application.conf configuration file in the “etc” folder. The default setting for queue is as follows:
ambience.queue {
  manager {
    engines: ["first","second"]
    ...
  }
  runners: {
    "docx" : "ambience.docxengine.queue.DocXJobRunner"
    "etl" : "ambience.etl.runtime.queue.ETLJobRunner"
    "rml" : "ambience.rmlengine.queue.RMLJobRunner"
  }
}
For Server2, it is to be used as a server for long RML reports. Edit the following:
ambience.systemId: "System2"
ambience.queue {
  manager {
    engines: ["third","fourth"]
    ...
  }
  runners: {
    "rml-slow" : "ambience.rmlengine.queue.RMLJobRunner"
  }
}
Disable Bind
In Server2, add the following line in the application.conf file:
ambience.web.bind-enabled = false
This tells the system that this server is not serving web pages. Therefore it does not matter that the default port (1740) clashes with the other server. Of course, if two web servers are desired, leave this enabled, change the port and set up a load balancer to share the load between both ports.
Run both servers. One will only handle rml-slow job types while the other will handle rml, docx and etl job types. Do note that these are job types, not queues. There is still only one queue (see JobQueue in MongoDB) but different instances are configured to recognise different items in the queue.
If an engine only handles rml-slow, then it will ignore anything earlier in the queue and only pull out the first rml-slow request for handling.
That just leaves telling the queue system which job type of RML are there.
Add Parameters To RML
Connect the Designer to the Ambience server. Open an RML and add a parameter.

Two choices are provided: rml and rml-slow to match the names of the two job types. Save the RML and go to the Repository and render the modified RML.
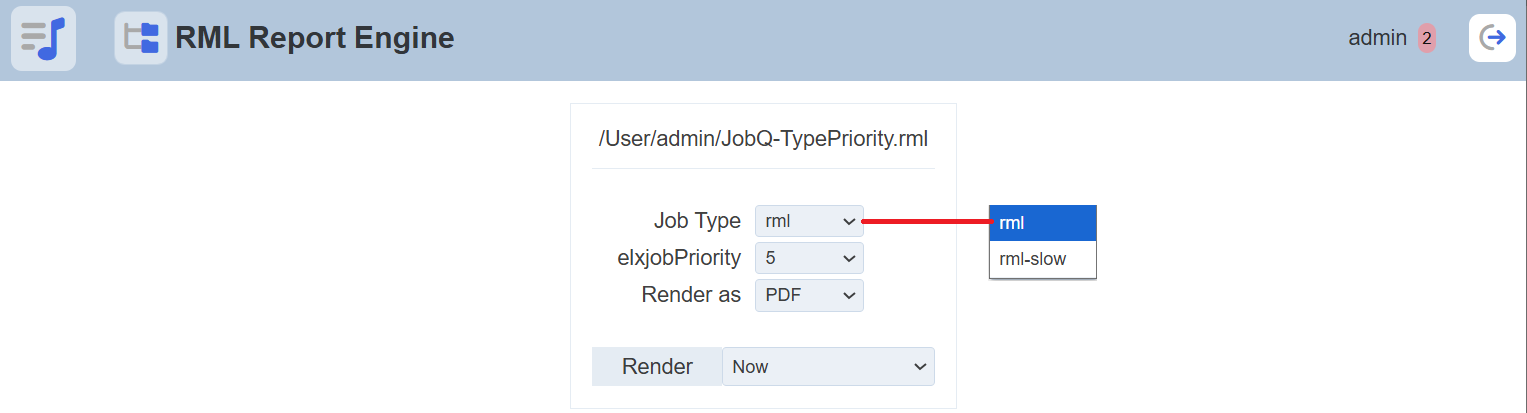
If rml is chosen, the main “web” server (Server1) will render the report. If rml-slow is chosen, then slow server (Server2) will render the report.
From the JobQueue collection, under the “engine” column, the third engine is selected to run the report.

Note that the choice of Job Type must be done as a parameter. It cannot be a value inside the RML file because the logic would need to retrieve into the RML to extract the information before it could add it to the queue. As it is an external parameter, it can be passed via HTTP to the render endpoints just by using the ?elx-jobType=rml-slow URL syntax.
Render Time
You may notice that if you run the RML using rml-slow, it will take a little while longer to reply than if rml is used, even if it is the same report.
If it is run as rml, then it might not appear in the JobQueue at all.
These two observations are linked. The web server (Server1) has some special “bypass” logic which says “if there is an engine free - forget the queue, just call it now”. These items will not appear in the JobQueue and will provide a fast, interactive return. However, if all engines are busy, the request will be queued.
Queued requests are slightly slower because of the overheads of submitting and retrieving jobs from the queue. For long reports, which can take tens of minutes, a second or two is negligible, which is why rml-slow is put on the non-web engine where there is no bypass logic to avoid the queuing.
Priorities
The elx-jobPrority governs how items are ready from the queue. It can be defined just like the elx-jobType in the Designer.

When an engine is looking for work, it will sort the eligible jobs (i.e., those with a jobType it understands) by:
jobPriorityexpireAttime (derived from when it was added to the queue)
In other words, with three priority 5 reports, the earliest added would be chosen, but any priority 1 report would be done first.
In the above example, user chooses between 1, 3, 5, 7, 9, with the default being 5. The JobQueue shows the selected value.
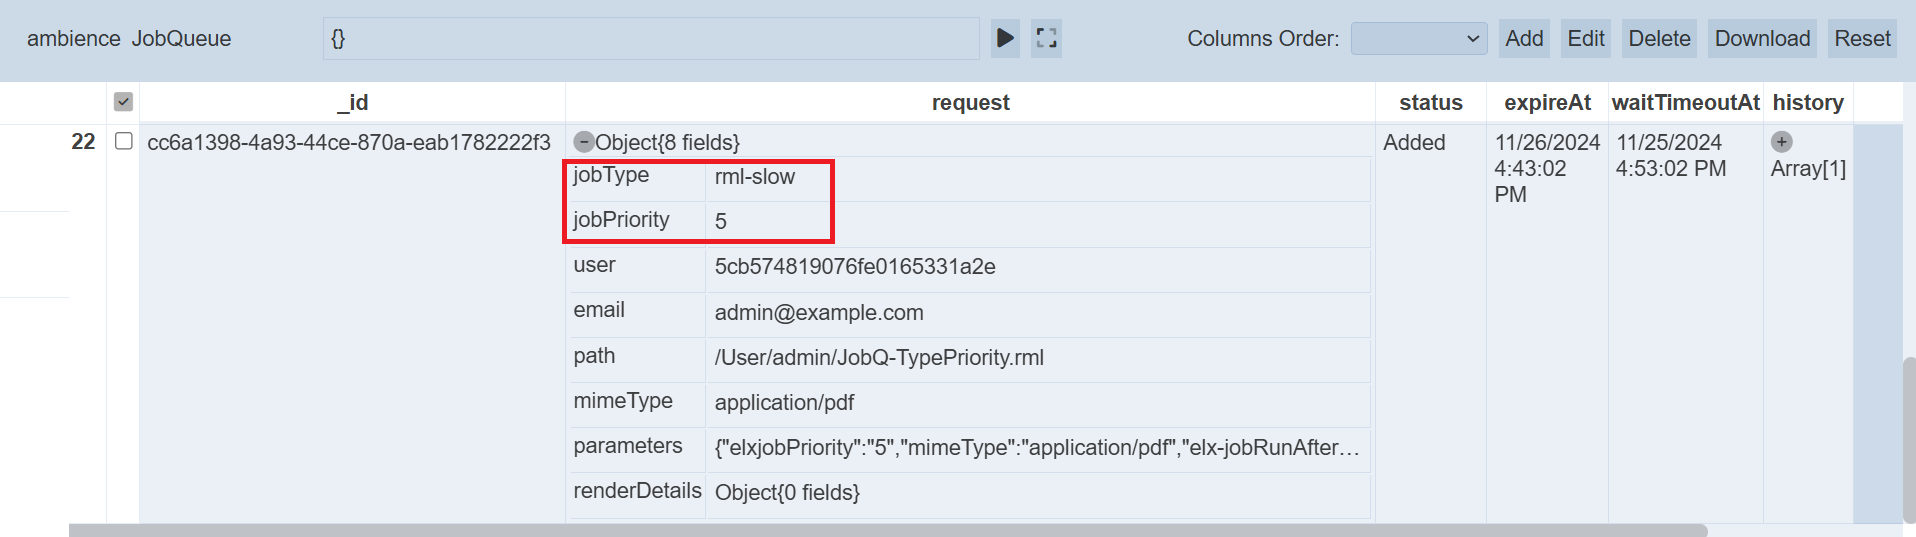
No elx-jobPriority was set, so the default of 5 is chosen. If a value is to be specified, then “1” is the first (highest) priority. There is no limit on the number, a value of “100” can be set for a very, very low priority job, for example. Again, this value can be passed as part of the URL if it is calling the server from outside. Below is en example:
elx-jobType=rml-slow&elx-jobPriority=7