Index Management
The Index Management tab in the Developer module allows you to manage the indexes of the selected database collection.

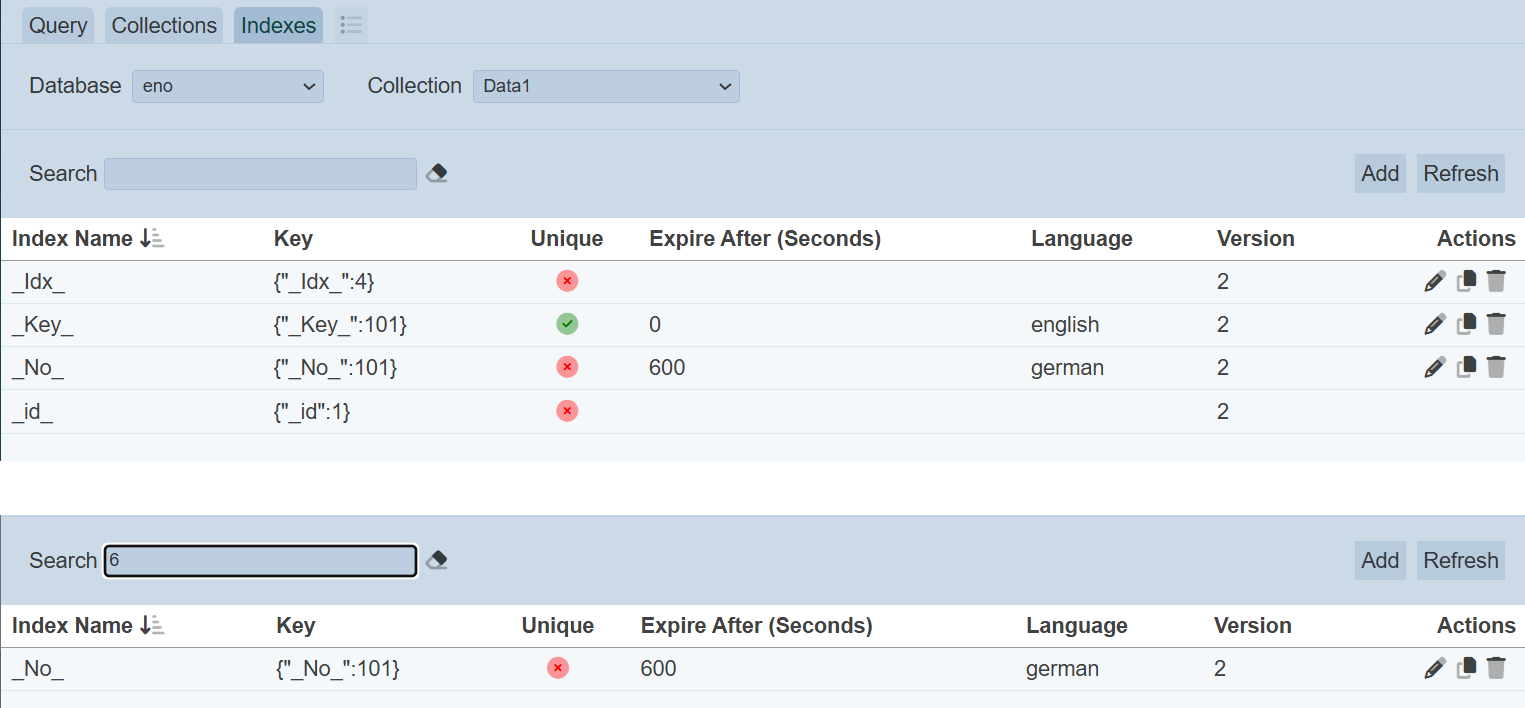
The upper part of the page allows you to select the database and collection, and search the list of indexes, as well as action buttons that you can perform on the collection. The lower part of the page displays the indexes for the selected collection and the action icons that can be performed on the indexes.
In this page, you can perform the following:
- Select database collection
- Add index
- Edit index
- Copy index
- Delete index
- Refresh
- Search
All database collections have an index on _id created by default, which is not editable.
Select Database/Collection
To display the indexes of a collection, select the desired database in the “Database” field and select the desired collection in the “Collection” field. The indexes of the selected collection will be displayed in the panel below.
Add Index
To add an index to the collection, click on the “Add” button at the upper right of the page.

The “Add” panel will appear.
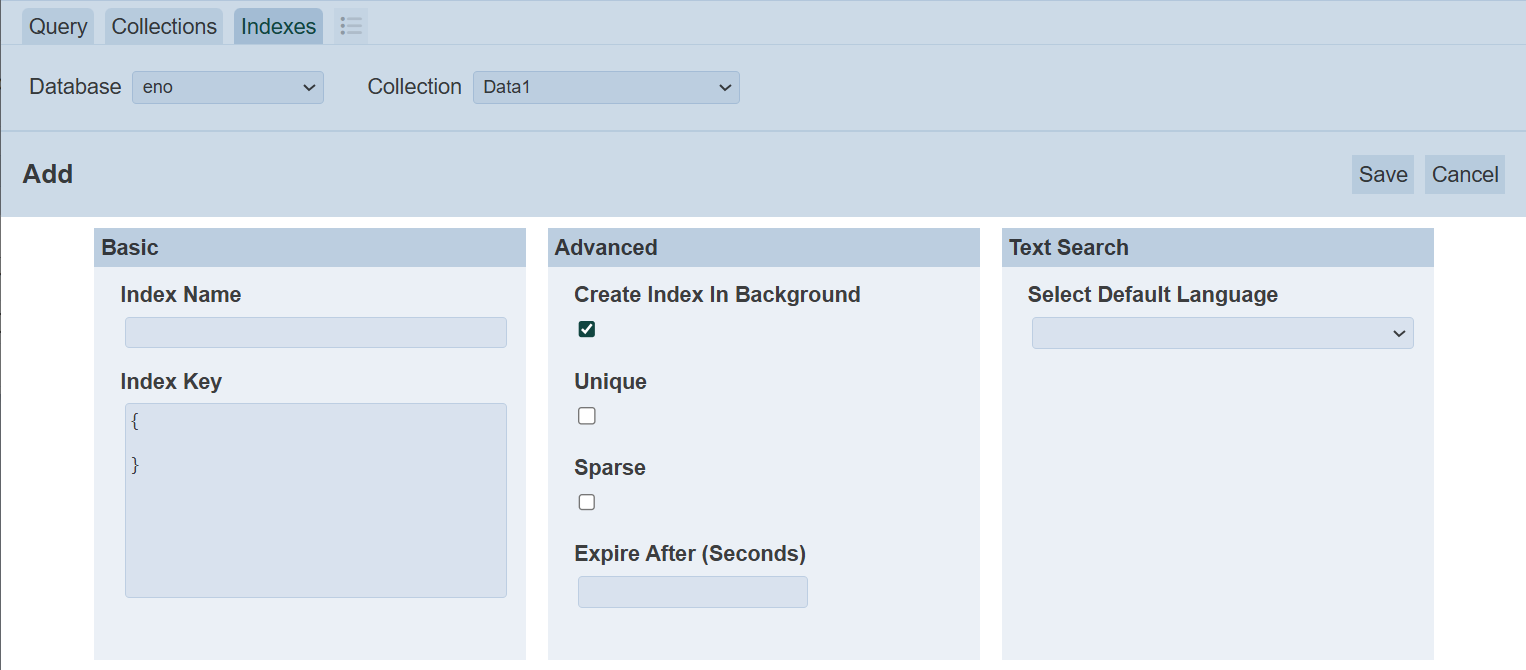
| Field | Description | Input Type | Default Value |
|---|---|---|---|
| Basic | |||
| Index Name | Name of new current index. | Textbox | None |
| Index Key | Code for new key. | Textbox | None |
| Advanced | |||
| Create Index in Background | If selected, creates index in the background. | Checkbox | Selected |
| Unique | If selected, creates an unique index. | Checkbox | Not selected |
| Sparse | If selected, index only references documents with specified field. | Checkbox | Not selected |
| Expire After (Seconds) | Defines when the expiry of the key in seconds. | Textbox | “0” |
| Text Search | |||
| Select Default Language | Defines the language to be used. | Drop-down list | None selected |
In the Basic section, key in the unique name for the new index in the “Index Name” field. Key in the desired code in the “Index Key” field.
The Advanced section list the available options for the index types. Multiple selection is allowed. In this case, three options available:
- Create Index in Background - If selected, creates index in the background
- Unique - Creates an unique index so that the collection will not accept insertion or update of documents where the index key value matches a existing value in the index
- Sparse - If selected, the index only reference documents with the specified field
The “Expire After (Seconds)” defines when the key expires. By default, the value is “0”.
In the “Text Search” section, select the desired language from the drop-down list in the “Select Default Language” field.
Click on the “Save” button at the upper right corner of the panel to save the new index.
A notification will appear once the new index is created.

Error message will appear if any of the fields are entered or selected incorrectly. Below is an example.


If the “Unique” option is selected for the index, a green tick will appear under the “Unique” column corresponding that index. Those indexes that do not select the “Unique” option will have red crosses under the “Unique” column.
Edit Index
To edit the properties of an index, click on the  “Edit” icon under the “Actions” column corresponding the desired index.

The “Edit” panel will appear.
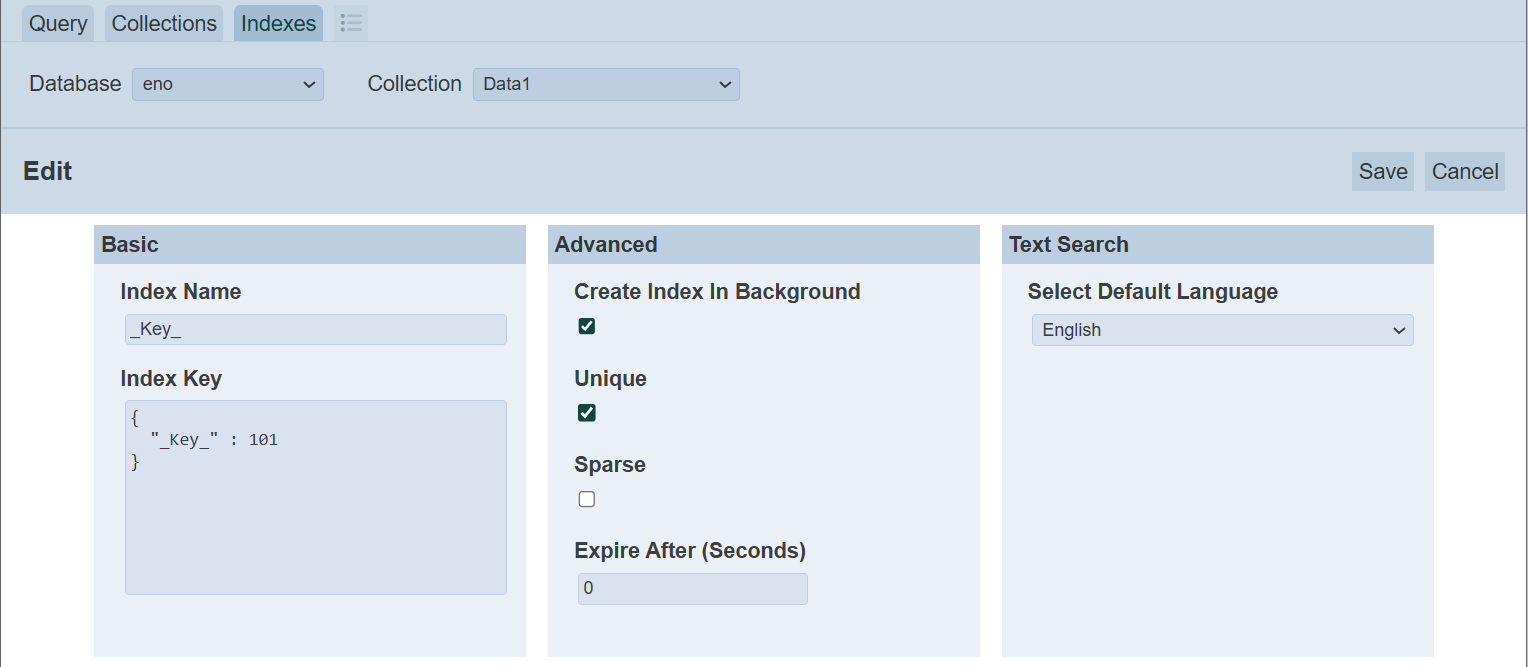
Except for the “Index Name” field, edit the other fields as necessary and click on the “Save” button to save the changes.
A notification will appear after the index is saved.

Copy Index
You can copy the index from the current collection to another collection. To do so, click on the  “Copy” icon under the “Actions” column corresponding the desired index.
The “Copy Collection’s Index” dialog box will appear.
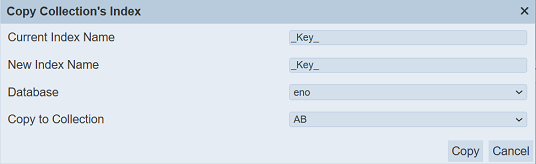
| Field | Description | Input Type | Default Value |
|---|---|---|---|
| Current Index Name | Name of the current index (not editable). | Textbox | As selected |
| New Index Name | Name of the new index. | Textbox | As in “Current Index Name” |
| Database | List of database available. | Drop-down list | Name of current database |
| Collection | List of collections available. | Drop-down list | First collection in “Database” |
In the “New Index Name” field, the default index name is used. Change to the appropriate name if the default name is not desired. The “Database” field shows are current database of the selected index. Change to the appropriate database. In the “Copy to Collection” field, select the collect to copy the index to and click on the “Copy” button to copy the index.
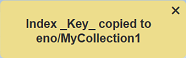
A notification will appear after the index has been successfully copied to the other collection.
If the index already exist in the other collection, an error message will appear.

Delete Index
To delete an index, click on the  “Delete” icon under the “Actions” column corresponding the desired index.
The “Drop Collection Index” dialog box will appear.
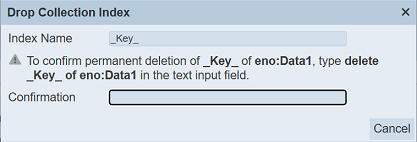
Do note the “Delete” button is not available. Enter the phrase as indicated in the “Confirmation” field. The “Delete” button will appear. This is to avoid accidental deletion of the key.
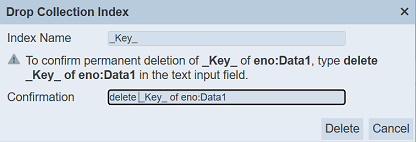
To delete the key, click on the “Delete” button. To abort the action, click on the “Cancel” button.
A notification will appear after the index is deleted.

Refresh
The “Refresh” button at the upper right corner of the Index Management page allows you to refresh the page in case the collection is being updated.
Search
There is a cross-field search function for the list of indexes.

This provides an easy way to search through the indexes. It is case-insensitive and displays indexes that have the entered search value in any of the values of the fields below:
- Index Name
- Key
- Expire After (Seconds)
- Language