
DataStore
The ![]() DataStore processor is an output mechanism used to generate the processed data into different file formats.
DataStore processor is an output mechanism used to generate the processed data into different file formats.
The different file types supported in the Data Designer includes:
- Binary
- CSV
- Connection Pool
- Custom Java DataStore
- JSON File
- MongoDB
- None
- Text File
- XLSX File
- XML File
Add DataStore
To add a DataStore processor, select the ![]() button on the menu bar and click on the location in the designer diagram. Use the Flow connector to connect the DataStore processor and another processors together.
button on the menu bar and click on the location in the designer diagram. Use the Flow connector to connect the DataStore processor and another processors together.
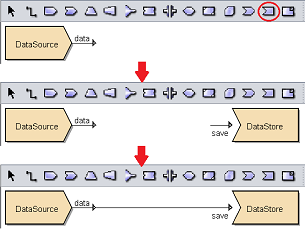
The DataStore processor is present but it is not defined yet.
Edit DataStore
There are two ways to access a DataStore processor.
- Double-click on the processor
- Right-click on the processor and select “Properties” option from the pop-up menu
To edit a DataStore processor, right-click and select “Properties” or double-click on the processor to display the 2-page “DataStore Wizard”.
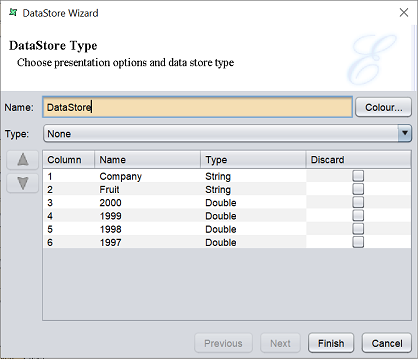
In the first page, the “Type” parameter allows you to select the type of output from the DataStore processor. By default, “None” is selected.
Select the fields to discard by selecting them under the “Discard” column. This will remove the selected fields from the DataDrop processor output. If no fields are selected to discard, all records will pass through.
If “None” is selected in the “Type” field, the second page of the wizard is not required. Click on the “Finish” button to save the settings or click on the “Cancel” button to abort.
If other option is selected in the “Type” field, click on the “Next” button to continue. Depending on the type selected, different fields will appear in the second page of the wizard.
DataDrop is particularly useful for storing records that fail data cleansing or data integrity checks for subsequent processing, or for debugging complex composite diagrams.
Note: When trying to generate a composite datasource with multiple DataDrop processors by right-clicking the datasource in the Repository panel and selecting the “Generate” option, you area ble to select the DataDrop processor to generate.
Binary Output (a name=“binary”></a)
This option allows the DataStore to write data to a binary (BIN) file. Using Binary DataStore, you can generate a binary file from the following datasource:
- Tabular datasource
- Compressed text datasource
- Excel datasource
- Random datasource
- XML datasource
- MSSQL database
When “Binary” is selected in the “Type” field, the second page will appear as below.
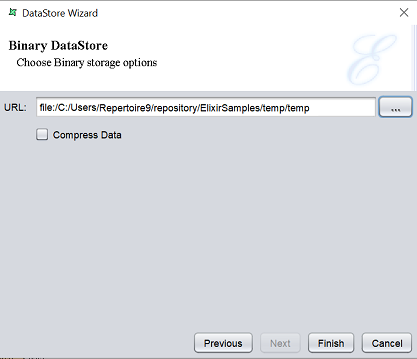
Key in the URL which indicates the location of the output binary file to be saved. Alternatively, click on the  button to browse to the desired location in the repository. Select the “Compress Data” field if you wish to compress the binary file.
CSV
This option writes comma separated values to a file. Each record will be output as a single line with the fields separated by a separator character. There is no trailing separator on the end of the line. In addition, the output can wrap the output values with qualifiers. There are usually single or double quotes which ensure that values which contain the separator are not treated as multiple fields. For example, if the field value is Hello, World and comma is used as a separator, the CSV will be malformed, unless a qualifier is used to delimit the field.
This datastore is not suitable for fields that contain embedded newline characters. Any such values should be fixed with earlier processors before the datastore.
When “CSV” is selected in the “Type” field, the second page will appear as below.
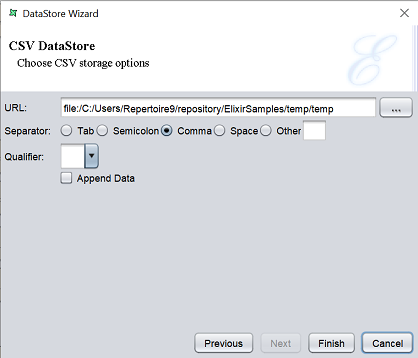
Key in the URL which indicates the location of the output CSV file to be saved. Alternatively, click on the button to browse to the desired location in the repository.
Select the desired separator from the various radio buttons. By default, “Comma” is selected. Select the desired qualifier from the drop-down list in the “Qualifier” field or key the desired qualifier. By default, no qualifier is selected.
If data is to be appended to an existing CSV file, select the “Append Data” field. The same separator and qualifier options (and data schema) of this datastore should match that of the existing CSV file.
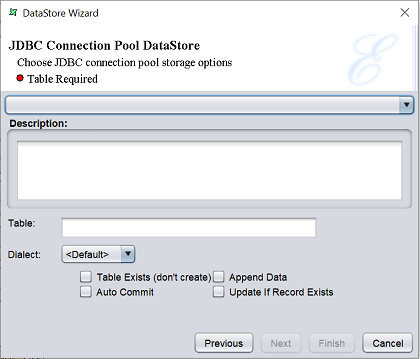
Connection Pool
This option writes records to the database to the connection pool to which it is connected. If a valid URL to a connection pool is selected, the description of the connection pool will be displayed.
| Fields | Description |
|---|---|
| Table Exist (don’t create) | If selected, the TAble entered in the “Table” field will be updated accordingly. If not, a new table will be created. An error will occur if there is a table of the same name in the database. |
| Append Data | If selected, data will be updated to the specified table accordingly. |
| Auto Commit | If selected, enables data to be updated in the database whenever changes are made. If not, new records added will not be reflected in the database. |
| Update If Record Exists | This option will only work if the destination table has primary key(s) defined. If selected, the system will check for the presence of record(s) based on the primary key. IF found, it will perform an UPDATE. IF not, it will perform an INSERT. |
Custom Java DataStore
This option can be used to write data to any JAva API, whether it is a proprietary protocol or JMS queue. The built-in DataStore are actually predefined instances of the JAva DataStore.
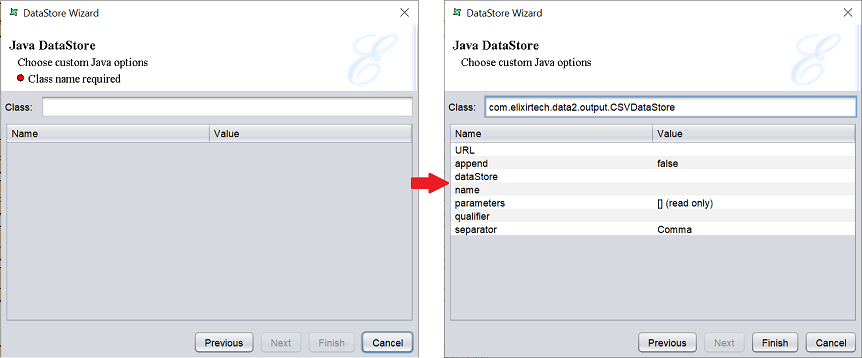
In the “Class” field, enter com.elixirtech.data2.output.CSVDataStore. A list of parameters appear in the table below.
The CSVDataStore is written using standard JAvaBean naming conventions, so the available accessors can be extracted automatically.
In order to implement your own DataStore, you need to implement a DataListener interface. When you have coded and complied your class, it should be placed in a jar in the /Plubic/lib/ folder in the repository. If you modify the jar file, click the “Refresh Job Engine Jars”. Now you can enter your class name in the Custom Java DataStore wizard and enter any values that you have exposed through get and set methods. Click on the “Generate” option to invoke the class to process the records.
JSON File
This option writes data to a JSON (JAvaScript Object Notation) file. The JSON files are widely used as the input for many new charting tools, including Protovis and HighCharts. Each record will be output as a single line, in which each field name will be followed by the corresponding value with colon as the separator. Between pairs of field name and value, the separator is comma. Each record is contained in curly brackets “{}”, while the entire contents are contained in square brackets “[]”. Below is an example:
[
{ "Company": "A", "Fruit": "Apple", "2000": 201.0, "1999": 102.0 },
{ "Company": "B", "Fruit": "Orange", "2000": 323.0, "1999": 32.0 },
{ "Company": "C", "Fruit": "Berry", "2000": 99.0, "1999": 20.0 },
]
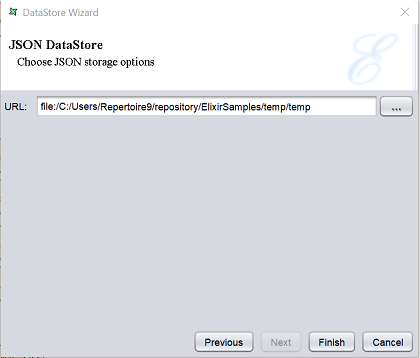
In the “URL” field, key in the location where the JSON file is to be saved. Alternatively, click on the button to browse to the desired location.
MongoDB
This option allows you to save the output to MongoDB that is connected.
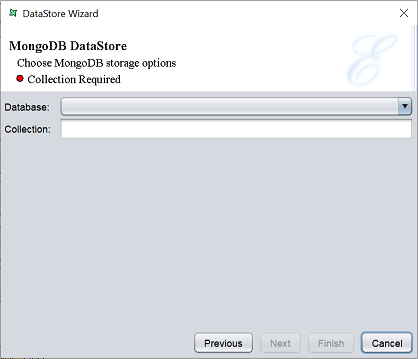
Select the database from the drop-down list in the “Database” field. In the “Collection” field, key in the name of the desired collection.
None
This option discards the records. This is a useful trigger for priming data caches, or in conjunction with data drops. DataStore or Result can be triggered by name from the Elixir Runtime Engine. For example, if you want to ensure a cache is loaded, connect it to a None DataStore. Now you can generate this datastore any time you want the cache to be loaded.
Text File
This option writes expanded text templates to a file.
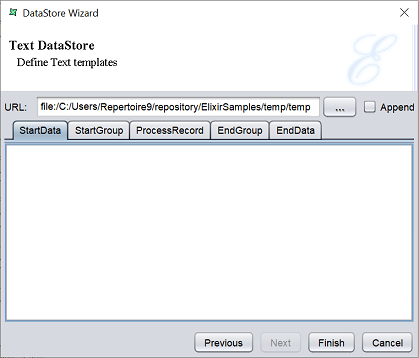
By defining a template each for the “StartData”, “StartGroup”, “ProcessRecord”, “EndGroup” and “EndData” tabs, you can control exactly how the text file is constructed. This is a flexible and fast alternative to using a Report Writer for producing text output.
A template is expanded by performing substitution of values using the familiar ${...} syntax. JavaScript can be embedded too, by using the ${=...} syntax. For example, to add the current timestamp to the output, you an use a template:
The current time is ${=java.util.Date();}
The “StartData” template is invoked first, so this is a good place for a header. If there are any groups in the output, the “StartGroup” and “EndGroup” templates will be expanded at the appropriate point. Each individual record will be epxnaded using the “ProcessRecord” template.
XLSX File
This option writes records to an Excel (XLSX) file.
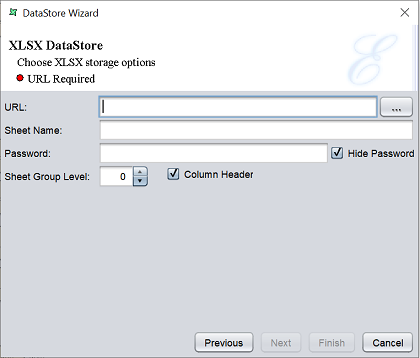
Key in the location of the XLSX file to be saved in the “URL” field. Alternatively, click on the button to browse to the desired location. In the “Sheet Name” field, key in a name for the worksheet.
By default, all records will be written to a single sheet. However, if the output records are grouped, the “Sheet Group Level” field can be used to force subsequent data to a new sheet. For example, if there are two levels of grouping and the level value is set to 1, then each start of a new level one group will start on a separate worksheet.
Each sheet will have a header, if the “Column Header” checkbox is selected.
You can set a password for the XLSX file by entering a password in the “Password” field. By default, the “Hide Password” field is selected, which hides the password as you type. To view the password entered, un-select this field.
Note: Different versions of Excel (and Excel compatible readers, like OpenOffice) have different limit for the maximum number of rows allowed in a single sheet. Elixir Data Designer limits the rows on one sheet to 31999.
XML File
This option writes XML or information transformed from XML to a file. By default, the records along with the schema are written out in Tabular DataSource format. A simple XML structure that embeds the values directly into the datasource itself, so that it has no other dependencies. You may take the XML file produced and use it with other tools, or by naming the output file with a “.ds” extension, you can use it as a datasource. You can even write the file directly into the repository, by using a repository:/ URL so that Elixir tools can access it immediately.
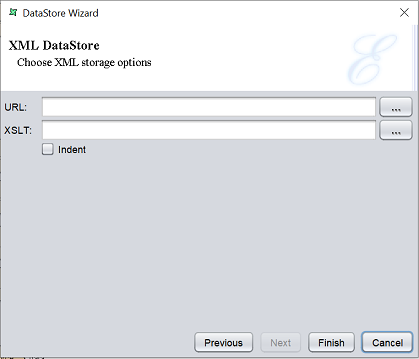
By specifying the name of an XSLT transformation, the XML data output can be readily transformed into another XML structure, or any kind of text output. You can use XSLT to produce the same output as the CSV or Text DataStore, if they were not already provided for you.
Note: If you need to send some sample data to Elixir, generating a Tabular Datasource using the XML DataStore is ideal, because the datasource file has no dependencies on your database, repository or file system configuration.
Delete DataStore
To remove a DataStore processor from the designer diagram, select the desired DataStore processor, then either:
- Click on the “delete” key on your keyboard
- Right-click on display the pop-up menu and select the “Delete Graphic” option
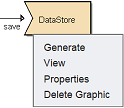
Pop-up Menu
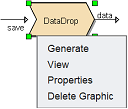
Right-click on the DataStore processor and a pop-up menu will appear.
There are four functions in the pop-up menu:
| Function | Description |
|---|---|
| Generate | Generates the output file based on the selected type. |
| View | Switches to the “Data” tab, which displays the records of the datasource after the discard operation. |
| Properties | Launches the DataStore Wizard that allows you to edit the DataStore properties. |
| Delete Graphic | Deletes the DataStore processor. |