Project Editor
The Project Editor allows you to create and edit tasks and subtasks for the project, as well as access the Task Editor. To access the Project Editor, users need to have the mod-task-editor privilege.
Add Task
To add a task to the project, click on the “Add” button on the upper right corner of the page.

The “Add Task” dialog box will appear.
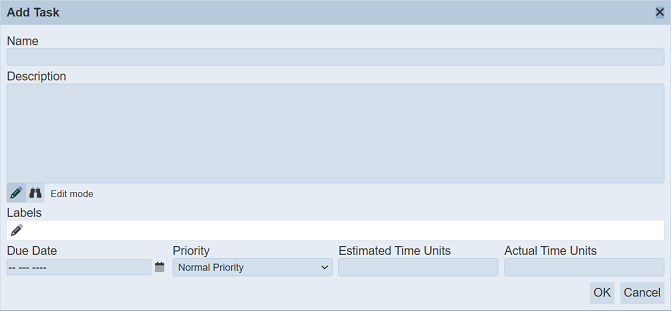
| Field | Description | Default Value |
|---|---|---|
| Name | Name of the task. | Empty |
| Description | Brief description of the task. | Empty |
| Labels | Label of the task. One or more labels can be added. |
Empty |
| Due Date | Due date of the task. | Empty |
| Priority | Priority of the task. Available options: - High priority - Normal Priority - Low Priority |
“Normal Priority” |
| Estimated Time Units | Estimated time taken to execute the task. | Empty |
| Actual Time Units | Actual time taken to execute the task. | Empty |
Name and Description
In the “Name” field, key in a name for the new task. It is a good practice to provide a brief description for the task in the “Description” field, though it is not mandatory. There are two icons below the “Description” field:
 “Edit Mode” (default)
When selected, allows you to edit the description. “Preview”
When selected, allows you to view how the description will appear in the Task Editor.
Label
To add a label, click on the “Edit Labels” icon. The “Edit Label” dialog box will appear.
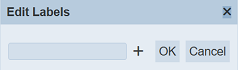
If there are labels added to other task in the same project, a drop-down list will appear.
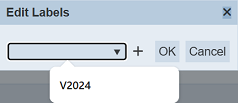
If none of the values in the drop-down list is desired, key in a new label in the text box. If more labels are to be added, click on the “+” icon next to the text box. The previously keyed in label will be added.
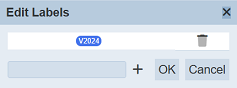
Key in another label and repeat until all required labels are keyed in. To remove a label, click on the  “Delete” icon. Click on the “OK” button to save the labels once all required labels are added.
Due Date
To add a date in the “Due Date” field, click on the  “Data Picker” icon to display the Data Picker.
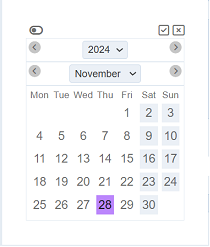
Select the desired year, month and day. Click on the  “Ok” icon to save the date. To abort, click on the “X” icon.
Priority
In the “Priority” field, the default value is “Normal Priority”. If this is not the desired value, choose the desried value from the drop-down list.
Estimated/Actual Time Units
In the “Estimated Time Units” and “Actual Time Units”, key in a numeric value. The actual unit for these two fields is to be defined by each project. That is, for one project, the unit may be defined as “Days”, while another project may define the unit as “Weeks” or “Months”.
Once all information are entered, click on the “OK” button to save the new task. To abort, click on the “Cancel” button.
If the name is left empty, an error message will appear.

Once added successfully, the new task will be added to the page, at the end of the list of tasks.
Edit Task
To edit a task, click on the “Edit” icon under the “Actions” column corresponding the desired task.

The “Edit Task” dialog box will appear.

The fields are the same as “Add Task”. Edit as desired. Click on the “OK” button to the changes. Click on the “Cancel” button to abort the action.
Open Task
To open a task, click on the name of the task under the “Task” column.
The Task Editor page will appear, showing the details of the task.
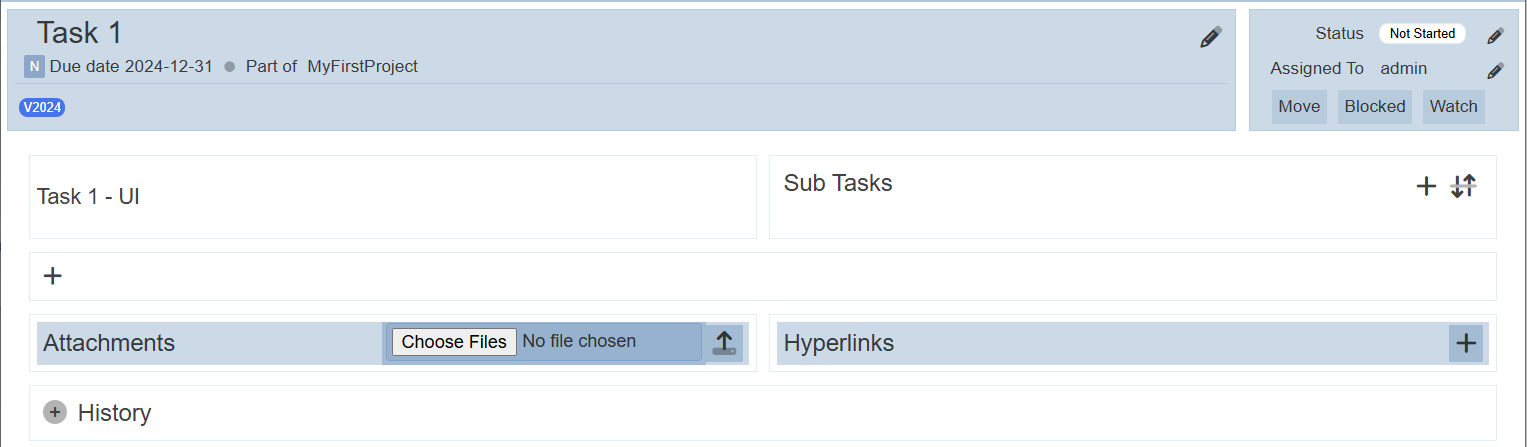
Refer to Task Editor for more details.
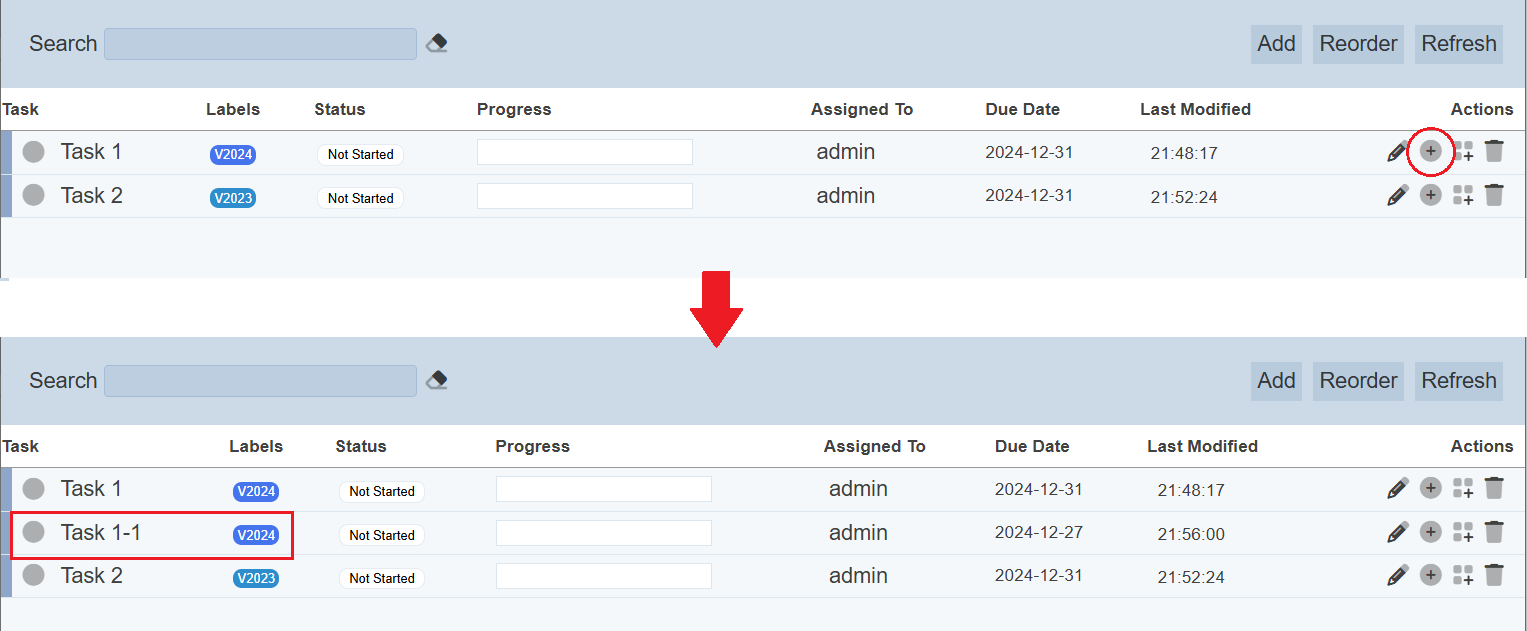
Add Next Task
This function allows you to add a new task below the selected task. This avoid the need to reorder the tasks, as the “Add Task” automatically adds the task at the end of the list.
To add a nw task, click on the  “Add Next Task” icon under the “Actions” column.
THe “Add Task” dialog box will appear.
Refer to “Add Task” on the details of the fields. Click on the “OK” button to the new task. Click on the “Cancel” button to abort the action.
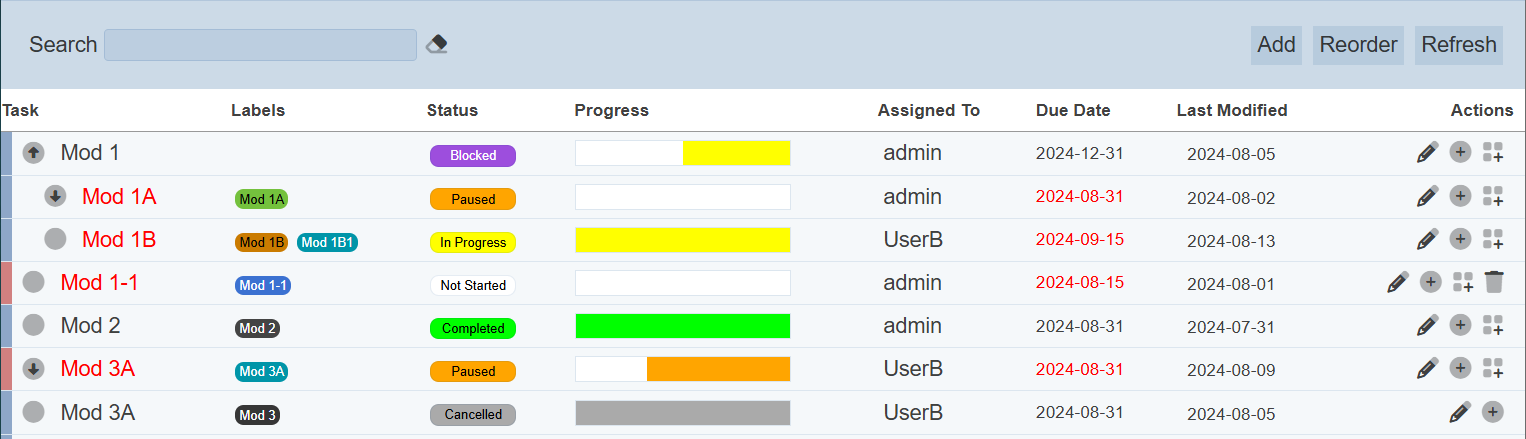
In the example above, tasks “Task 1” and “Task 2” are already in the project. A new task “Task 1-1” needs to be added in between them. Clicking on the “Add Next Task” icon under the “Actions” column of task “Task 1”, adds the new task “Mod 1-1” in between.
Add Subtask
This function allows you to add a child task to the selected parent task. Do note that this function is not available for task with the “Cancelled” status.
To do this, click on the  “Add Subtask” icon under the “Actions” column corresponding the selected task.
THe “Add Task” dialog box will appear.
Refer to “Add Task” on the details of the fields. Click on the “OK” button to the new task. Click on the “Cancel” button to abort the action.
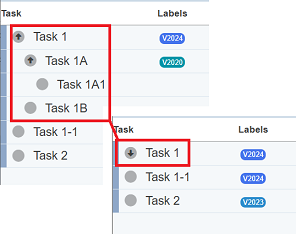
Once the subtask or child task is added to the list, the icon on the left of the parent task will change.
This icon allows user to collapse to hide the child task or expand to show. By default it is expanded. To hide the subtask, click on the  “Collapse” icon next to the parent task. Vice versa, click on the
  “Expand” icon to show the subtasks.
Delete
This function allows you to delete a task.
The task will be removed from the list.
To do so, click on the “Delete” icon under the “Actions” column corresponding the desired task. Do note that only task with status “Not Started” can be deleted. Parent task cannot be deleted until all subtasks are deleted.
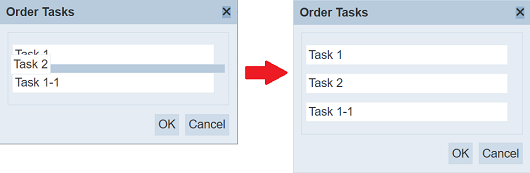
Reorder
This function allows you to reorder the position of the tasks of the same level.
To do so, click on the “Reorder” button on the upper right corner of the page.
The “Order Tasks” dialog box will appear.
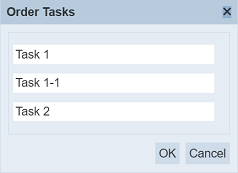
Simply drag-and-drop the task to be relocated to the desired location.
Refresh
After performing actions on the browser/tab, the list is reloaded to display the list of tasks. The manual “Refresh” button is available and is particularly useful if there are others making changes on the same page.
The “Refresh” button is found on the upper right corner of the page. Clicking on it reloads the list.
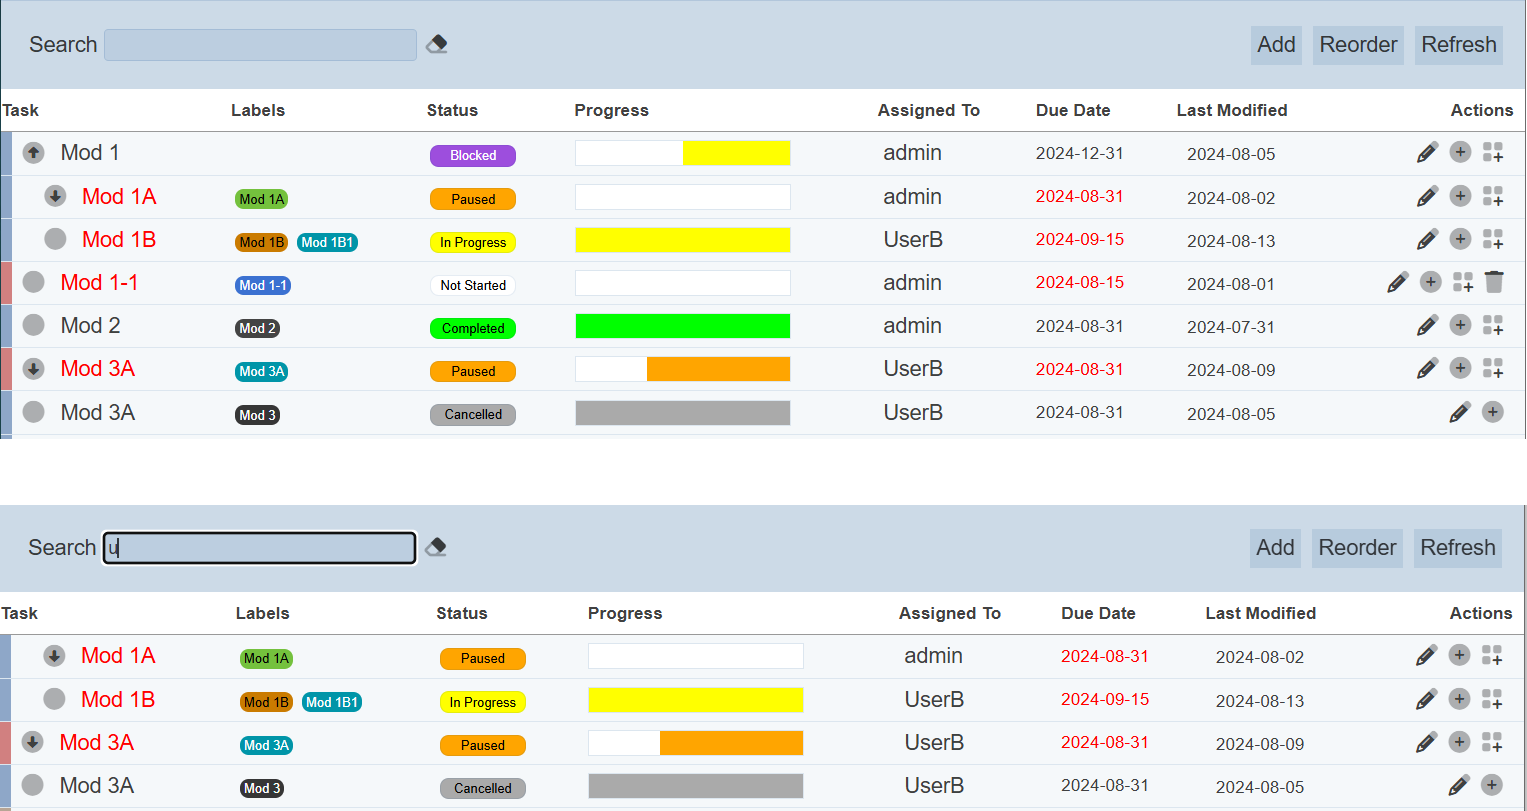
Search
There is a cross-field search function for the list of tasks. It is located at the upper left corner of the page.

This provides an easy way to search through the tasks. It is case-insensitive and displays files that have the entered search value in any of the values of the fields below:
- Tasks
- Labels
- Status
- Assigned To
- Due Date
- Last Modified