
Automatic Report Generation
It is beneficial for the reports to be generated automatically instead of being generated manually. This can avoid error and forgetting to generate the report. To generate based on a schedule, the following steps are required:
-
Upload the required report template (DocX or RML) and datasource onto the Repository.
-
Create ETL chainset that calls the report template to generate the report.
-
Create calendars and trigger that will automatically generates the report.
The following sections describes the above steps.
Report Template and Datasource
Before generating a report, the report template (either DocX or RML) file and the datasource must be present in the Repository module. If they are not present, see Section 2.5.1 Upload Report Template and Datasource on how to upload the relevant files onto the repository.
Create ETL
Use the following steps to create an ETL chainset that calls the report and generates an output file:
-
Click on the
 “Elixir Repertoire” icon on the upper left corner of the page and select “All Services”. In the right panel, select “ETL”.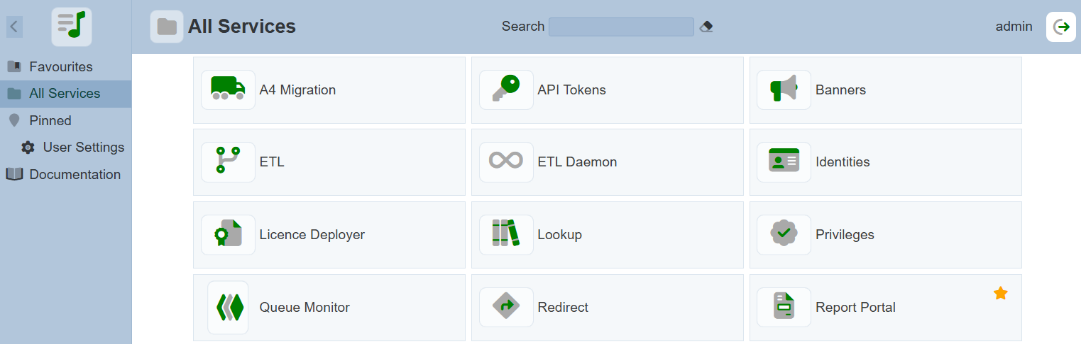
-
The “ETL” page will appear.

-
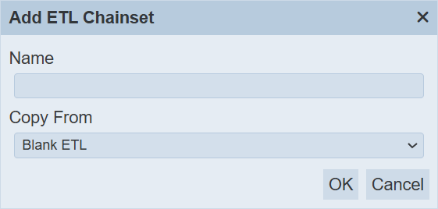
In the “ETL” page, click on the “Add” button on the upper right corner of the page. A “Add ETL Chainset” dialog box will appear.
-
In the dialog box, key in and select the following:
-
“Name” field – Key in a name for the new ETL chainset
-
“Copy From” field – Selects to copy from existing ETL from drop-down list or a blank ETL (in this example, a blank ETL is selected)
-
-
Click on the “OK” button to create the new blank ETL and the ETL Designer page will appear.

-
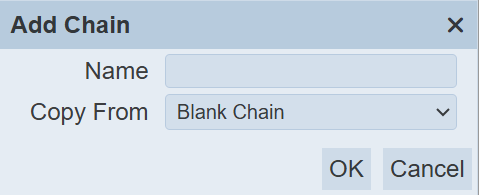
In “Chains” section, click on the “+” icon. The “Add Chain” dialog box will appear.
-
In the dialog box, key in and select the following:
-
“Name” Field – Key in a name for the new chain
-
“Copy From” field – Selects an existing chain from the drop-down list or a blank chain (in this example, select “Blank Chain”)
-
-
Click on the “OK” button to save the changes. A message will appear upon successful saving the ETL.

-
In this example, three steps are required:
a. First step – Calls the Ambience RML engine to generate the report
b. Second step – Defines the path of the report generated
c. Third step – Places a marker to indicate the ETL chain is usable directly by authenticated HTTP calls
-
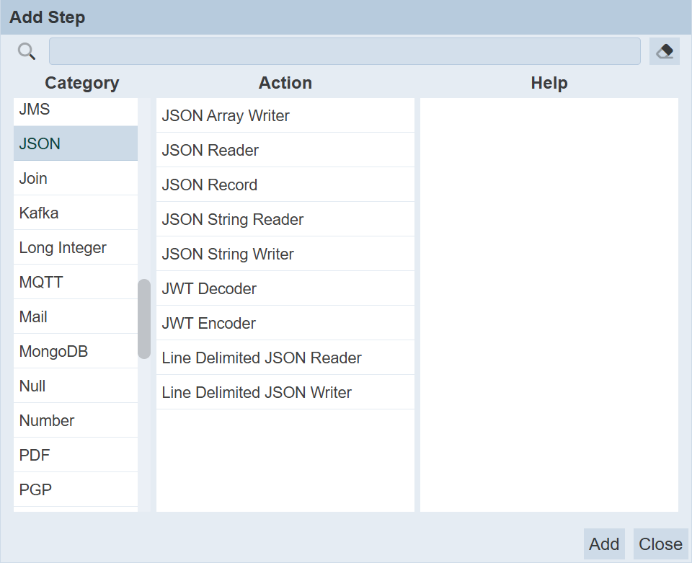
Click on the “+” icon in the “Steps” panel. The “Add Step” dialog box will appear.
-
Search and add the following ETL steps in the following category:
Category Step Name RML Ambience RML Engine File File Writer Result HTTP Endpoint -
Add first ETL step and click on the “Add” button. The ETL step will be added into the “Steps” panel. Repeat the other two steps and click on the “Close” button to close the dialog box. A message will appear upon successful saving the ETL.

-
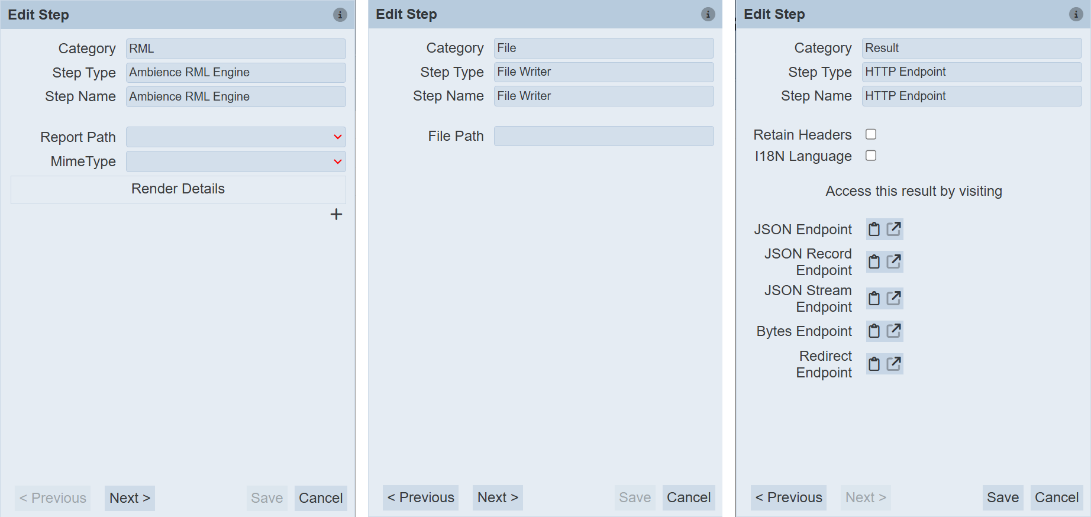
The “Edit Step” dialog box will appear, prompting user to enter the required parameters.
-
For the first ETL step, select the desired value for the following parameters:
-
“Report Path” field – Selects the report template in the repository from the drop-down list
-
“Mime Type” field – Selects the output report file format
-
-
To go to the next ETL, click on the “Next >” button at the bottom of the dialog box.
-
For the second ETL step, define the path for the output report file in the “File Path” field.
-
Click on the “Next >” button to go the next ETL. The third ETL does not have any parameters. Click on the “Save” button to save the edits. To go to the previous ETL step, click in the “< Previous” button.
-
To test if the ETL chainset generates the report, either select the last ETL step and click on the
 “Run to Step” icon that appear on the right or click on the
  “Run Steps” icon. Find the output report file in the location defined in the second ETL step.
-
To edit the ETL step, select the ETL step and click on the
 “Edit” icon. The “Edit Step” dialog box will appear.
Scheduler ETL Via Email
This method allows you to send an alert to any users, as long as their email addresses are defined in the step. Use the following steps to create a scheduler ETL via email:
-
Click on the
“Elixir Repertoire” icon on the upper left corner of the page and select “All Services”. In the right panel, select “ETL”. -
The ETL page will appear.
-
In the “ETL” page, click on the “Add” button on the upper right corner of the page. A “Add ETL Chainset” dialog box will appear.
-
In the dialog box, key in and select the following:
-
“Name” field – Key in a name for the new ETL
-
“Copy From” field – Selects an existing ETL from drop-down list or a blank ETL (in this example, select “Blank ETL”)
-
-
Click on the “OK” button to save the changes.
-
The ETL Designer page appears.
-
In “Chains” section, click on the “+” icon. The “Add Chain” dialog box will appear.
-
In the dialog box, key in and select the following:
-
“Name” Field – Key in a name for the new chain
-
“Copy From” field – Selects an existing chain from the drop-down list or a blank chain (in this example, select “Blank Chain”)
-
-
Click on the “OK” button to save the changes. A message will appear upon successful saving the ETL.

-
For the via email method, two steps are required:
a. First step – Compose Mail
b. Second step – Send Mail
-
Click on the “+” icon in the “Steps” panel. The “Add Step” dialog box will appear.
-
Add first ETL step and click on the “Add” button. The ETL step will be added into the “Steps” panel. Repeat for the other step and click on the “Close” button to close the dialog box. A message will appear upon successful saving the ETL.
-
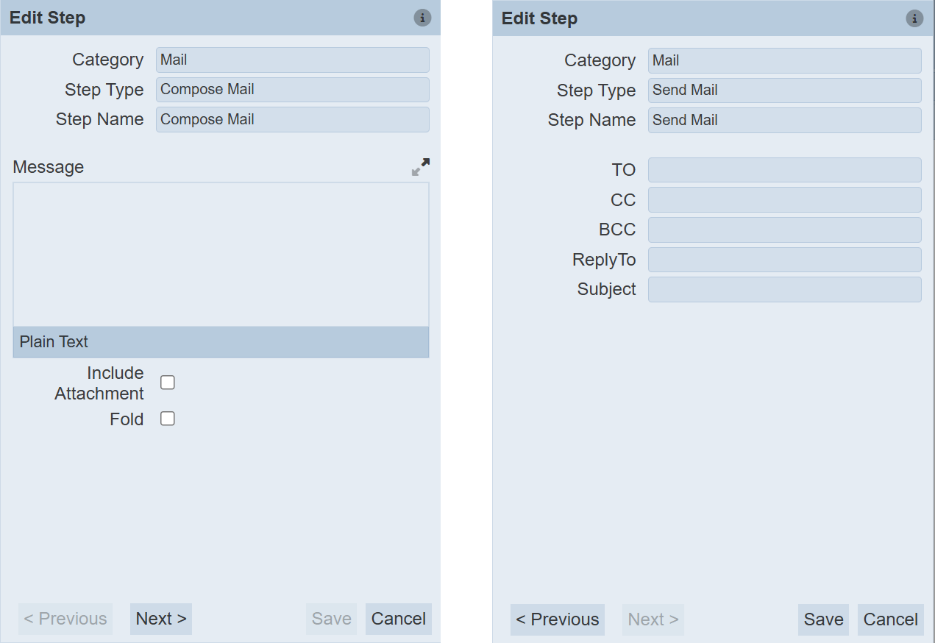
The “Edit Step” dialog box will appear.
Key in the desired text as content for the email. Click on the "Next
" button to go to the next ETL.
-
In the second ETL, key in the appropriate email addresses and subject in the respective fields.
-
To go back to the previous ETL, click on the “< Previous” button. Click on the “Save” button to save the edits.
Create Schedule
The Scheduler module allows you to set up jobs to automatically trigger the generation of these reports. The Scheduler module also allows you to view the status of the job, or sent an email to you, if it is being set up. The Scheduler module consists of three pages:
-
Status – Shows the status of the job triggers that have run or are currently running
-
Trigger – List all jobs that are available for the owner
-
Calendar – List all constraints shared among the triggers
Create Calendar
The Calendar page in the Scheduler module allows you to set conditions or constraints in these calendars and apply them onto the trigger to determine when the job is to be run, such as which year, month, day and/or time, as well as the time zone. Do note that the calendar constraints may be shared and can be used by more than one trigger. Use the following steps to create a simple public holiday calendar:
-
Click on the
“Elixir Repertoire” icon on the upper left corner of the page and select “All Services”. In the right panel, select “Scheduler”.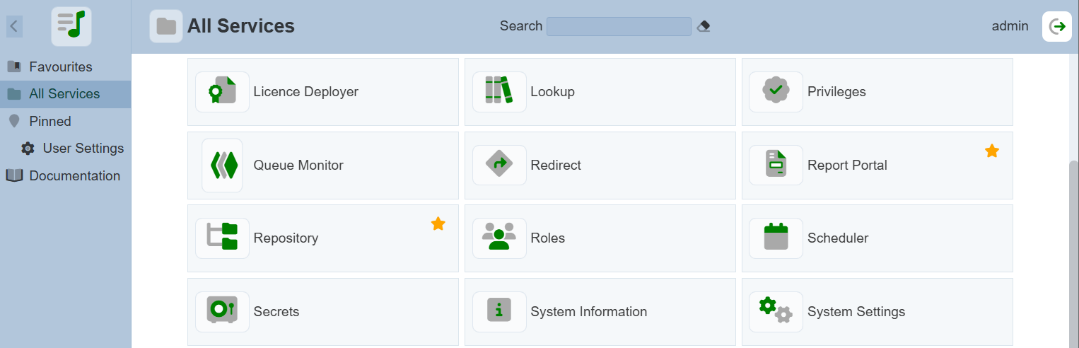
-
The “Scheduler” page will appear.

-
Click on the “Calendar” option in the left panel.

-
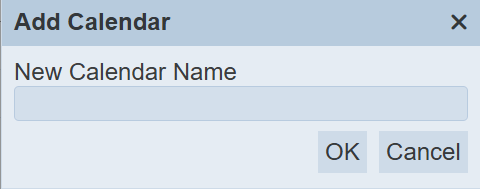
Click on the “Add” button on the upper right corner of the “Calendar” page. The “Add Calendar” dialog box will appear.
-
In the dialog box, key in a unique name and click on the “OK” button to create the new calendar.
-
The new calendar with no constraints will appear in the management page.
-
To edit the calendar, click on the name of the calendar under the “Name” column.
-
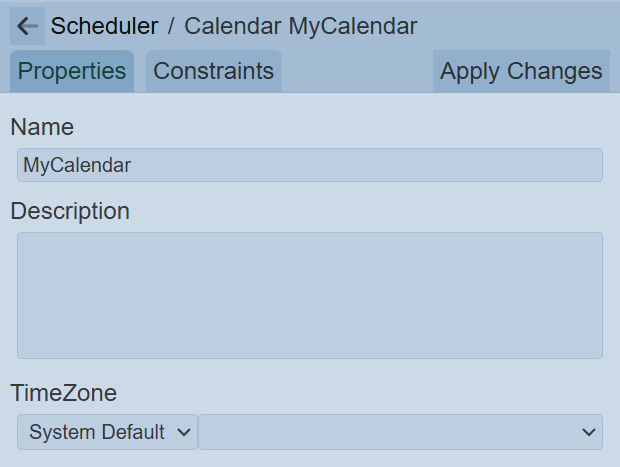
The “Scheduler / Calendar” panel will appear.
-
In the “Properties” tab, key in and select the following:
-
“Name” field – Edit the unique name of the calendar
-
“Description” field – Key in a brief description for the calendar (optional)
-
“TimeZone” field – Selects timezone from drop-down list (optional but recommended) (in this example, select “Singapore”)
-
-
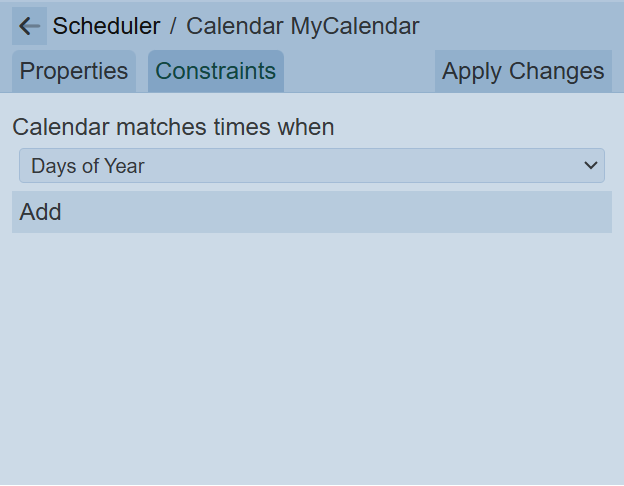
In the “Constraint” tab, select the following:
-
“Calendar matches times when” field – Selects “Day of Year”
-
The next field is dependent on the above field, one or more fields may appear
-
-
Click on the “Add” button to add a new date.
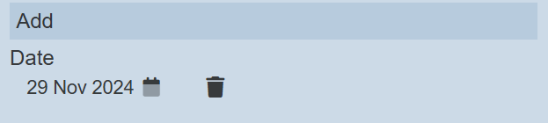
By default, the current date is selected.
-
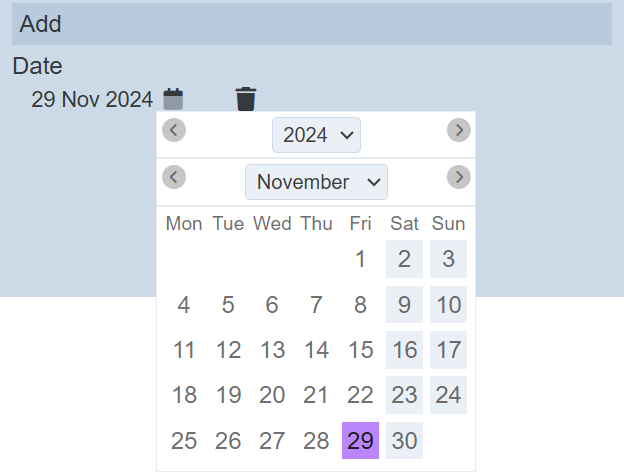
Click on the “Calendar” icon and select the correct date.
-
Repeat steps 6 and 7 until all public holidays are added.
-
Click on the “Apply Changes” button to save the changes.
-
Click on the
 “Previous” icon to return to the management page.
Repeat the above steps to create a weekday calendar that involves Monday to Friday only.
Trigger
A trigger defines the following:
-
Chain or chainset to run
-
Frequency or interval of the trigger
-
Calendars to decide when a trigger should fire at a particular month, date, day and/or time, as well as the time zone
Use the following steps to create a simple trigger:
-
Click on the “Trigger” option in the left panel.

-
Click on the “Add” button on the upper right corner of the page.
-
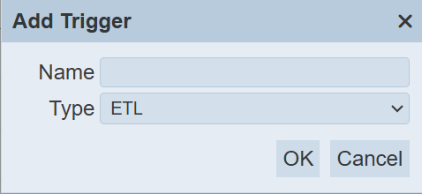
The “Add Trigger” dialog box will appear.
-
Key in a unique name for the trigger in the “Name” field and select the type of trigger for the “Type” field.
There are two types of triggers:
-
ETL – Job run by ETL chain/chainset
-
Report – Job run by defining report
-
-
The new trigger is created and will appear in the management page.
-
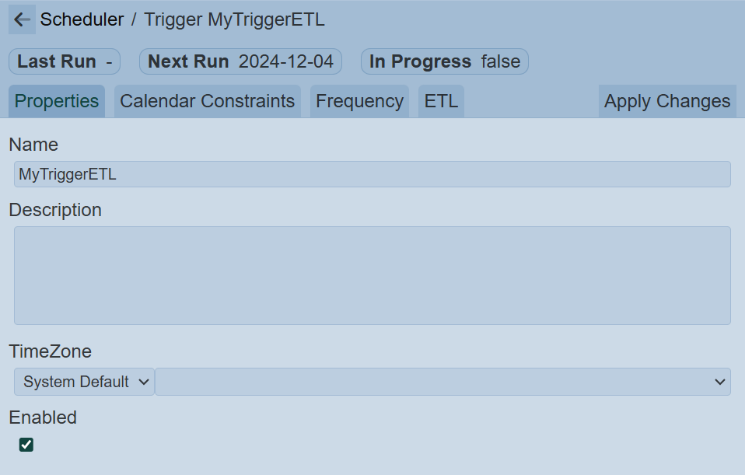
To edit the trigger, click on the name of trigger under the “Name” column. The “Scheduler / Trigger” panel will appear.
-
In the “Properties” tab, key in and select the following:
-
“Name” field – Key in a unique name for the calendar
-
“Description” field – Key in a brief description for the calendar (optional)
-
“TimeZone” field – Selects timezone from drop-down list (optional but recommended) (in this example, select “Singapore”)
-
“Enabled” field – Ensure this field is selected
-
-
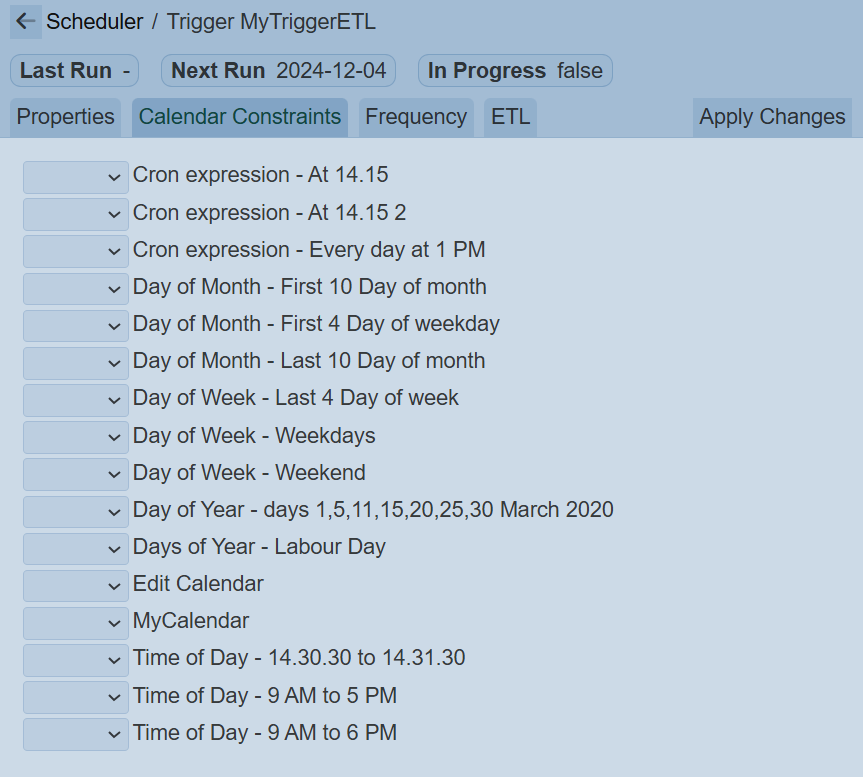
In the “Constraint” tab, select the following:
-
“Day of Week – Weekdays” – Selects “Include”
-
“Public Holiday Singapore” – Selects “Exclude”
This will ensure only weekday and non-public holidays will trigger the job.
-
-
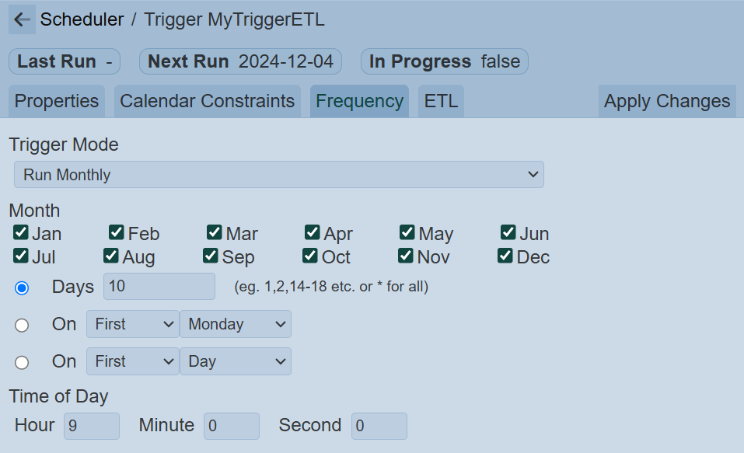
In the “Frequency” tab, key in and select the following:
-
“Trigger Mode” field – Selects “Run Monthly”
-
“Monthly” field – Selects all months
-
“Days” field – Selects this field and key in “10”
-
“Time of Day” field – Key in “9” in the “Hour” field, “05” in the “Minute” field
-
-
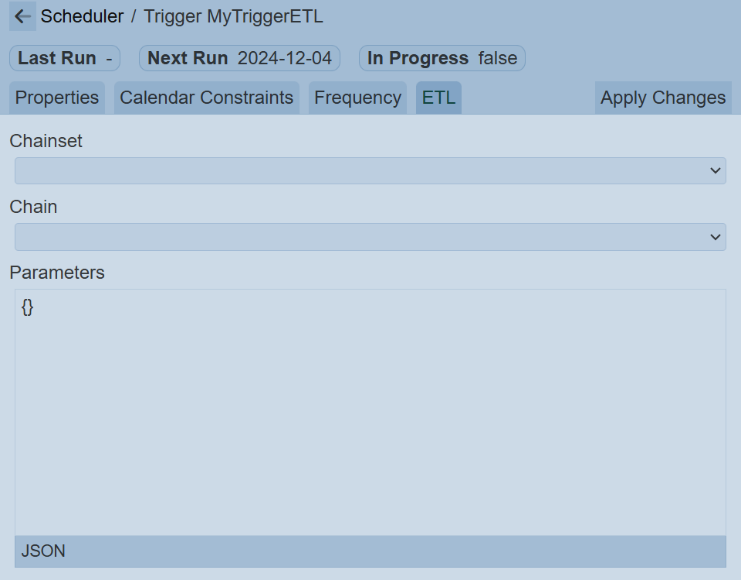
The last tab depends on which type of trigger is selected prior. In this case, ETL is selected.
-
In the “Job” tab, select the scheduler ETL that was created in Section 2.5.3 Scheduler ETL.
-
Click on the “Apply Changes” button to save the changes.
-
Click on the
“Previous” icon to return to the management page.