Mailing Address
This example shows how to create a RML report that prints mailing addresses for example, magazines or brochures to clinics.
This involves three steps:
- Create datasource
- Create RML template
- Generate report
Create Datasource
First, a datasource need to be created. This datasource will contain the name and address of clinics. In this example, an Excel file is used to store the name, address and zip code of the clinics.
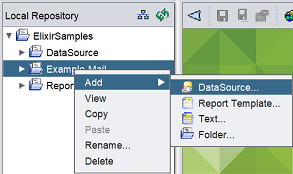
Next, add the Excel file into the Designer. To do so, select the desired folder and right click the mouse. In the pop-up menu, select the “Add” option and the “DataSource…” sub-option.
The “DataSource Wizard” dialog box will appear.
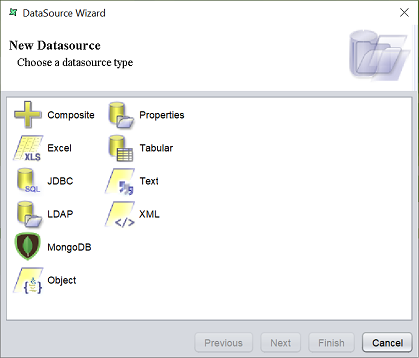
Select the “Excel” option and click on the “Next” button.

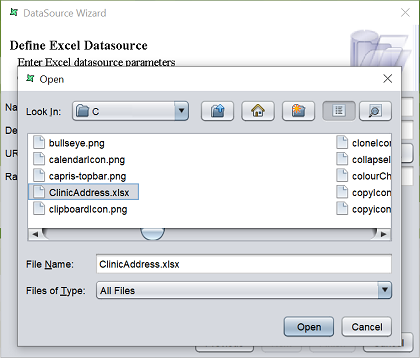
Key in a name for the datasource in the “Name” field. Click on the ‘…’ icon on the right of the “URL” field to browse to the location of the Excel file.
Click on the “Next” button to continue.
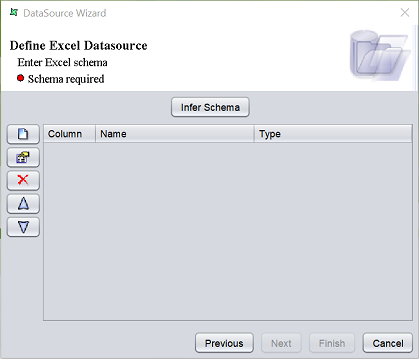
In the next page, click on the “Infer Schema” button. The list of fields will be listed in the table.
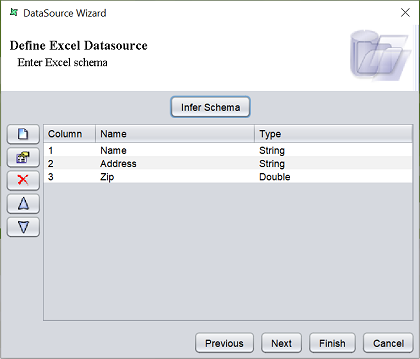
If any of the name or type is not desired, you can edit them by selecting the desired row and click on the “Edit” icon on the left. In this example, the field type of the “Zip” field is not correct. String should be used instead. To change it to string type, select the last row and click on the “Edit” icon.
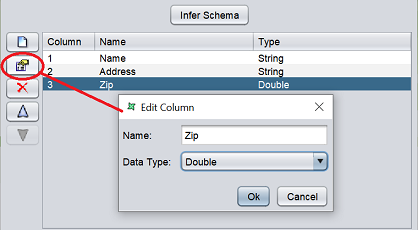
In the “Edit Column” dialog box, change the data type to “String” and click on the “Ok” button to save the change. Click on the “Finish” button in the DataSource Wizard to save the datasource.
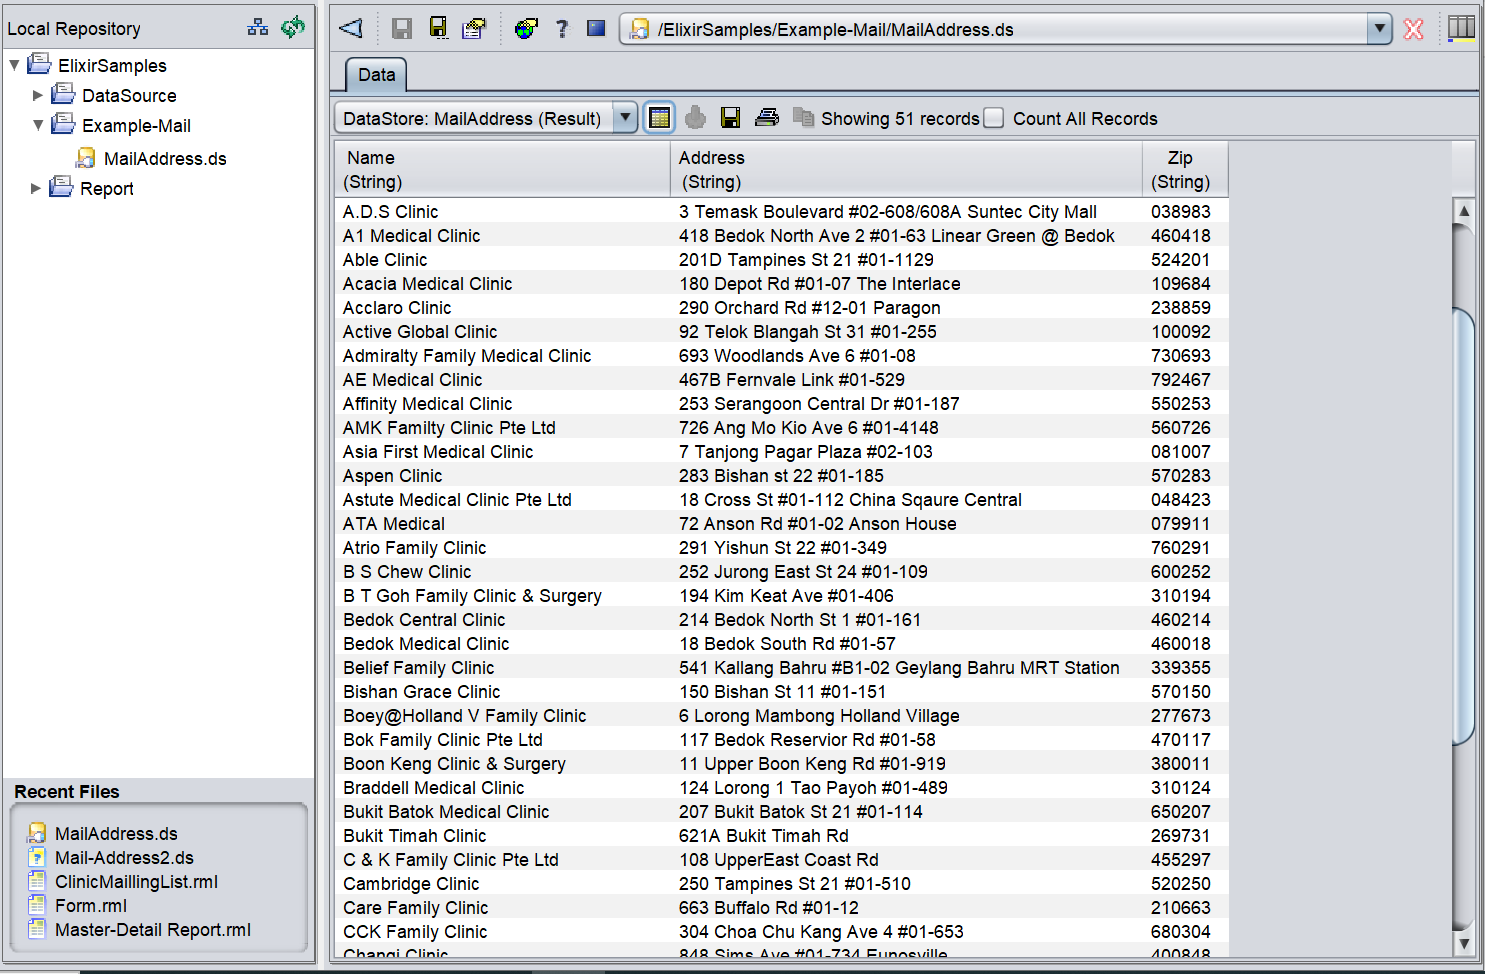
Once the datasource is created, it is opened in the workspace but the data is not loaded. To view the data, click on the “Load Data” icon.
Create RML Template
To create a RML template, select the desired folder and right click the mouse. In the pop-up menu, select the “Add” option and the “RML Template…” sub-option.
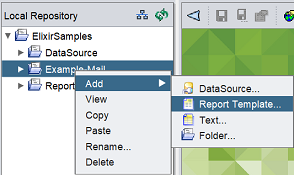
The “Report Wizard” dialog box will appear.
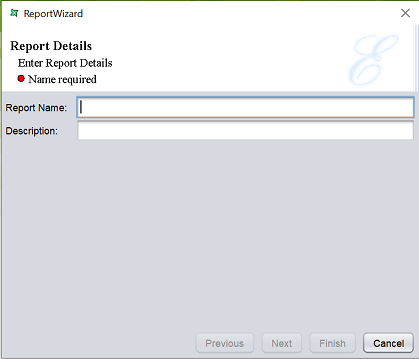
Key in an appropriate name for the report in the “Name” field and click on the “Next” button to continue.
The next page allows you to select a datasource.
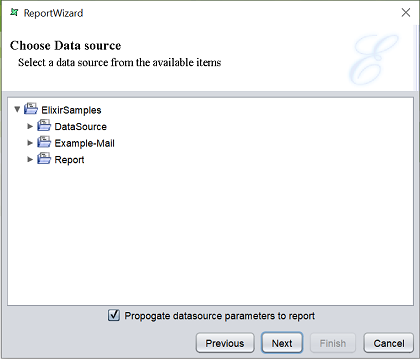
Select the desired datasource from the folders and click on the “Next” button to continue.
This page allows you to select the report type from the list of available options.
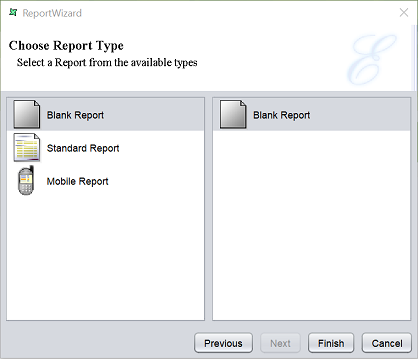
In this example, the report needs to generate mailing labels. Thus in the left panel, select “Standard Report” and in the options that appear, select “Mailing Labels”.
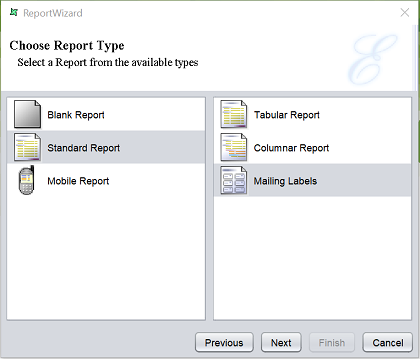
Click on the “Next” button to continue.
The next page shows two panels. The left panel shows all the fields from the datasource. The right panel shows the fields selected to be used in the report.
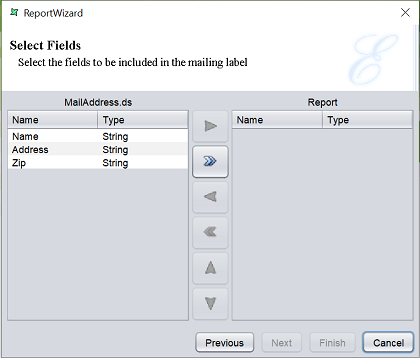
In this example, all fields are required. Click on the “All Fields” icon. Once the fields are added to the right panel, the “Next” and “Finish” buttons will be available.
Click on the “Finish” button to complete the creation of the RML template.
The report will open in the workspace.

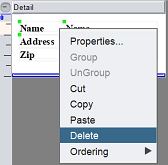
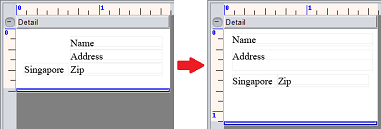
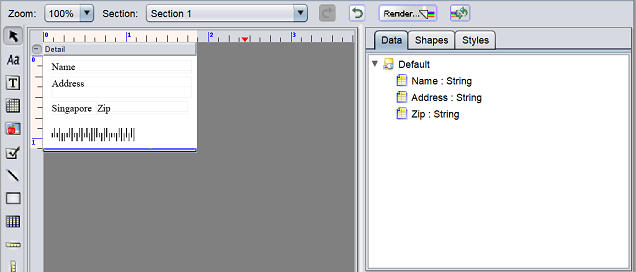
The three fields in the datasoruce are automatically added in the sample mailing label in the report, along with their labels. For the “Name” and “Address” fields, only the value of the fields are required. To remove the label, select the label, either hit the “delete” key on the keyboard or right click to display the pop-up menu and select the “Delete” option.
For the “Zip” field, the label need to change to “Singapore” to display the zip code properly. The label is bold by default, It also need to be in normal font instead of bold. To do so, select the “Zip” label, either right click to display the pop-up menu and select the “Properties” option or double click on the label. The “Properties” dialog box will appear.
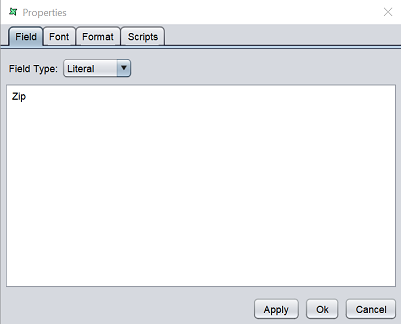
Change the “Zip” to “Singapore” in the “field” tab. Switch to the “Font” tab and unselect the “Bold” field.
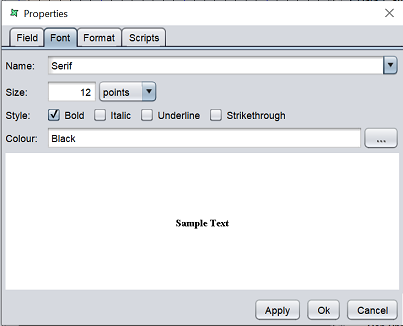
Click on the “Ok” button to save the changes.
Align the fields to the left and ensure the address field has enough space to display the address properly.
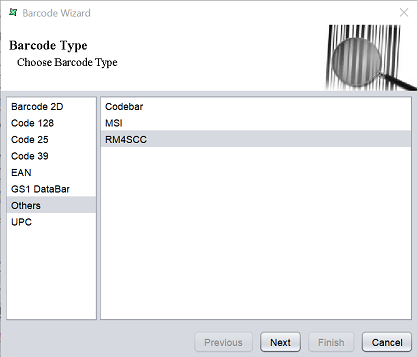
Lastly, a RM4SCC barcode need to be added. The RM4SCC barcode is used in postal mails, encoding the zip code in half- and full-height bars.
To add the barcode, select the  “Barcode” option from the toolbar on the left of the workspace and click on the location where the barcode is to be placed in the mailing label. The “Barcode Wizard” will appear.

Select the “Others” option from the left panel and select the “RM4SCC” sub-option that appear in the right panel. Click on the “Next” button to continue.
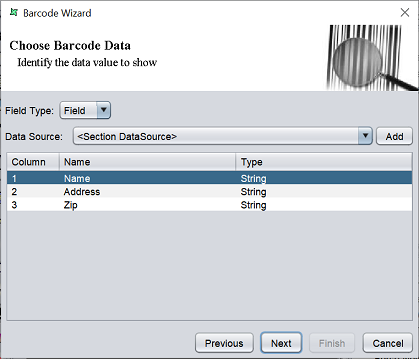
In the next page, select the desired field for the barcode. In this case, the “Zip” field is used. Select the “Zip” field and click on the “Next” button to continue.
In last page in the wizard shows the default setting of the barcode.
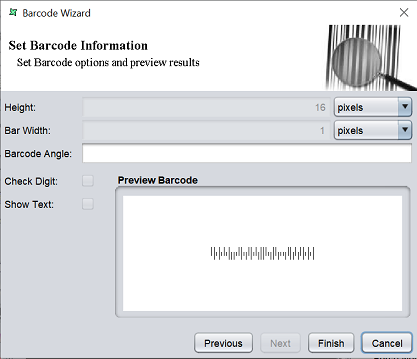
In this example, the default settings are used. Click on the “Finish” button to add the barcode onto the mailing label.
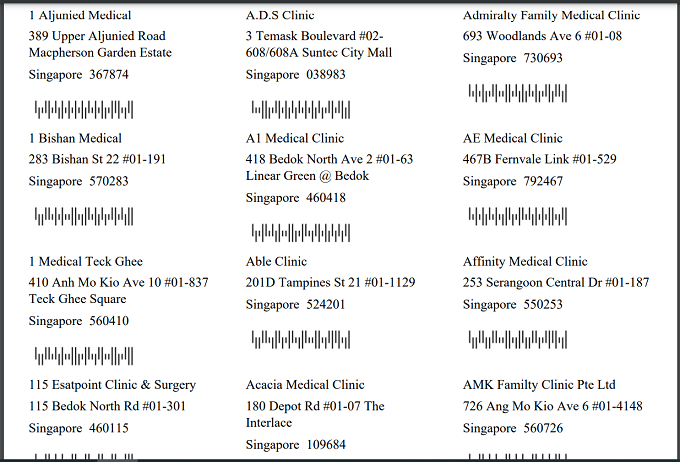
The mailing label now has the name, address, zip code of the clinic, as well as the RM4SCC barcode (based on zip code).
Generate Report
To generate the report, click on the  “Render…” button at the top bar.

The “Render Wizard” will appear.
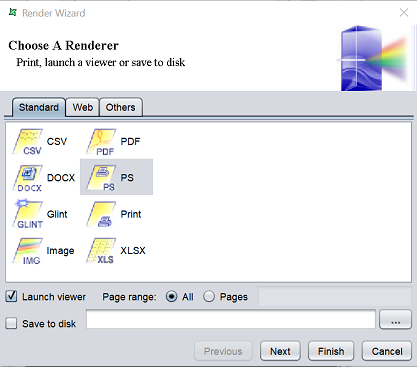
Select the desired output type and click on the “Next” button to cotinue. The next page allows you to change the default settings of the output type selected. If there are no settings, the page will be empty. Click on the “Finish” button to generate the report.
Below is an exanple of a PDF output format of the RML report.