Resources
The Resources tab allows users to manage the resources used in the other tabs.
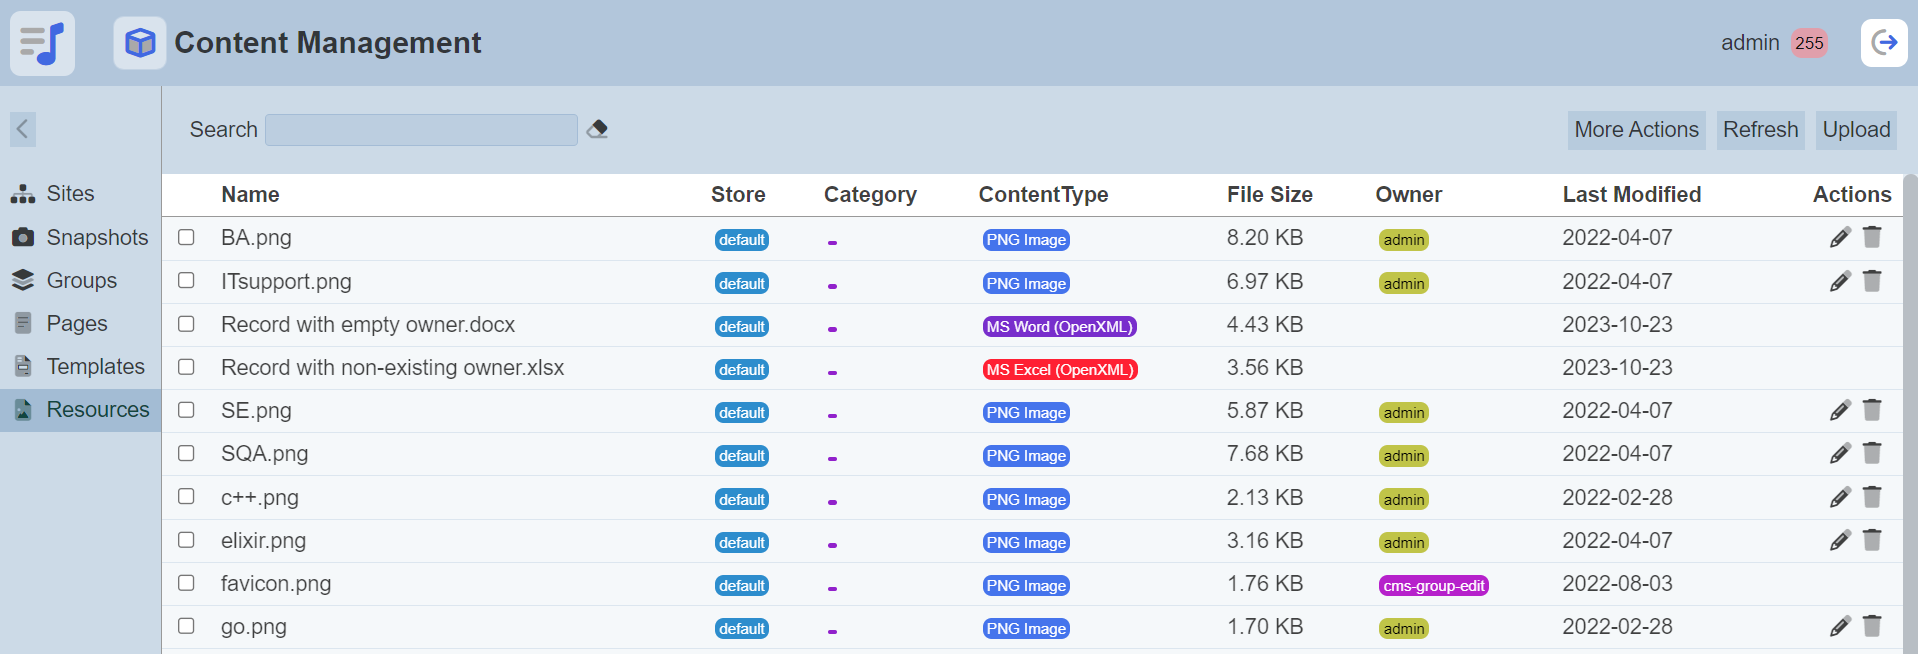
The resource are typically images, CSS and Java scripts, they can be of any file format. These resources can be accessed from various components added in the Page and Template Designers.
Only owner of the resource can access the resource files. No actions are allowed if the user is not the owner.
Module Interface
| Interface | Description | Required Privilege |
|---|---|---|
| CMS | Allows access to CMS management page. | mod-cms-management |
| CMS Designer | Allows access to CMS Designer page. | mod-cms-designer |
| CMS Designer | Allow to edit CMS Groups, Page, Template and Resources. | mod-cms-designer-edit |
Upload Resource
This function allows you to upload any files onto the Resources tab.
Click on the “Upload” button at the upper right corner of the page.

The “Upload Resource” dialog box will appear.
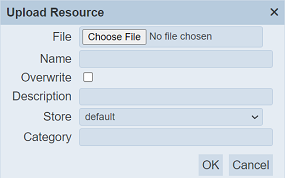
| Field | Description | Input Type | Default Value |
|---|---|---|---|
| Name | Name of the resource. | Text field | Empty |
| Overwrite | When selected, overwrites existing resource with the same name. | Checkbox | Not selected |
| Description | Brief description of the resource (optional). | Text field | Empty |
| Store | Selects the binary store data size. Available options: - default - default-large |
Drop-down list | “default” |
| Category | Category of the resource (optional). | Text field | Empty |
You can either drag-and-drop the desired file onto the “Drop File Here” area or browse to the location of the desired file. The filename of the selected file will appear in the “Name” field. If it is not desired, change to an appropriate name. Do note that the name must be unique. If the name already exist, a message will appear.

To overwrite, select the checkbox next to the “Overwrite” field.
When selecting the option for the “Store” field, the maximum size of data is 15 MB and 500 MB for “default” and “default-large” values respectively. These values are defined in the application.conf file in Ambience for MongoDB. Depending on the size of the resource, select the appropriate value from the drop-down list.
Click on the “OK” button to overwrite the existing resource. To abort, click on the “Cancel” button.
Once the resource is uploaded. a message will appear.

Edit Resource
This function allows you to edit the name and description of the resource.
Click on the ![]() “Edit” icon under the “Actions” column corresponding the desired resource. If you are not the owner of the resource, the
“Edit” icon under the “Actions” column corresponding the desired resource. If you are not the owner of the resource, the ![]() icon will not appear.
icon will not appear.
![]()
The “Edit” dialog box will appear.
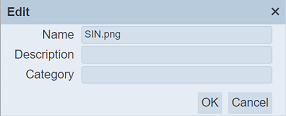
In the dialog box, edit the fields are required and click on the “Save” button to save the changes.
More Actions
This feature allows user to perform actions on multiple resources at the same time.
When the “More Actions” button located at the upper right corner of the page is clicked, a list of available actions are displayed.

If no resource is selected prior clicking the button, there will be fewer actions available. To select a resource, select the checkbox next to the name of the resource.
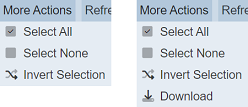
| Option | Description |
|---|---|
| Select All | Selects all resources in the list. |
| Select None | Unselects all resources. |
| Invert Selection | Inverts the current selection. That is, any resources selected will be unselected and vice versa. |
| Download | Downloads the resources selected. |
Download Resource
This function allows you to download the selected resource.
To download the selected resource, click on the “More Actions” button and select the “Download” option.
If one resource is selected, the downloaded file will have the original file format.
If more than one resource are selected, the “Download” dialog box will appear.

Key in a name in the “File name” field and click on the “OK” button. The downloaded file will be a zip file with the file name provided prior. The individual files in the zip file are in their original format.
Delete Resource
This function allows you to delete a resource.
To delete a resource, click on the  “Delete” icon under the “Actions” column corresponding the desired resource. If you are not the owner of the resource, the
  icon will not appear.
![]()
There is an option to undo the deletion. A notification with an “Undo” button appears right after clicking on the “Delete” icon.

Upon clicking on the “Undo” button, the deleted resource is restored and is added back to the list of resource.
Refresh
After performing actions on the browser/tab, the list is reloaded to display the list of resources. The manual “Refresh” button is available and is particularly useful if you have opened multiple pages and are making changes.
The “Refresh” button is found on the upper right corner of the page. Clicking on it reloads the list of resources.

Search
There is a cross-field search function for the list of resources. It is located at the upper left corner of the page.

This provides an easy way to search through the resource list. It is case-insensitive and display resources that have the entered search value in any of the values of the fields below:
- Name
- Store
- Category
- Content Type
- File Size
- Owner
- Last Modified
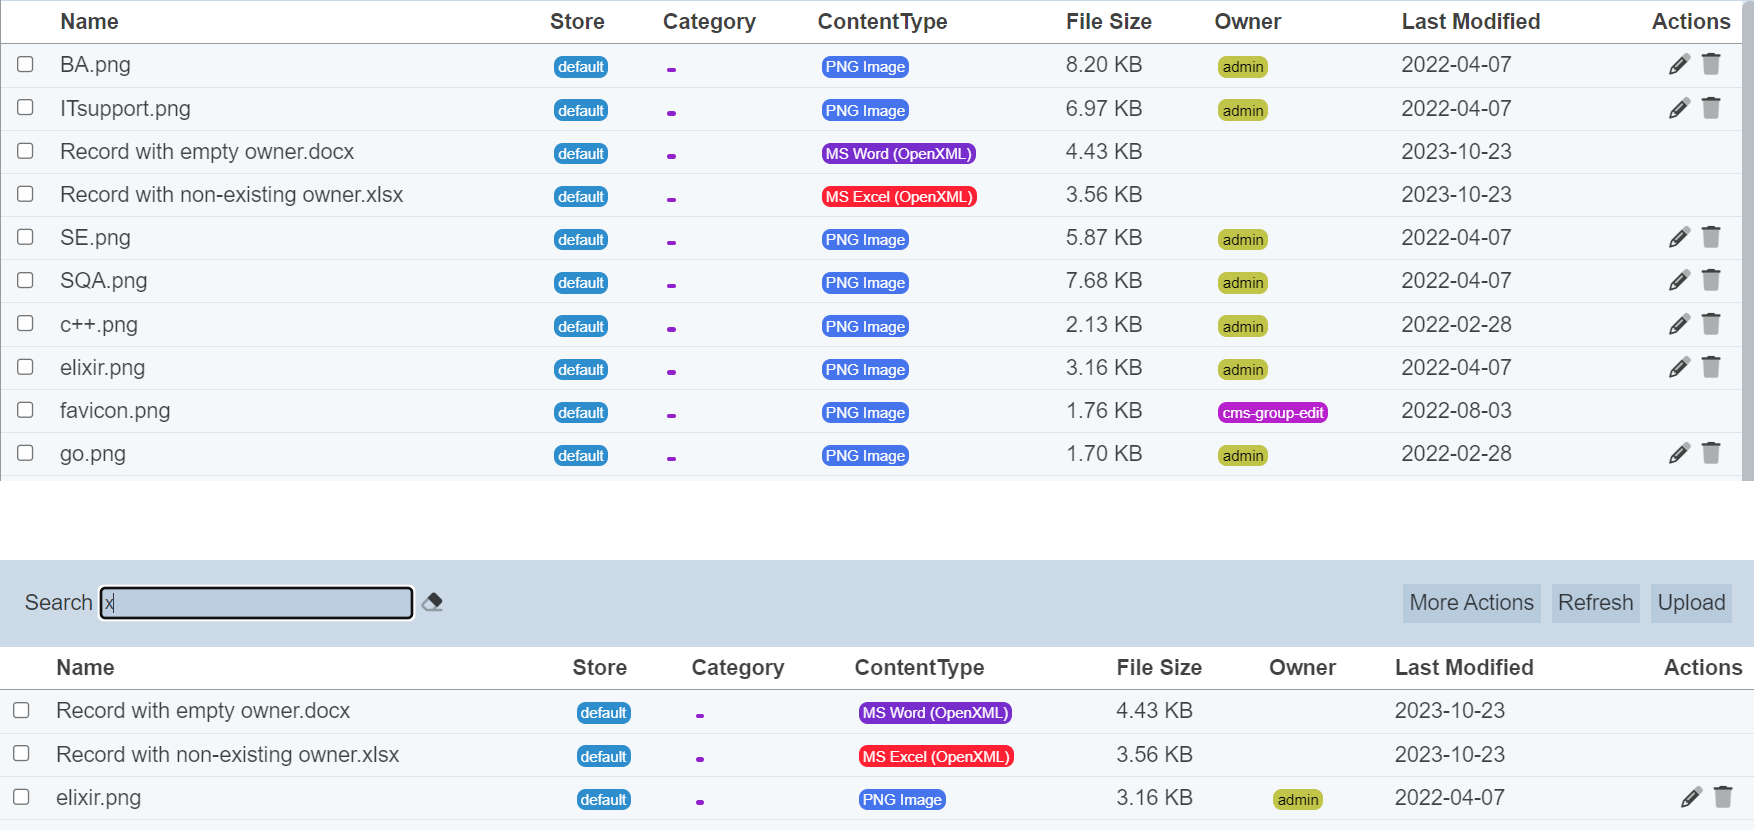
Alternatively, you can click on the any store, category, content type or owner under their respectivel column to aid the search for the resources in the page.

In the example above, resource that belongs to the owner “admin” and category “Picture” is shown.
These two search methods can be combined together, with each criteria separated by a comma.
