
Binning Control
Description
Binning is a way to group a number of more or less continuous values into a smaller number of “bins”. This filter control is used to group values of a specific field in a dataset identified in the “Filter” property into several groups.

Once the filter control is created, it can be added onto the view as a control and the binning or grouping is displayed in the view.
Viewer Usage
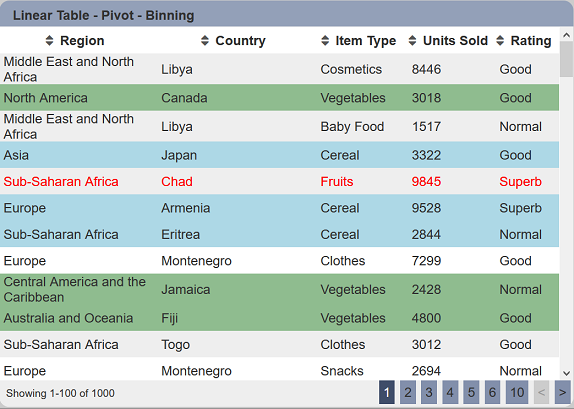
The binning or grouping is displayed in the view, in the example below, the “Rating” column. You can click on the column heading to sort the values. The linear table also has Row Foreground and Row background defined for some options under “Item Type” column, “Vegetables” having green background, “Cereal” having blue background amd “Fruits” having red foreground (text).

To edit the binning control, select the  “Open Binning” icon of the right of the Binning Control.
The “Binning Editor” dialog box will appear. You can change edit the current settings or add new ones by clicking on the “+” icon.
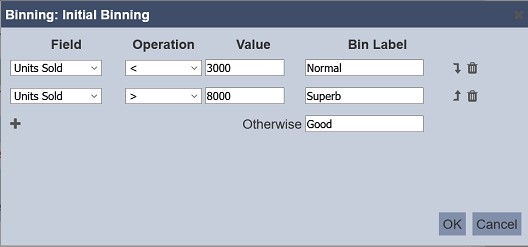
You can change the value of “Superb” bin from 8000 to 9000. Click on the “OK” button to save the changes. Click on the “Cancel” button to abort.
The “Rating” column will change according your edits, (i.e., the first data row “Rating” is changed from “Superb” to “Normal”).
Do note that this change is temporary. Once the page is exited, the pre-defined binning in the Binning Control applies. It is advisable to set the “Visibility” of this control to “Always”.
Specific Properties
Below are the fields that are specific to this control:
| Field | Description | Mandatory | Input Type | Default Value |
|---|---|---|---|---|
| Initial Binning | Determines the initial binning values upon loading in the Dashboard Viewer. | N | Dialog box | “None” |
Example
In this example, a linear table is used. A Binning Control is created and then added to the linear table.
To create a binning control, select the “+” icon in the Filter Control Panel. The “Add Control” dialog box will appear.
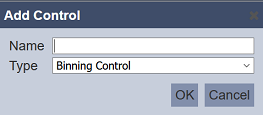
In the dialog box, key in the desired name for the control (in this case, the name is “Rating”) and select “Binning Control”. Click on the “OK” button.
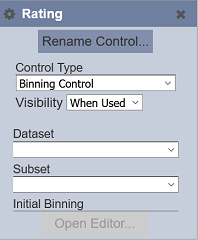
In the “Rating” control dialog box, select the same dataset and subset of the view that you wish to add into. Click on the “Open Editor” button to add a new binning condition.
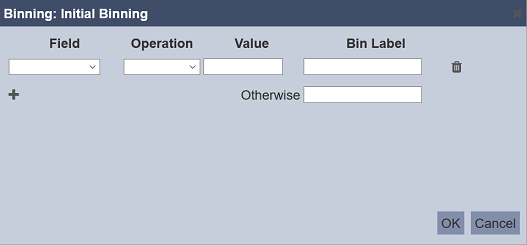
| Field | Description | Mandatory | Input Type | Default Value |
|---|---|---|---|---|
| Field | Defines the field to be used for comparison. | Y | Drop-down list | “None” |
| Operation | Defines the operator to be used. | Y | Drop-down list | “None” |
| Value | Defines the value to be compared to. | Y | Textbox | “None” |
| Bin Label | Defines the text to be displayed if the comparison returns true. | Y | Textbox | “None” |
| Otherwise | Defines the text to be displayed if the comparison returns false. | Y | Textbox | “None” |
Select the appropriate values and text accordingly. To add more binning condition, click on the “+” icon on the left, below the “Field” column. In this example, 2 binning conditions are added. You can rearrange the order of the conditions by clicking on the  or
or  icons. To remove a condition, click on the
  icon.
icon.
Click on the “OK” button to save the changes.
In the linear table, first add the “Rating” Binning Control in the “Controlled By” property. This will allow the “Rating” Binning Control to be added as a column into the table.

Then, in the “Columns” property, add “Rating” as one of the columns to be displayed.
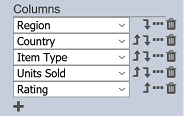
Click on the “Save” button on the upper right corner of the page. A new column “Rating” is added to the new to the linear table.