
Flow
The ![]() Flow connector is used for linking various processors to ensure a sequential flow of data.
Flow connector is used for linking various processors to ensure a sequential flow of data.
If there is no valid flow of data, the flow connector appears with dashed lines. This happens when the flow is unable to read the schema information from its input.
Add Flow
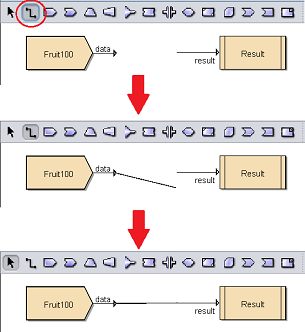
The simple example below connects a DataSource processor to the Result processor. To do so, ensure no processor is selected at the moment. Select the ![]() button on the menu bar and click on the DataSource processor. While holding down the mouse, move towards the Result processor. A line will appear from the DataSource processor towards the direction of your mouse. Click onto the Result processor to join the two processors together.
button on the menu bar and click on the DataSource processor. While holding down the mouse, move towards the Result processor. A line will appear from the DataSource processor towards the direction of your mouse. Click onto the Result processor to join the two processors together.
Delete Flow
To remove the Flow connector, simply select the connector and click on the “delete” key on your keyboard. Alternatively, right-click on the connector to display the pop-up menu and select “Delete Graphic” option.
Pop-up Menu
To access the pop-up menu of the Flow connector, right-click on the connector.
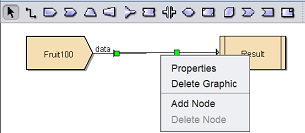
There are four functions in the pop-up menu.
| Function | Description |
|---|---|
| Properties | Launches the DataFlow Wizard that allows you to edit the dataflow properties. |
| Delete Graphic | Deletes the Flow connector. |
| Add Node | Adds a node of the line in the designer diagram. This allows the line to have extra points to draw angular lines. |
| Delete Node | Deletes the selected node of the line in the designer diagram. |
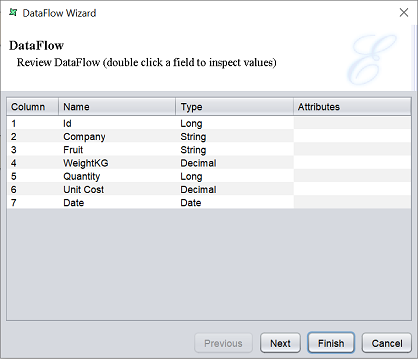
The “Properties” option in the pop-up menu when selected will display the “DataFlow Wizard” that allows you to review the dataflow from the datasource.
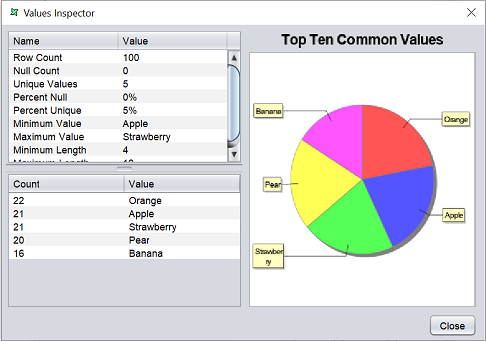
To inspect the values of the data, double-click on the desired field and the “Values Inspector” dialog box will appear. These values are not editable. Click on the “Close” button to exit the dialog box.
Click on the “Next” button reviews the next page that allows you to review the properties (if any).
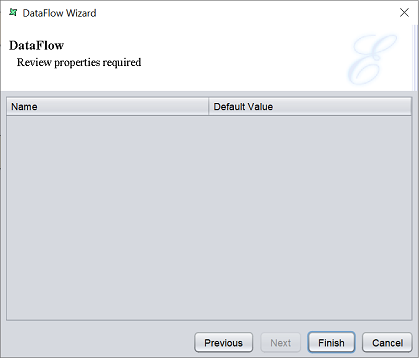
Click on the “Finish” button to complete reviewing the dataflow or click on the “Previous” button to go back to the previous page. To abort, click on the “Cancel” button.